Introduction
Thank you for purchasing the Retro Fighters BrawlerGen 2-in-1 Controller. This controller is designed to enhance your gaming experience on both Sega Genesis/Mega Drive and Sega Saturn systems, offering a modern ergonomic design with versatile compatibility. Please read this manual thoroughly to ensure proper setup and operation.
Key Features
- 2-in-1 Connector: Compatible with both Sega Genesis/Mega Drive and Sega Saturn consoles.
- Modern Ergonomics: Designed for comfortable extended gameplay sessions.
- Responsive Controls: Features a precise D-pad, analog stick, and responsive buttons.
- Extended Cable: Includes a 10-foot (3-meter) cable for flexible gaming setups.
- Broad Compatibility: Works with original Sega Genesis/Mega Drive, 32X, Sega CD, Sega Master System, Sega Saturn, and most third-party Genesis systems.
Package Contents
Ensure all items are present before proceeding with setup:
- Retro Fighters BrawlerGen 2-in-1 Controller
- Instruction Manual (this document)
Controller Overview
Familiarize yourself with the controller's layout and button functions.
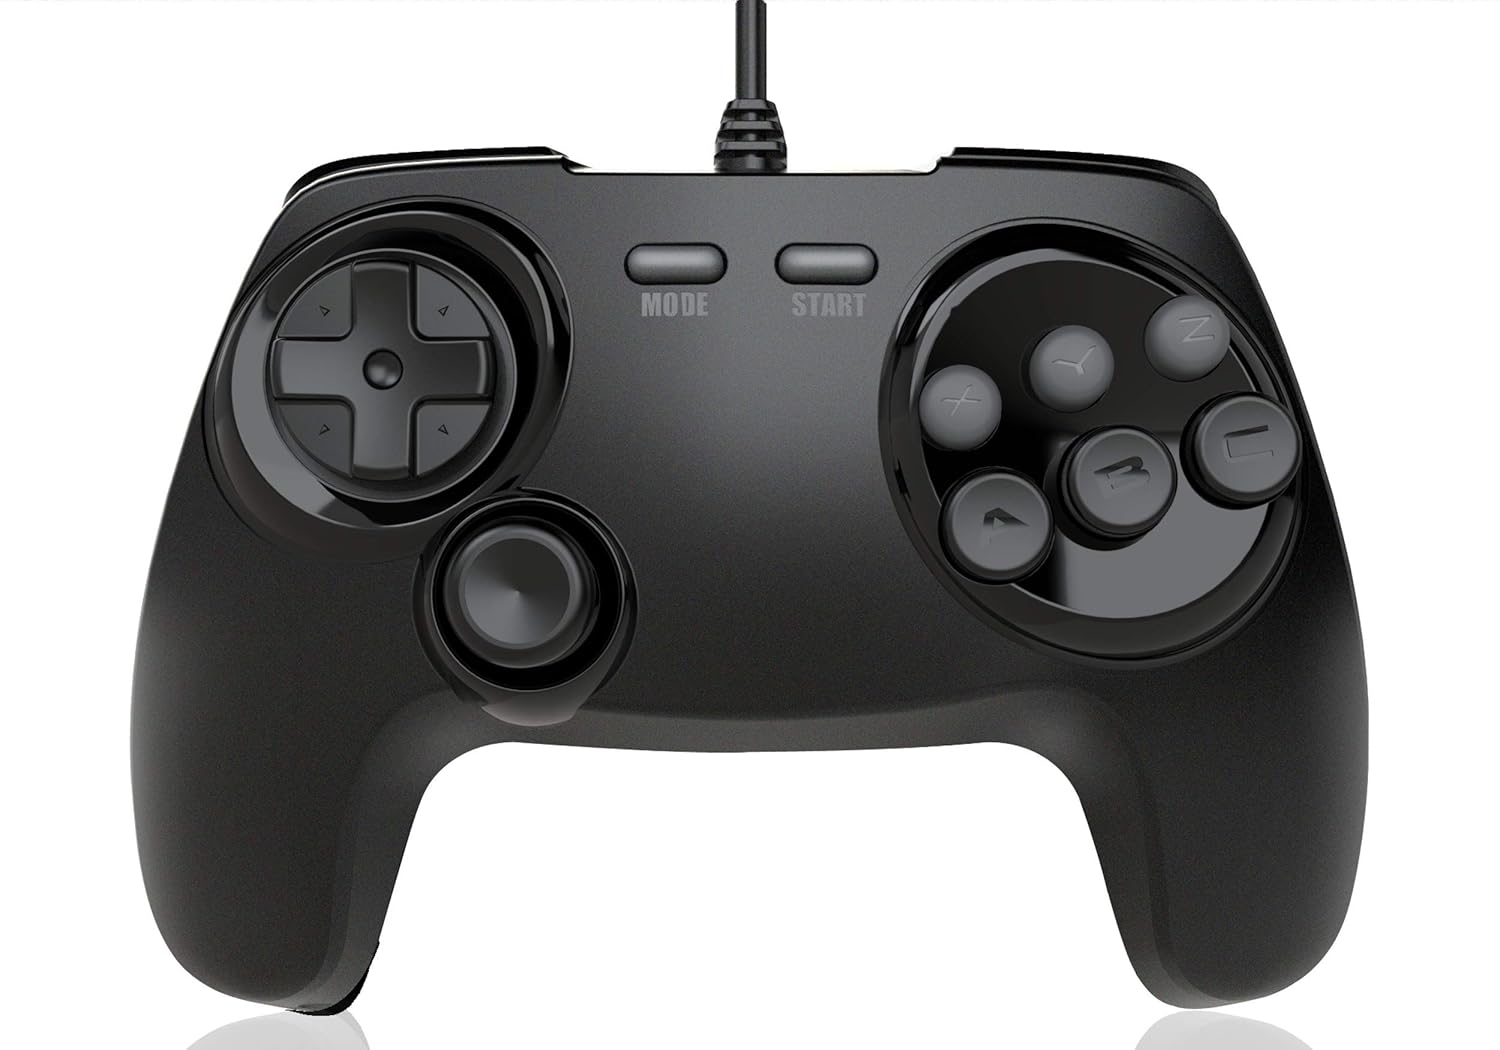
Image 1: Front view of the Retro Fighters BrawlerGen controller. Shows the D-pad on the left, analog stick below it, MODE and START buttons in the center, and six face buttons (X, Y, Z, A, B, C) on the right. This image illustrates the primary control layout.
- D-Pad: Directional input for movement and menu navigation.
- Analog Stick: Provides analog movement input, primarily for Sega Saturn 3D games.
- MODE Button: System-specific function (e.g., pause, menu access).
- START Button: Pauses games or confirms selections.
- Face Buttons (A, B, C, X, Y, Z): Primary action buttons.
- Shoulder Buttons (L, R): Additional action buttons located on the top of the controller.
Setup Instructions
- Identify Console Port: Locate the controller port on your Sega Genesis/Mega Drive or Sega Saturn console.
- Connect Controller: Insert the 2-in-1 connector firmly into the console's controller port. The connector is designed to fit both Genesis and Saturn ports.
- Power On Console: Turn on your gaming console.
- Test Functionality: Start a game and test all buttons, the D-pad, and the analog stick to ensure proper operation.
Note: The controller's 2-in-1 connector automatically adapts to the connected system (Sega Genesis/Mega Drive or Sega Saturn).

Image 2: Side view of the Retro Fighters BrawlerGen controller, showing the integrated 2-in-1 connector cable. This image helps in identifying the correct connection point for the console.
Operating the Controller
Sega Genesis/Mega Drive Mode
- The D-pad provides directional input.
- Buttons A, B, C, X, Y, Z function as standard Genesis buttons. The X, Y, Z buttons typically map to the C, B, A buttons on a 3-button Genesis controller, or provide additional functionality in 6-button compatible games.
- The START button functions as the game's start/pause button.
- The MODE button may have specific functions in certain Genesis games, similar to the original 6-button controller.
Sega Saturn Mode
- The D-pad provides directional input.
- The Analog Stick provides analog input for compatible Sega Saturn 3D games.
- Buttons A, B, C, X, Y, Z function as standard Saturn face buttons.
- The L and R shoulder buttons provide additional input.
- The START button functions as the game's start/pause button.
- The MODE button may have specific functions in certain Saturn games, such as accessing in-game menus.

Image 3: Angled view of the Retro Fighters BrawlerGen controller, highlighting the ergonomic grip and the placement of the analog stick and D-pad. This perspective shows the comfortable contours of the controller.
Care and Maintenance
- Cleaning: Use a soft, dry cloth to clean the controller. For stubborn dirt, a slightly damp cloth can be used, followed by immediate drying. Avoid harsh chemicals or abrasive cleaners.
- Storage: Store the controller in a cool, dry place away from direct sunlight and extreme temperatures.
- Cable Care: Avoid sharply bending or twisting the controller cable. Do not pull the cable to disconnect it from the console; always grasp the connector itself.
- Avoid Liquids: Keep the controller away from liquids to prevent damage to internal components.
Troubleshooting
| Problem | Possible Cause | Solution |
|---|---|---|
| Controller not responding. | Loose connection, console not powered on, or incompatible system. |
|
| Buttons or D-pad are unresponsive/sticky. | Debris under buttons, or internal component issue. |
|
| Analog stick not working in Saturn games. | Game does not support analog input, or controller not recognized correctly. |
|
Specifications
- Model: BrawlerGen 2-in-1 Controller
- Compatibility: Sega Genesis/Mega Drive, 32X, Sega CD, Sega Master System, Sega Saturn, most 3rd party Genesis systems.
- Cable Length: 10 feet (approximately 3 meters)
- Dimensions: Approximately 7.24 x 5.91 x 3.35 inches (18.39 x 15.01 x 8.51 cm)
- Weight: Approximately 12.8 ounces (362.87 grams)
- Manufacturer: Retro Fighters
Warranty Information
Retro Fighters products are typically covered by a manufacturer's warranty against defects in materials and workmanship. For specific warranty terms, duration, and claim procedures, please refer to the official Retro Fighters website or contact their customer support directly. Keep your proof of purchase for warranty claims.
Customer Support
If you encounter any issues not covered in the troubleshooting section or require further assistance, please contact Retro Fighters customer support:
- Website: www.retrofighters.com/support (Example link, actual link may vary)
- Email: support@retrofighters.com (Example email, actual email may vary)
When contacting support, please have your product model (BrawlerGen 2-in-1 Controller) and proof of purchase ready.


