
FPVDrone FPVDrone 225mm
Contents
FPVDrone 225mm FPV Racing Drone Frame Instruction Manual
Model: FPVDrone 225mm
Introduction
Thank you for choosing the FPVDrone 225mm FPV Racing Drone Frame. This high-quality 3K carbon fiber frame is engineered for durability and performance in 5-inch quadcopter freestyle applications. Its robust design and ample internal space make it suitable for various electronic installations, providing a solid foundation for your FPV build. This manual will guide you through the assembly, provide operational considerations, and offer maintenance tips to ensure the longevity of your frame.
Safety Information
While this product is a drone frame and not a complete flying drone, it is crucial to understand the safety implications of building and operating FPV drones. Always prioritize safety during assembly and subsequent operation.
- Eye Protection: Always wear appropriate eye protection when working with tools and small components.
- Component Handling: Be careful when handling carbon fiber plates, as edges can be sharp.
- Electrical Safety: When installing electronic components (not included with the frame), ensure all connections are correct and insulated to prevent short circuits. Refer to the manuals of your electronic components for specific safety guidelines.
- Battery Safety: Lithium Polymer (LiPo) batteries, commonly used with FPV drones, require careful handling. Always follow manufacturer guidelines for charging, discharging, and storage.
- Tool Usage: Use the correct tools for assembly. Overtightening screws can strip threads or damage carbon fiber.
Package Contents
Please verify that all components listed below are present in your package before beginning assembly. If any parts are missing or damaged, please contact customer support.
- Carbon Fiber Top Plate (2.5mm)
- Carbon Fiber Bottom Plate (2.5mm)
- Carbon Fiber Arms (5mm, 4 pieces)
- Carbon Fiber Side Plates / Camera Mounts
- Carbon Fiber Mid Plate / X-Plate
- Aluminum Standoffs (25mm)
- Assorted Screws and Nuts
- Lipo Battery Strap
- Battery Pad / Anti-slip Pads
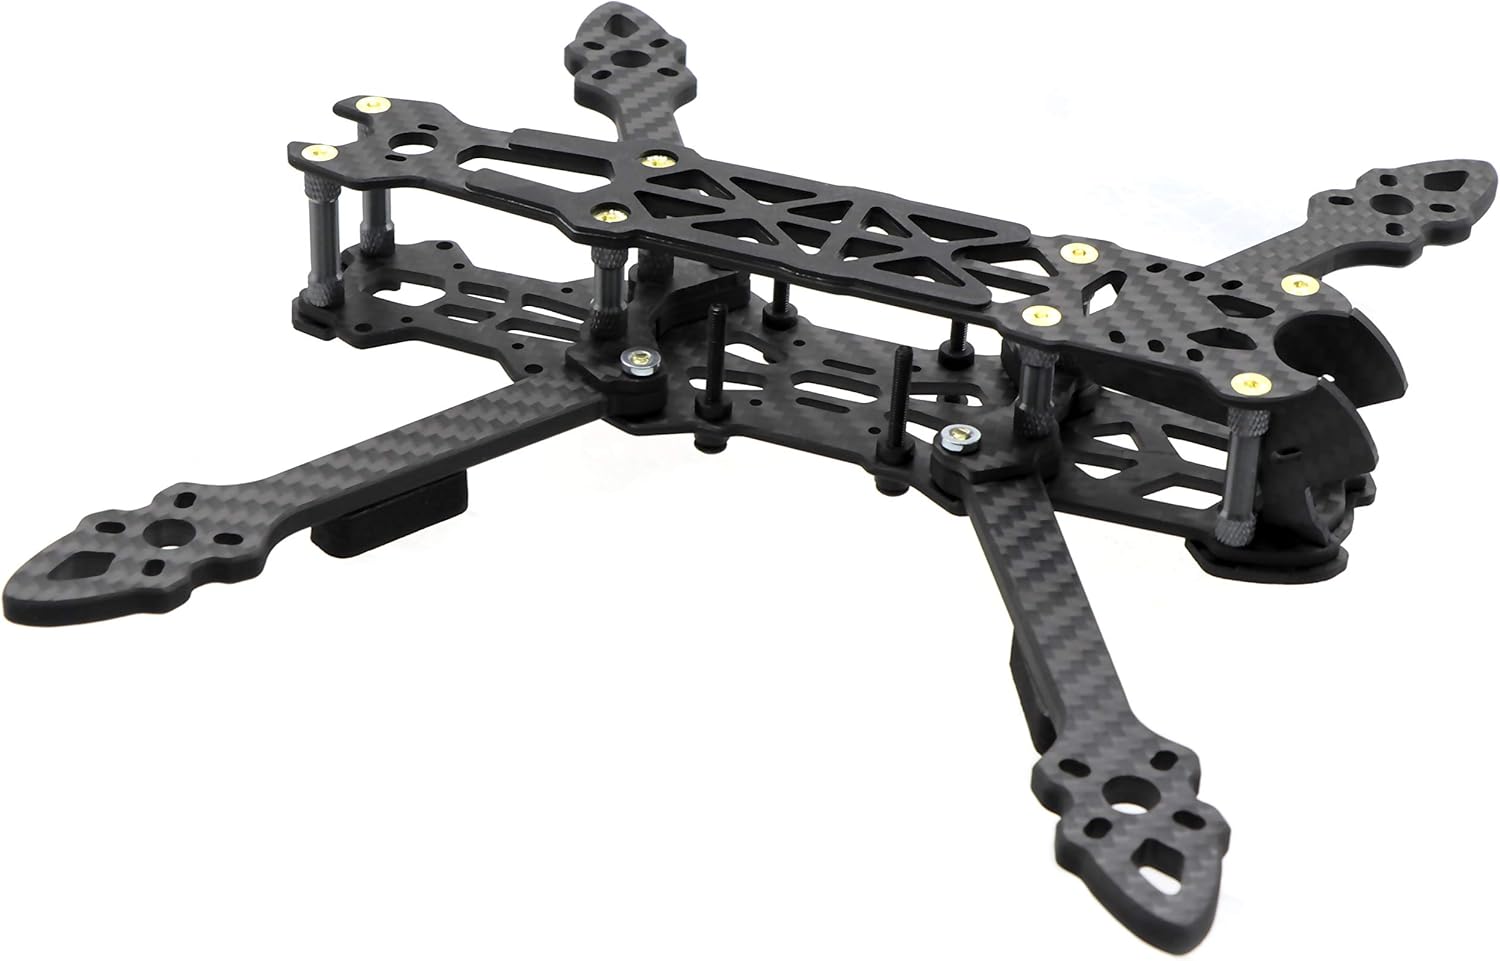
Image: All components included in the FPVDrone 225mm frame kit, neatly arranged for inspection.
Assembly Instructions
The FPVDrone 225mm frame is designed for straightforward assembly. While specific step-by-step diagrams for every screw are not provided, the general process involves securing the arms, bottom plate, and top plate using the provided standoffs and screws. Ensure all screws are tightened securely but do not overtighten to avoid stripping threads or damaging the carbon fiber.
- Prepare Components: Lay out all carbon fiber plates, arms, standoffs, and screws. Identify the top plate, bottom plate, and the four arms.
- Attach Arms to Bottom Plate: Secure the four 5mm thick carbon fiber arms to the 2.5mm bottom plate using the appropriate screws. Ensure the arms are oriented correctly to form the 'X' configuration.
- Install Standoffs: Attach the 25mm aluminum standoffs to the designated mounting points on the bottom plate. These will support the top plate and create space for your electronic stack.
- Mount Side Plates/Camera Mounts: Install the carbon fiber side plates, which typically also serve as camera mounts, between the bottom and top plates.
- Secure Top Plate: Place the 2.5mm top plate onto the standoffs and secure it with screws.
- Apply Anti-slip Pads: Affix the included anti-slip pads to the underside of the arms to protect them and provide grip. Apply the battery pad to the top plate where the battery will be mounted.
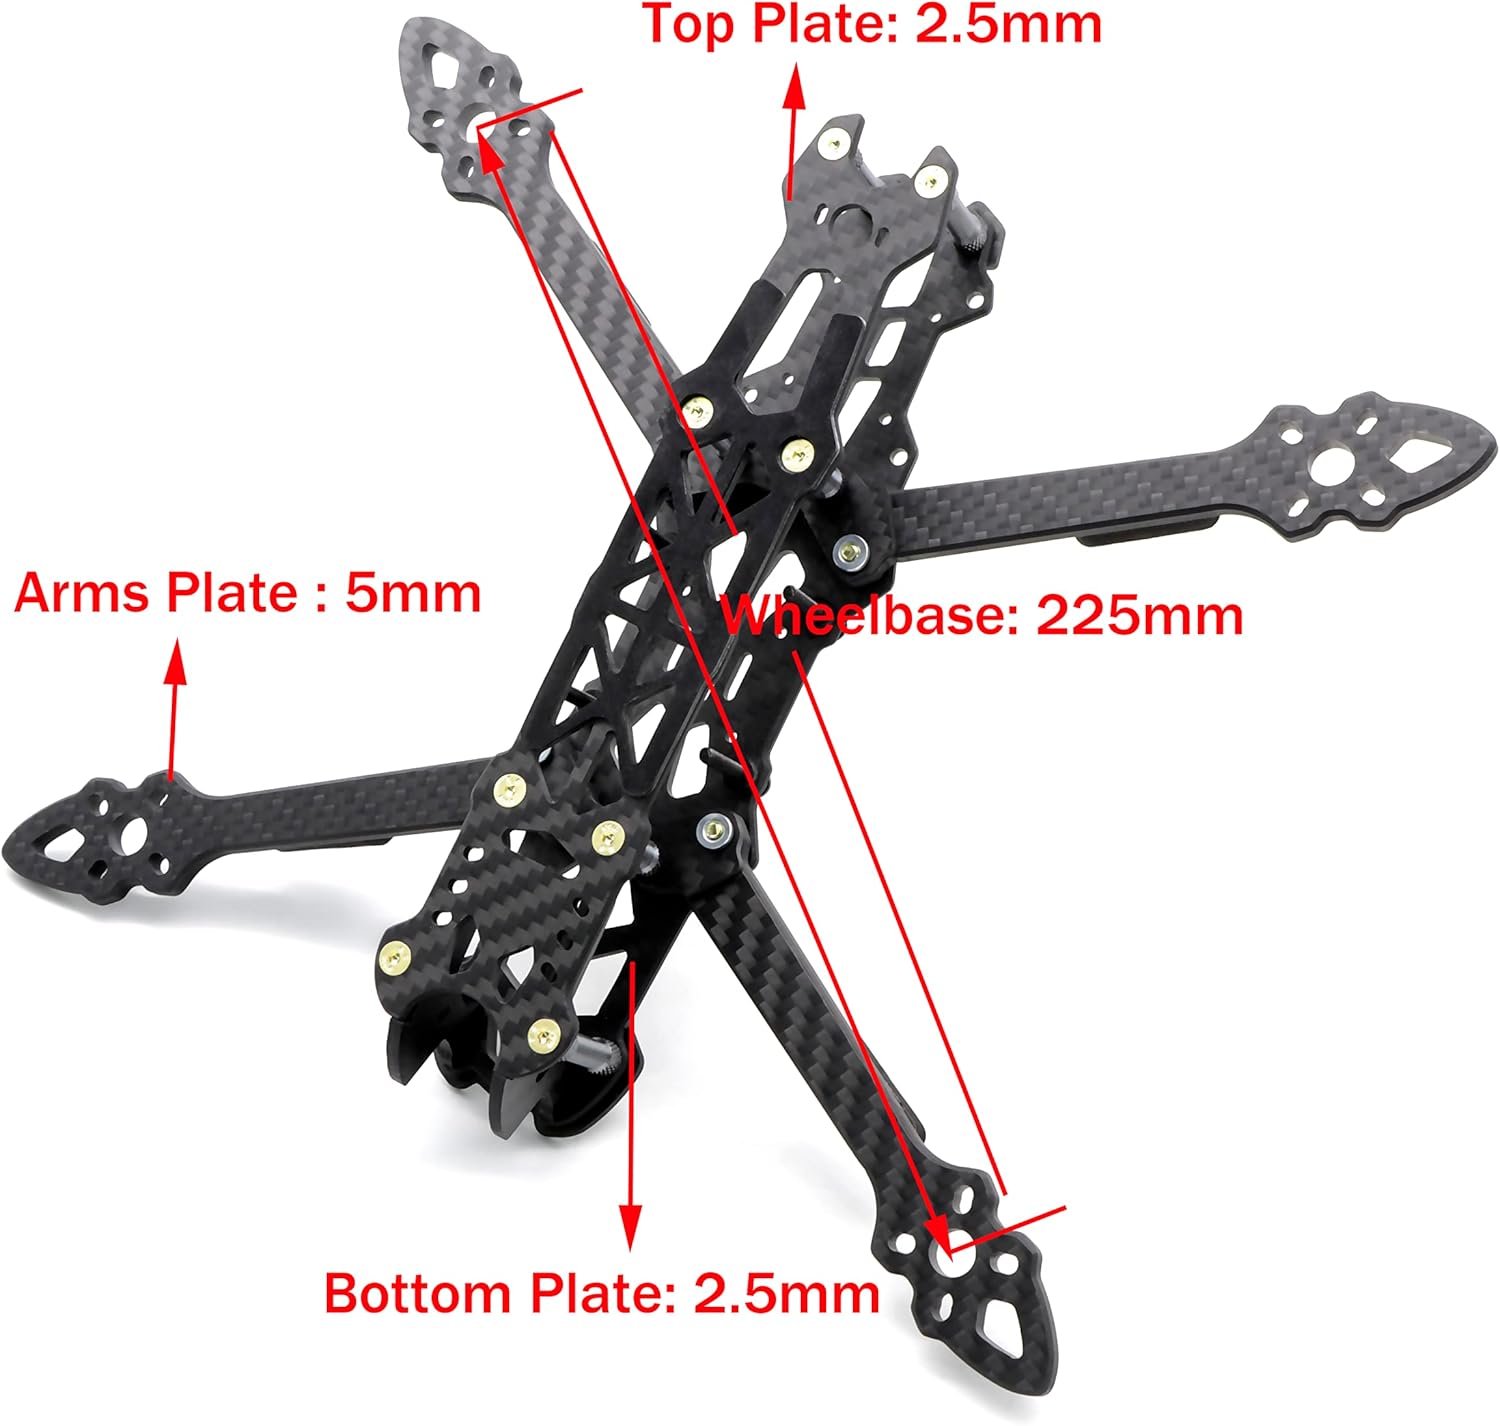
Image: Diagram illustrating the wheelbase and plate thicknesses of the FPVDrone 225mm frame.

Image: The fully assembled FPVDrone 225mm frame, ready for electronic component installation.
Operating Considerations
This frame provides the structural basis for your FPV drone. Proper installation of electronic components is key to its performance and safety.
- Component Compatibility: The frame supports both 30.5x30.5mm and 20x20mm flight control stacks, offering flexibility for various builds. Ensure your chosen components fit within the available space.
- Camera Fit: Note that the camera mounting area is primarily designed for 19mm wide and smaller FPV cameras. Larger cameras may require modifications or alternative mounting solutions.
- Cable Management: Plan your wiring carefully to keep cables tidy and secure within the frame. This improves airflow, reduces interference, and prevents damage during crashes.
- Center of Gravity (CG): Aim for a balanced center of gravity once all components are installed. This is crucial for stable flight performance. The 25mm standoffs contribute to a good height and CG relation.
Maintenance
Regular maintenance will extend the lifespan of your FPVDrone frame and ensure continued performance.
- Inspect for Damage: After each significant crash or hard landing, inspect the carbon fiber plates and arms for cracks, delamination, or stress marks. Pay close attention to the arm mounting points.
- Check Screws and Standoffs: Periodically check all screws and standoffs for tightness. Vibrations during flight can cause them to loosen. Replace any stripped screws or damaged standoffs immediately.
- Clean the Frame: Use a soft brush or compressed air to remove dirt, dust, and debris from the frame, especially around electronic components. Avoid using harsh chemicals that could damage the carbon fiber.
- Replace Damaged Parts: If any carbon fiber part is significantly damaged, replace it promptly to maintain structural integrity and flight safety.
Troubleshooting
Here are some common issues encountered during FPV drone frame assembly and potential solutions:
| Issue | Possible Cause | Solution |
|---|---|---|
| Screws stripping easily | Soft screw material; overtightening. | Use a hand tool for final tightening, not a power tool. Consider replacing with higher-quality screws if issues persist. |
| Flight controller stack does not fit | Stack is too tall for the 25mm standoffs; incorrect mounting hole alignment. | Ensure your stack's height is compatible with 25mm standoffs. The frame supports 30.5x30.5mm and 20x20mm mounting patterns. Consider a different stack configuration or component choice. |
| FPV camera does not fit in mount | Camera is wider than 19mm. | This frame is optimized for 19mm wide (micro) FPV cameras. For larger cameras, you may need to source 3D-printed adapters or consider a different frame. |
| Arms feel loose after assembly | Screws not fully tightened; damaged carbon fiber or screw holes. | Ensure all arm screws are tightened firmly. Inspect the carbon fiber around the screw holes for damage. Replace arms if necessary. |
Specifications
| Feature | Detail |
|---|---|
| Brand | FPVDrone |
| Model Name | FPVDrone 225mm |
| Material | 3K Carbon Fiber |
| Wheelbase | 225mm |
| Arm Thickness | 5mm |
| Top Plate Thickness | 2.5mm |
| Bottom Plate Thickness | 2.5mm |
| Standoff Height | 25mm |
| Flight Control Mounting | 30.5x30.5mm and 20x20mm |
| Recommended Propeller Size | 5 inch |
| Item Weight | 6.4 ounces |
| Package Dimensions | 8.23 x 4.21 x 1.73 inches |
Warranty Information
Specific warranty details for the FPVDrone 225mm FPV Racing Drone Frame are not provided in this manual. For information regarding warranty coverage, terms, and conditions, please refer to the product listing on the retailer's website or contact the seller directly. Keep your proof of purchase for any warranty claims.
Customer Support
If you encounter any issues or have questions regarding the FPVDrone 225mm FPV Racing Drone Frame that are not covered in this manual, please reach out to the manufacturer or seller through the platform where you purchased the product. They can provide further assistance and technical support.
Ask a question about this manual
Ask about setup, troubleshooting, compatibility, parts, safety, or missing instructions. Manuals+ will review the question and use this page’s manual context to help answer it.