
1. Important Safety Information
Please read these instructions carefully before using the SENCOR SJE 1055SS Juicer. Keep this manual for future reference. Failure to follow these safety guidelines may result in electric shock, fire, or serious injury.
- Always ensure the appliance is switched off and unplugged from the power outlet before assembly, disassembly, or cleaning.
- Do not immerse the motor unit in water or any other liquid. Clean with a damp cloth only.
- Keep hands and utensils away from the feeding chute during operation to prevent injury. Use the food pusher provided.
- Ensure all parts are correctly assembled and the safety locking bar is securely in place before operating the juicer. The juicer features an automatic shut-off when the lid is removed for safety.
- Do not operate the appliance with a damaged cord or plug, or if the appliance malfunctions or has been damaged in any manner.
- This appliance is for household use only. Do not use outdoors.
- Supervise children to ensure they do not play with the appliance.
2. Product Overview and Components
Familiarize yourself with the parts of your SENCOR SJE 1055SS Juicer before first use.

Figure 1: Fully assembled SENCOR SJE 1055SS Juicer, showing the main unit, pulp container, and juice collector.
- Food Pusher: Used to guide fruits and vegetables into the feeding chute.
- Feeding Chute: Wide opening for inserting ingredients.
- Lid/Cover: Transparent cover that secures the juicing mechanism.
- Filter Basket/Strainer: Stainless steel mesh filter for separating juice from pulp.
- Juice Collector: Collects the extracted juice.
- Pulp Container: Detachable container for collecting discarded pulp.
- Motor Unit/Base: Contains the motor and control knob.
- Safety Locking Bar: Secures the lid to the motor unit during operation.
- Control Knob: For selecting speed settings (0, I, II).
- Anti-slip Feet: Located on the base for stability during operation.
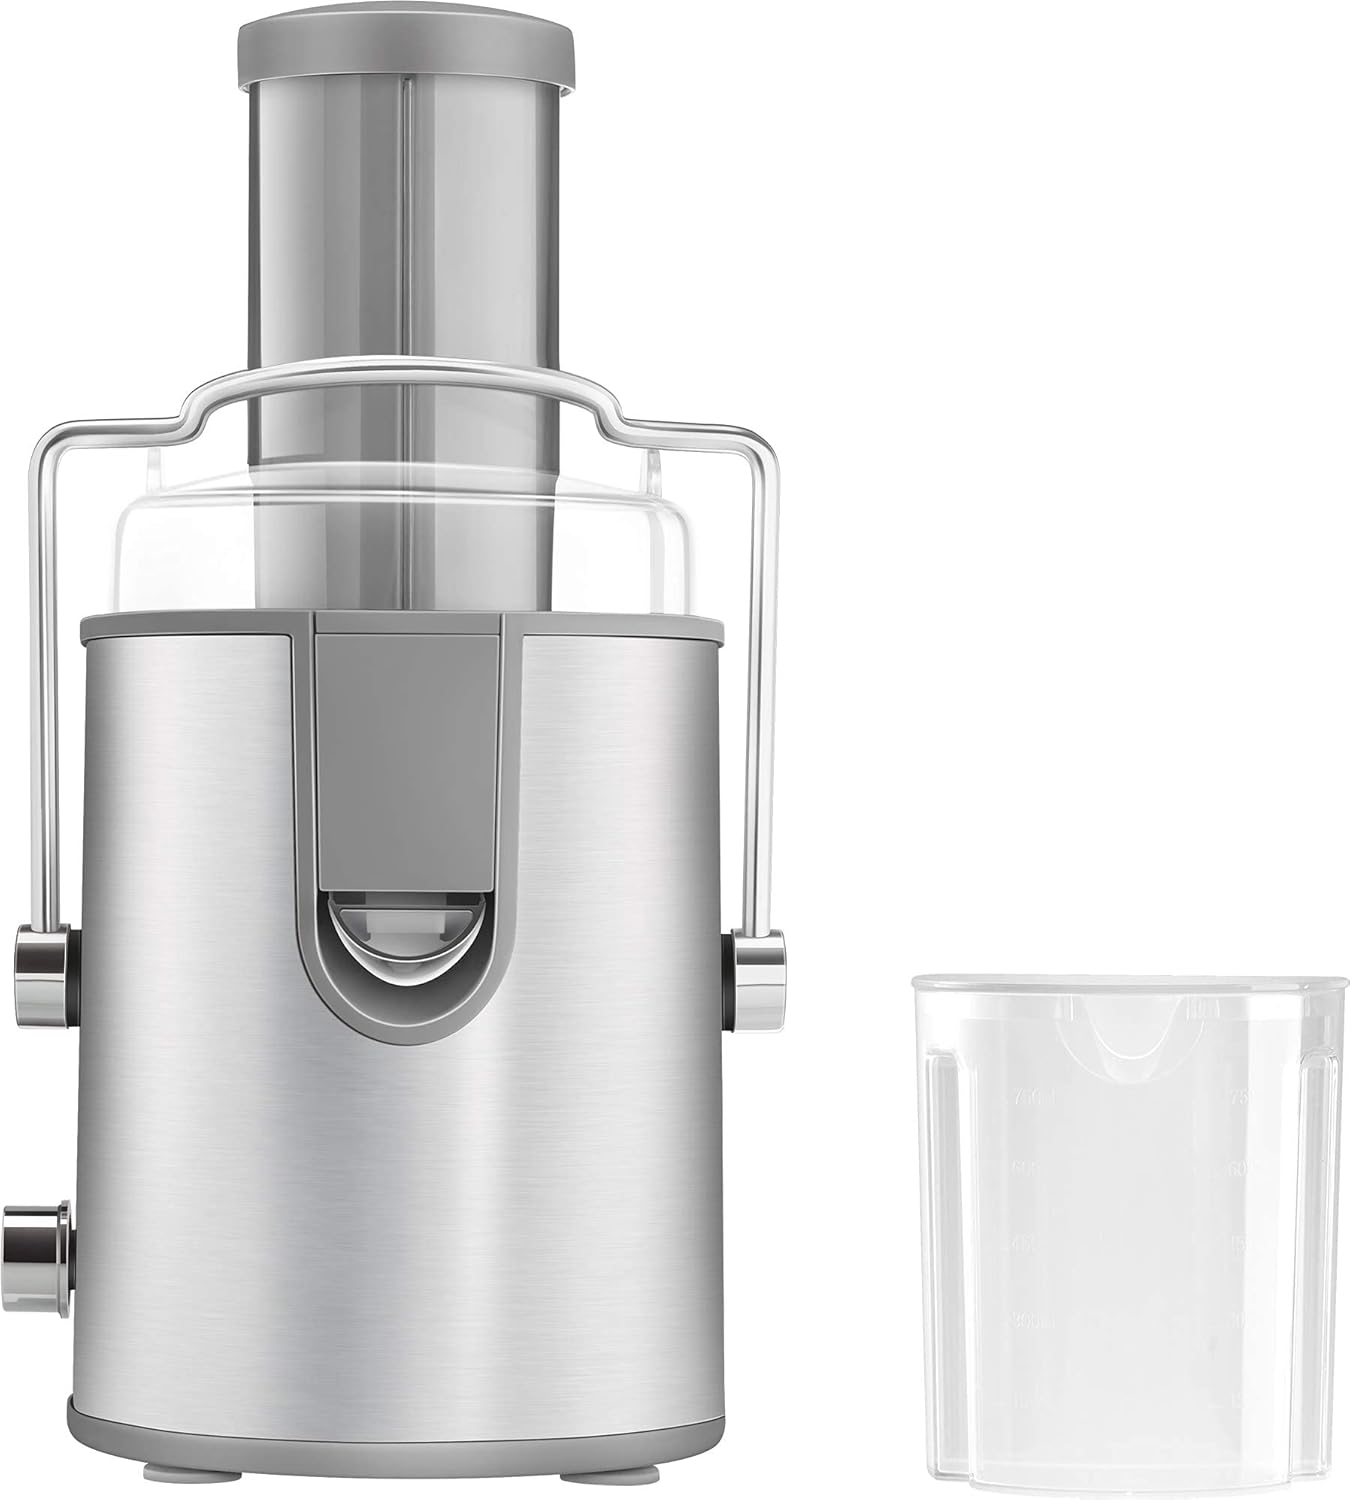
Figure 2: Side view of the juicer, highlighting the control knob and safety locking bar.

Figure 3: The dedicated 1.6-liter pulp container for the SENCOR SJE 1055SS Juicer.
3. Setup and Assembly
Before first use, wash all detachable parts (lid, filter basket, juice collector, pulp container, food pusher) in warm soapy water, rinse thoroughly, and dry. The motor unit should only be wiped with a damp cloth.
- Place the motor unit on a stable, flat, and dry surface. Ensure it is unplugged.
- Position the pulp container under the pulp spout on the back of the motor unit.
- Place the juice collector onto the motor unit, ensuring the juice spout aligns correctly.
- Insert the stainless steel filter basket firmly onto the motor unit's central shaft.
- Place the lid onto the motor unit, aligning the feeding chute with the filter basket.
- Secure the lid by lifting the safety locking bar and hooking it over the lid's side tabs. Ensure it clicks into place. The juicer will not operate if the locking bar is not correctly engaged.
- Insert the food pusher into the feeding chute.
4. Operating Instructions
Follow these steps for efficient juicing:
- Preparation: Wash fruits and vegetables thoroughly. For larger items, cut them into pieces that fit easily into the wide feeding chute. Remove hard pits from fruits (e.g., peaches, plums) and large seeds. Peeling is generally not necessary for most fruits and vegetables, but citrus fruits should be peeled to avoid bitter taste.
- Placement: Ensure the juicer is correctly assembled and the safety locking bar is engaged. Place a glass or jug under the juice spout to collect the juice.
- Power On: Plug the juicer into a suitable power outlet.
- Select Speed: Turn the control knob to the desired speed setting:
- Speed I (10,600 rpm): Suitable for softer fruits and vegetables (e.g., berries, tomatoes, grapes).
- Speed II (12,600 rpm): Recommended for harder fruits and vegetables (e.g., carrots, apples, celery).
- Juicing: Gradually feed the prepared ingredients into the feeding chute. Use the food pusher to gently guide them down. Do not force ingredients, as this can strain the motor and reduce juice yield.
- Pulp Collection: The juicer automatically separates pulp into the 1.6-liter pulp container. Empty the pulp container when it becomes full to maintain optimal performance.
- Finish Juicing: Once all ingredients are juiced, turn the control knob to the "0" (off) position and unplug the appliance.
Note: The juicer is equipped with an automatic shut-off mechanism that activates if the lid is removed during operation, enhancing user safety.
5. Maintenance and Cleaning
Regular cleaning ensures the longevity and hygienic operation of your juicer. Always unplug the appliance before cleaning.
- Disassembly:
- Unplug the juicer.
- Release the safety locking bar.
- Remove the food pusher, lid, filter basket, juice collector, and pulp container.
- Cleaning Detachable Parts: Wash the food pusher, lid, filter basket, juice collector, and pulp container immediately after use.
- Product care instructions: Hand Wash Only. Use warm, soapy water and a soft brush (especially for the filter mesh) to remove pulp residue. Rinse thoroughly under running water.
- The stainless steel finish of the juicer is designed for easy and hygienic maintenance; wipe it clean with a damp cloth.
- Cleaning Motor Unit: Wipe the motor unit with a soft, damp cloth. Never immerse the motor unit in water or rinse it under a tap.
- Drying and Storage: Ensure all parts are completely dry before reassembling or storing the juicer. Store in a cool, dry place.
6. Troubleshooting
If you encounter issues with your juicer, refer to the following common problems and solutions:
| Problem | Possible Cause | Solution |
|---|---|---|
| Juicer does not start. |
|
|
| Low juice yield or excessive pulp. |
|
|
| Juicer stops during operation. |
|
|
If the problem persists after trying these solutions, please contact customer support.
7. Specifications
| Brand | SENCOR |
| Model Number | SJE41005780 |
| Product Type | Centrifugal Juicer |
| Material | Stainless Steel, Glass, Plastic |
| Finish Type | Stainless Steel |
| Maximum Power | 800 Watts |
| Voltage | 220V |
| Speed Settings | 2 Speeds (10,600 rpm / 12,600 rpm) |
| Pulp Container Capacity | 1.6 Liters |
| Product Dimensions (D x W x H) | 17D x 39W x 28H centimetres |
| Item Weight | 3.76 Kilograms |
| Controller Type | Button/Knob |
| Product Care Instructions | Hand Wash Only (detachable parts) |
8. Warranty and Support
This SENCOR SJE 1055SS Juicer comes with a Limited Warranty. Please refer to the warranty card included with your purchase for specific terms and conditions, including coverage duration and limitations.
For technical assistance, troubleshooting beyond this manual, or to inquire about warranty claims, please contact SENCOR customer support through their official website or the contact information provided in your product packaging.
When contacting support, please have your model number (SJE41005780) and purchase date available.