Introduction
Welcome to the Alesis Strike Pro SE Electronic Drum Set instruction manual. This guide provides essential information for the proper setup, operation, and maintenance of your new electronic drum kit. Please read this manual thoroughly before using the product to ensure safe and optimal performance.
Safety Information
- Power Supply: Use only the power adapter supplied with the unit. Ensure the voltage matches your region's requirements.
- Water and Moisture: Do not expose the unit to water or moisture. Avoid using it near sinks, bathtubs, or in damp environments.
- Ventilation: Ensure proper ventilation around the module and other electronic components. Do not block ventilation openings.
- Cleaning: Clean only with a dry cloth. Avoid liquid cleaners or solvents.
- Servicing: Refer all servicing to qualified service personnel. Do not attempt to repair the unit yourself.
Setup
Follow these steps to correctly assemble and connect your Alesis Strike Pro SE electronic drum set.
Assembly Instructions
Carefully unpack all components and identify each part. Refer to the included diagram for proper placement.
- Assemble the Rack: Connect the chrome rack tubes according to the provided assembly diagram. Ensure all clamps are securely tightened.
- Attach Drum Pads: Mount the snare, tom, and bass drum pads to the rack using the included clamps and arms. Adjust their positions for comfortable playing.
- Attach Cymbals: Secure the hi-hat, crash, and ride cymbals to the cymbal arms on the rack. Ensure they are stable and can swing freely.
- Position Kick Pedal: Place the kick pedal in front of the bass drum pad. Connect the beater to the pedal and ensure it strikes the center of the pad.
- Connect Cables: Connect each drum pad and cymbal to the Strike Performance Module using the included trigger cables. Match the labels on the cables to the corresponding inputs on the module.

Image: The Alesis Strike Pro SE Electronic Drum Set fully assembled, showing the rack, drum pads, cymbals, and kick pedal.
Connecting the Module
The Strike Performance Module is the brain of your drum set. Connect it as follows:
- Power Connection: Connect the power adapter to the module's power input and then to a power outlet.
- Audio Output: Connect the main audio outputs of the module to your amplifier, headphones, or audio interface using appropriate cables.
- USB Connection: For MIDI connectivity and software integration, connect the module to your computer via a USB cable.

Image: A close-up view of the Alesis Strike Performance Module, highlighting its controls and display.
Operating Instructions
This section covers the basic functions and advanced features of your Alesis Strike Pro SE drum set.
Basic Operation
- Power On/Off: Press the Power button on the module to turn the unit on or off.
- Volume Control: Use the Master Volume knob on the module to adjust the overall output level.
- Kit Selection: Use the navigation buttons and dial on the module to browse and select different drum kits.
- Playing the Pads: Strike the mesh heads and cymbals with drumsticks. The pads are pressure-sensitive, meaning the sound will vary based on how hard you strike them.
Customizing Sounds
The Strike Performance Module offers extensive customization options for each pad and cymbal.
- Pad Assignment: Each pad can be assigned a different sound from the module's extensive sound library.
- Sensitivity Adjustment: Adjust the sensitivity of individual pads to match your playing style.
- Effects: Apply various effects such as reverb, chorus, and EQ to individual sounds or the entire kit.


Image: Left: Alesis Strike Pro SE Snare Drum Pad. Right: Alesis Strike Pro SE Tom Drum Pad. Both feature mesh heads for realistic feel.
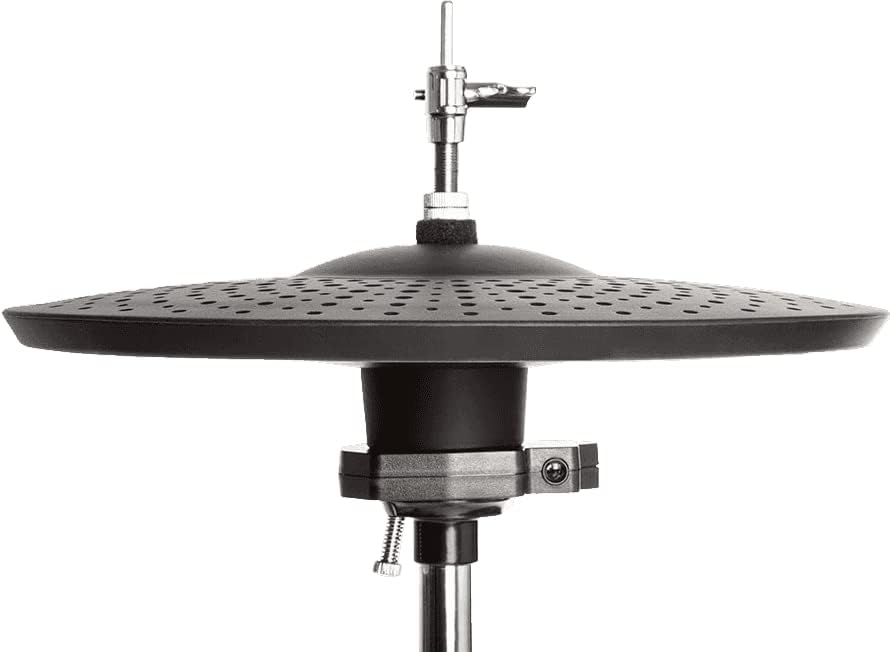
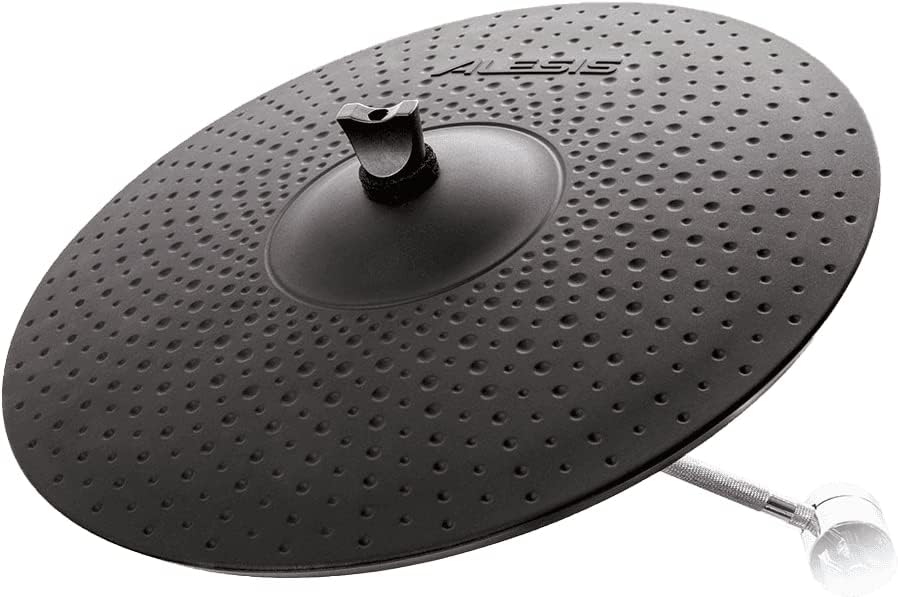
Image: Left: Alesis Strike Pro SE Hi-Hat Cymbal. Right: Alesis Strike Pro SE Ride Cymbal. Both are electronic cymbals designed for expressive play.

Image: The Alesis Strike Pro SE Bass Drum Pad, designed for use with a kick pedal.
Maintenance
Regular maintenance will help prolong the life and performance of your drum set.
Cleaning and Care
- Mesh Heads: Wipe mesh heads with a soft, dry cloth. Avoid abrasive cleaners.
- Cymbals: Clean cymbals with a slightly damp cloth, then dry thoroughly.
- Module and Rack: Use a dry, lint-free cloth to clean the module and chrome rack.
- Storage: When not in use for extended periods, store the drum set in a cool, dry place, away from direct sunlight and extreme temperatures.
Troubleshooting
If you encounter any issues, refer to the table below for common problems and their solutions.
| Problem | Possible Cause | Solution |
|---|---|---|
| No sound from pads/cymbals | Loose cable connection, incorrect module settings, low volume. | Check all trigger cable connections. Verify pad assignments in the module. Increase master volume. |
| Inconsistent triggering | Pad sensitivity too low/high, worn mesh head, faulty cable. | Adjust pad sensitivity in the module settings. Inspect mesh heads for damage. Try swapping cables to identify a faulty one. |
| Module not powering on | Power adapter not connected, faulty power outlet. | Ensure power adapter is securely connected and plugged into a working outlet. Try a different outlet. |
Specifications
Key technical specifications for the Alesis Strike Pro SE Electronic Drum Set:
| Feature | Detail |
|---|---|
| Model Name | STRIKEPROS |
| Item Model Number | STRIKEPROSPCEDXUS |
| Brand | Alesis |
| Body Material | Metal |
| Product Dimensions (L x W x H) | 35.43 x 27.56 x 31.5 inches |
| Item Weight | 121 pounds (55 Kilograms) |
| Date First Available | February 22, 2011 |
Warranty and Support
Alesis products are manufactured to the highest quality standards. For specific warranty details and terms, please refer to the warranty card included with your product or visit the official Alesis website.
Customer Support
If you require technical assistance or have questions regarding your Alesis Strike Pro SE, please contact Alesis customer support through their official website or the contact information provided in your product packaging. Have your model number and purchase date ready when contacting support.


