
cciyu 106775-5210-1032526471
CCIYU 932-306 Front Drive Shaft CV Joint Rebuild Kit User Manual
Model: 106775-5210-1032526471
Introduction
This manual provides comprehensive instructions for the installation, operation, and maintenance of the CCIYU 932-306 Front Drive Shaft CV Joint Rebuild Kit. This kit is designed to restore the functionality of your vehicle's constant velocity (CV) joint, ensuring smooth power transfer and preventing further damage to the drive shaft system. Please read this manual thoroughly before beginning any work.
Important Note: Always ensure the product is compatible with your vehicle by checking the description and model suitability before purchase and installation.
Product Overview
The CCIYU 932-306 Front Drive Shaft CV Joint Rebuild Kit includes all necessary components to refurbish a worn or damaged CV joint. This kit is specifically designed for:
- 2012-2013 Jeep Wrangler 3.6L (3604CC 220Cu. In. V6 GAS DOHC Naturally Aspirated)
- 2007 Jeep Wrangler 3.8L (3778CC 231Cu. In. V6 GAS Naturally Aspirated)
- 2007-2011 Jeep Wrangler 3.8L (3778CC 231Cu. In. V6 GAS OHV Naturally Aspirated)
The kit's primary function is to avoid the impact of the CV shaft to the greatest extent and ensure the normal operation of the ball cage, restoring optimal performance to your vehicle's drivetrain.
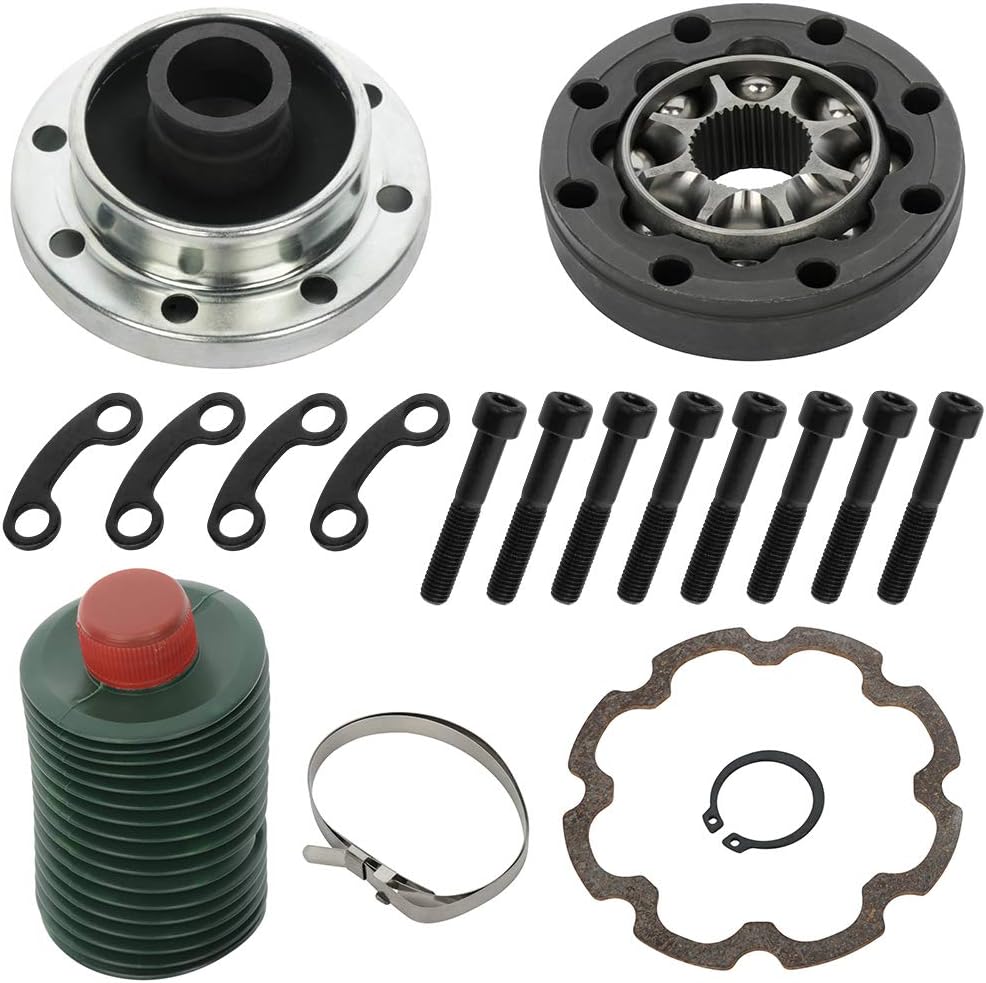
Figure 1: Overview of the CCIYU 932-306 Front Drive Shaft CV Joint Rebuild Kit, showing all included parts such as the CV joint, boot, clamps, grease, and hardware.
Package Contents
Upon opening the package, verify that all components are present and undamaged. The kit typically includes:
- CV Joint Assembly
- CV Boot
- Boot Clamps
- Grease Packet
- Mounting Hardware (bolts, circlip, gasket)

Figure 2: A closer look at the individual components of the rebuild kit, including the CV joint, boot, and various fasteners.
Setup and Installation
Installation of the CV joint rebuild kit requires mechanical knowledge and appropriate tools. If you are not confident in performing this repair, it is recommended to seek professional assistance.
Required Tools and Materials:
- Socket Wrench Set
- Torque Wrench
- Pry Bar
- Circlip Pliers
- Grease Gun (if not using provided packet)
- Shop Towels/Rags
- Safety Glasses and Gloves
Installation Steps:
- Vehicle Preparation: Safely lift and support the vehicle on jack stands. Remove the wheel and tire assembly.
- Access Drive Shaft: Depending on your vehicle's configuration, you may need to remove brake calipers, rotors, and other suspension components to gain access to the drive shaft.
- Remove Old CV Joint: Disconnect the drive shaft from the differential and transmission. Carefully remove the old CV joint, noting its orientation. Clean any debris from the shaft.
- Prepare New CV Joint: Apply the provided grease liberally to the new CV joint assembly. Ensure all ball bearings are adequately lubricated.
- Install CV Boot: Slide the new CV boot onto the drive shaft. Secure it with the provided clamps. Ensure a tight seal to prevent contamination.
- Assemble CV Joint: Carefully slide the new CV joint onto the drive shaft spline. Use the circlip to secure it in place.
- Reinstall Drive Shaft: Reconnect the drive shaft to the differential and transmission, ensuring all bolts are tightened to manufacturer specifications.
- Final Assembly: Reinstall any removed suspension or brake components. Lower the vehicle and torque lug nuts to specification.

Figure 3: The CV joint housing, which contains the internal components and connects to the drive shaft.

Figure 4: The underside of the CV joint housing, showing the mounting points.

Figure 5: An internal view of the CV joint, highlighting the ball bearings and splined shaft for power transmission.
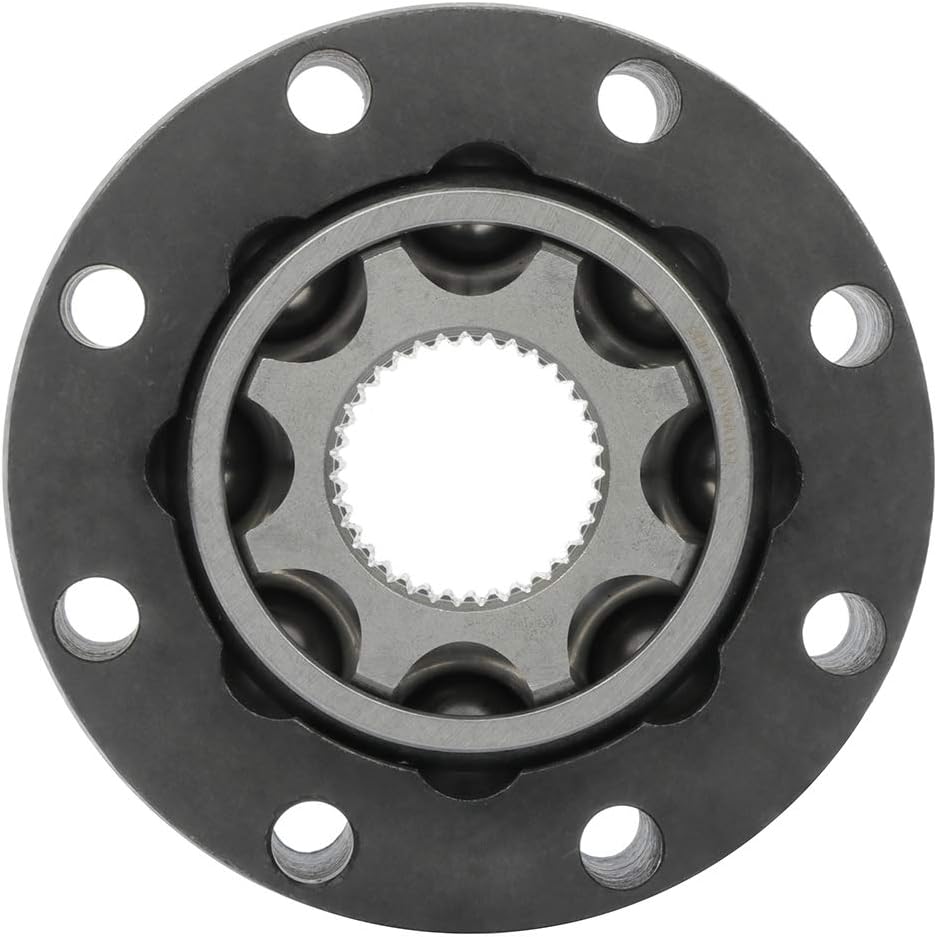
Figure 6: Side profile of the CV joint, showing its compact design.
Operating Considerations
Once installed, the CV joint operates automatically as part of your vehicle's drivetrain. Proper installation ensures optimal performance and longevity.
- Initial Test Drive: After installation, perform a short test drive in a safe area. Listen for any unusual noises (clicking, popping) or vibrations, which may indicate an issue with installation or a faulty component.
- Smooth Operation: A properly functioning CV joint will allow for smooth power transfer to the wheels, especially during turns and over uneven terrain.
Maintenance
The CV joint is a sealed unit, and regular maintenance primarily involves inspecting the CV boot for damage.
- Regular Inspection: Periodically inspect the CV boots for cracks, tears, or signs of grease leakage. A damaged boot can lead to contamination of the joint, causing premature wear and failure.
- Boot Replacement: If a boot is damaged, it should be replaced promptly to prevent dirt and moisture from entering the joint and to retain the lubricating grease.
- Grease Level: While the joint is sealed, if a boot is replaced, ensure the joint is repacked with appropriate CV joint grease.

Figure 7: A circlip, essential for securing the CV joint on the drive shaft.

Figure 8: A metal clamp, used to secure the CV boot tightly to prevent contamination and grease loss.
Troubleshooting
| Symptom | Possible Cause | Solution |
|---|---|---|
| Clicking or Popping Noise (especially during turns) | Worn or damaged CV joint, insufficient lubrication, or improper installation. | Inspect CV joint and boot. Ensure proper grease application. Re-install if necessary, or replace the joint if damaged. |
| Vibration during acceleration | Damaged CV joint, unbalanced drive shaft, or loose mounting hardware. | Check all mounting bolts for tightness. Inspect CV joint for play or damage. |
| Grease leaking from boot | Damaged or improperly clamped CV boot. | Inspect boot for tears. Re-secure or replace boot and re-pack joint with grease. |
If you encounter issues not listed here or if troubleshooting steps do not resolve the problem, it is recommended to consult a qualified automotive technician.
Specifications
| Attribute | Detail |
|---|---|
| Brand | CCIYU |
| Model Number | 106775-5210-1032526471 |
| OE Part Number | 52123553AA |
| Compatible Vehicles | 2012-2013 Jeep Wrangler 3.6L, 2007-2011 Jeep Wrangler 3.8L |
| Position | Front, Rear (as per product features, though title specifies Front) |
| Item Weight | 4.09 pounds |
| Product Dimensions | 7.87 x 4.72 x 4.53 inches |
Warranty and Support
Specific warranty information for CCIYU products is typically provided at the point of purchase or on the manufacturer's official website. Please retain your proof of purchase for any warranty claims.
For technical support, installation inquiries, or warranty claims, please contact CCIYU customer service through their official channels. You can often find contact information on the product packaging or the brand's Amazon store page.
CCIYU Brand Information: CCIYU specializes in direct replacement high-performance auto parts, including U steering joints, steering shafts, and CV axles. They aim to provide products that meet OE and ISO/IATF 16949 performance standards.

Figure 9: The official CCIYU brand logo.

Figure 10: CCIYU's commitment to Premium Quality, Fast Shipping, and Easy Installation.
Ask a question about this manual
Ask about setup, troubleshooting, compatibility, parts, safety, or missing instructions. Manuals+ will review the question and use this page’s manual context to help answer it.