
Introduction
Thank you for purchasing the Smart Starsat SR-90000 XTREAM HD DVB-S2 Satellite Receiver. This device is designed to provide a high-quality viewing experience with its H.265 HEVC (High Efficiency Video Coding) support and Full HD 1080P output. This manual will guide you through the setup, operation, and maintenance of your new satellite receiver, ensuring optimal performance and longevity.
Safety Information
- Read all instructions carefully before operating the device.
- Do not expose the receiver to rain or moisture to prevent fire or electric shock.
- Ensure proper ventilation around the unit to prevent overheating.
- Do not open the casing; refer all servicing to qualified personnel.
- Use only the power adapter supplied with the unit.
- Keep the device away from direct sunlight, heat sources, and strong magnetic fields.
Package Contents
Please check the box for the following items:
- Smart Starsat SR-90000 XTREAM Receiver
- 2 Remote Controls (one standard, one with WiFi technology)
- WiFi Antenna
- AV Cable
- Power Adapter
- User Manual (this document)
- Warranty Card
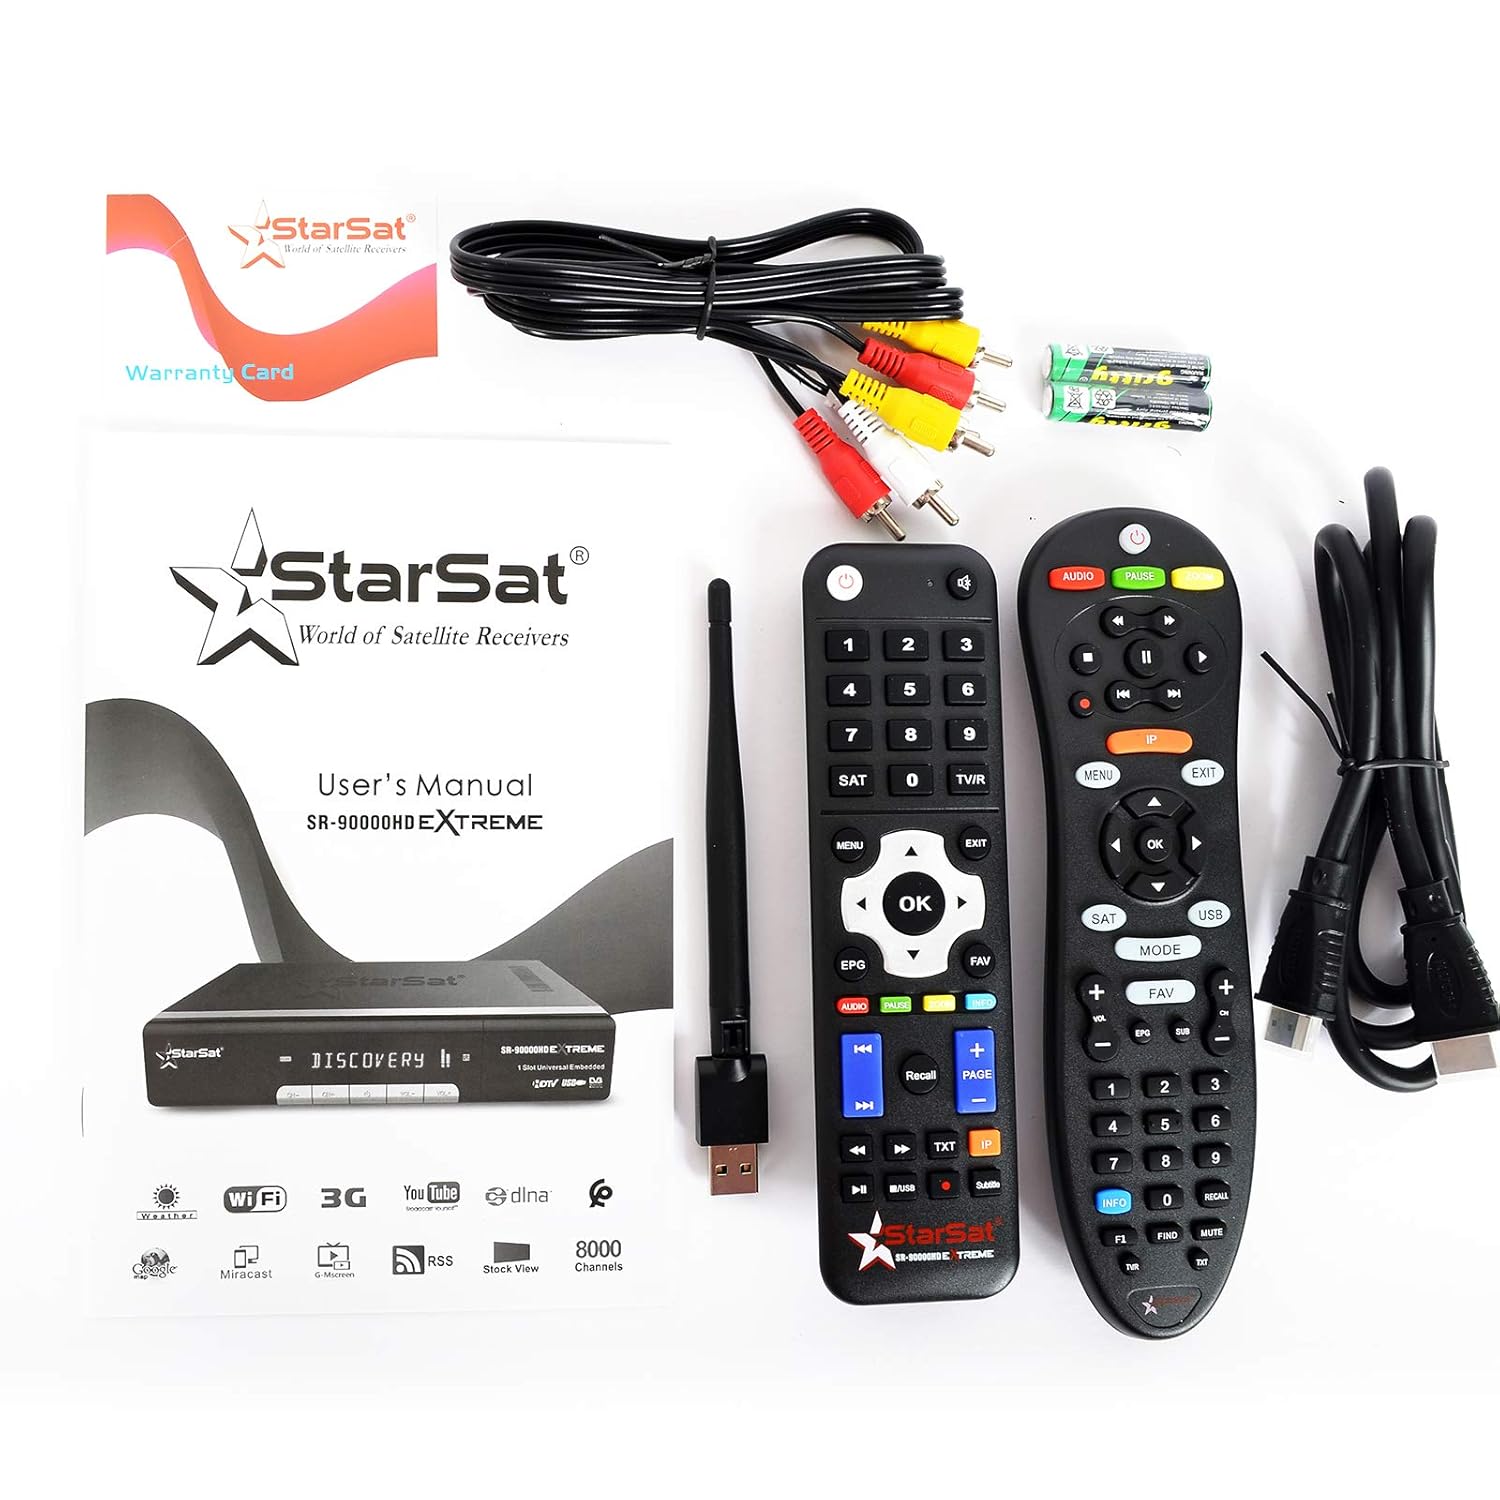
Image: All items included in the Smart Starsat SR-90000 XTREAM Receiver package.
Product Overview
Front Panel
The front panel of the SR-90000 XTREAM receiver features a display for channel numbers and status indicators, along with basic control buttons for power, channel up/down, and volume. A USB port is also accessible on the front for convenient media playback or software updates.
Rear Panel Connections
The rear panel provides all necessary ports for connecting your receiver to a television, satellite dish, and network.

Image: Rear panel connections of the SR-90000 XTREAM Receiver.
Key Ports:
- TUNER 1 IN / TUNER 2 IN: Connect your satellite dish cables here.
- USB 2.0: Two USB ports for external storage devices (e.g., USB drives for media playback or recording).
- DV OUT: HDMI output for connecting to your television.
- AUDIO L/R, VIDEO: RCA (AV) outputs for older televisions.
- COAXIAL: Digital audio output.
- RS232: Service port.
- LAN: Ethernet port for wired network connection.
- POWER IN: Connect the power adapter.
- ON/OFF Switch: Main power switch.
Setup
1. Connecting to Your Television
- Ensure both your TV and the receiver are powered off.
- For best quality, connect an HDMI cable from the DV OUT port on the receiver to an HDMI input on your TV.
- Alternatively, use the supplied AV cable to connect the AUDIO L/R and VIDEO ports on the receiver to the corresponding inputs on your TV.
2. Connecting to Your Satellite Dish
- Connect the coaxial cable(s) from your satellite dish LNB(s) to the TUNER 1 IN and/or TUNER 2 IN ports on the receiver.
3. Connecting to the Network (Optional)
- Wired Connection: Connect an Ethernet cable from your router to the LAN port on the receiver.
- Wireless Connection: Screw the provided WiFi antenna into the designated port on the receiver. You will configure the wireless connection in the system settings after initial power-on.
4. Power On and Initial Setup
- Connect the power adapter to the receiver and then to a power outlet.
- Flip the ON/OFF switch on the rear panel to the 'ON' position.
- Turn on your TV and select the correct HDMI or AV input source.
- Follow the on-screen instructions for initial setup, which typically includes language selection, time zone, and satellite configuration/channel scan.
Operating Instructions
Remote Control Functions
The receiver comes with two remote controls. The primary remote offers comprehensive control over all receiver functions. Familiarize yourself with the button layout for easy navigation.
Image: The two remote controls provided with the receiver.
- POWER: Turns the receiver on/off or to standby.
- MENU: Accesses the main menu for settings and features.
- OK/ENTER: Confirms selections or displays channel list.
- ARROW BUTTONS: Navigate through menus and channels.
- EXIT: Returns to the previous screen or live TV.
- VOL +/-: Adjusts volume.
- CH +/-: Changes channels.
- EPG: Displays the Electronic Program Guide.
- USB: Accesses media files from a connected USB device.
- FAV: Accesses favorite channel lists.
- AUDIO: Changes audio tracks or language.
- TXT: Teletext function.
Menu Navigation
Press the MENU button on your remote to access the main menu. Use the arrow buttons to navigate through options such as Installation, Channel Manager, System Settings, Media Center, and Network Settings. Press OK to select an option and EXIT to go back.
Channel Management
In the Channel Manager menu, you can perform tasks such as:
- Channel Scan: Search for new satellite channels.
- Edit Channels: Move, delete, or lock channels.
- Favorite Groups: Create custom lists of your preferred channels.
Media Playback
Insert a USB storage device into one of the USB ports. Navigate to the Media Center menu to browse and play supported media files (video, audio, images). The receiver supports DLNA for streaming content from compatible devices on your local network.
Internet Features
Connect your receiver to the internet via LAN or WiFi (configure in Network Settings) to access features like YouTube and other online services.
Maintenance
- Cleaning: Use a soft, dry cloth to clean the exterior of the receiver. Do not use liquid cleaners or aerosols.
- Ventilation: Ensure that the ventilation openings on the receiver are not blocked to prevent overheating.
- Software Updates: Periodically check the manufacturer's website or the receiver's system settings for available software updates to ensure optimal performance and access to new features.
Troubleshooting
| Problem | Possible Cause | Solution |
|---|---|---|
| No picture or sound | Incorrect TV input selected; loose cables; receiver not powered on. | Check TV input source; ensure all cables (HDMI/AV, power) are securely connected; power on the receiver. |
| Remote control not working | Dead batteries; obstruction between remote and receiver; remote not pointed correctly. | Replace batteries; remove obstructions; point remote directly at the receiver's IR sensor. |
| No satellite signal | Dish misalignment; loose LNB cable; bad weather. | Check LNB cable connection; ensure dish is properly aligned (may require professional assistance); wait for weather to clear. |
| Cannot connect to WiFi | Incorrect password; WiFi antenna not connected; router issues. | Verify WiFi password; ensure WiFi antenna is securely attached; restart your router. |
Specifications
| Feature | Description |
|---|---|
| Model | SR-90000 |
| Video Decoding | H.265 HEVC, Full HD 1080P |
| Tuner Type | DVB-S2 (Double Tuner) |
| USB Ports | 2 (USB 2.0) |
| Connectivity | WiFi (via included antenna), LAN (Ethernet), IR |
| Audio Output | AC/DC, Coaxial, Audio L/R |
| Video Output | HDMI (DV OUT), Video RCA |
| Supported Features | YouTube, DLNA, EPG, Multi Language, DISEQC1.0 / 1.1, PAL/NTSC |
| Compatible Devices | Television |
| Item Weight | 1.46 kg |
| Dimensions (Package) | 31.3 x 29.9 x 7.7 cm |
Warranty and Support
Your Smart Starsat SR-90000 XTREAM Receiver comes with a 1-year service warranty. For technical support, further information, or to check for software updates, please visit the official Starsat website:

Image: Product box highlighting features and the official Starsat website for support.


