1. Introduction
The SINGER Intelligent 36-inch Steam Press is designed for efficient and professional fabric care at home. This appliance provides a large pressing surface and powerful steam output to quickly remove wrinkles from various garments and fabrics. It features digital controls with multiple fabric settings and an automatic shutoff for safety.
2. Safety Information
Please read all instructions carefully before using the SINGER Intelligent Steam Press. Keep this manual for future reference.
- Always unplug the appliance when not in use and before cleaning.
- Do not operate the steam press with a damaged cord or plug.
- Keep the appliance away from water and other liquids.
- Ensure the steam press is placed on a stable, heat-resistant surface.
- Do not touch hot surfaces. Use handles or knobs.
- Keep out of reach of children.
- The appliance features an automatic shutoff for safety if left unattended.
3. Product Overview
Familiarize yourself with the components of your SINGER Intelligent Steam Press.

- Large 36-inch Non-Stick Pressing Surface: Provides ample space for various garments.
- Digital Controls: Easy-to-use interface for selecting fabric settings and monitoring temperature.
- Steam Burst Buttons: Located on the handle for on-demand steam.
- Removable Water Tank (300ml capacity): For easy refilling.
- Fabric Settings: Pre-set modes for Nylon, Silk, Wool, Cotton, and Linen.
- Auto Shutoff: Enhances safety by turning off the unit after a period of inactivity.

4. Setup
Follow these steps for initial setup before first use.
- Unpack the Appliance: Carefully remove all packaging materials and ensure all components are present.
- Position the Steam Press: Place the steam press on a sturdy, flat, and heat-resistant surface. Ensure there is adequate space around the unit for safe operation.
- Fill the Water Tank:
- Locate the removable water reservoir.
- Pull out the water tank from the base of the unit.
- Fill the tank with distilled water up to the MAX line. Using distilled water helps prevent mineral buildup.
- Carefully reinsert the water tank until it clicks into place.
Video 1: Manual SpeedyPress HD. This video demonstrates the process of filling the water tank and preparing the steam press for use. - Power On: Plug the power cord into a suitable electrical outlet. Turn on the power switch, usually located on the side or back of the unit.
5. Operating Instructions
Achieve professional pressing results by following these operating guidelines.
- Select Fabric Setting:
- Use the digital controls to select the appropriate fabric setting (Nylon, Silk, Wool, Cotton, Linen) for your garment. The press will heat up to the optimal temperature for that fabric.
- The unit has a quick heat-up time of approximately 1.8 minutes for the Nylon setting.
- Position the Garment:
- Carefully lay your garment flat on the pressing surface, ensuring it is smooth and free of creases.
- For sleeves or intricate areas, use the pressing cushion provided.
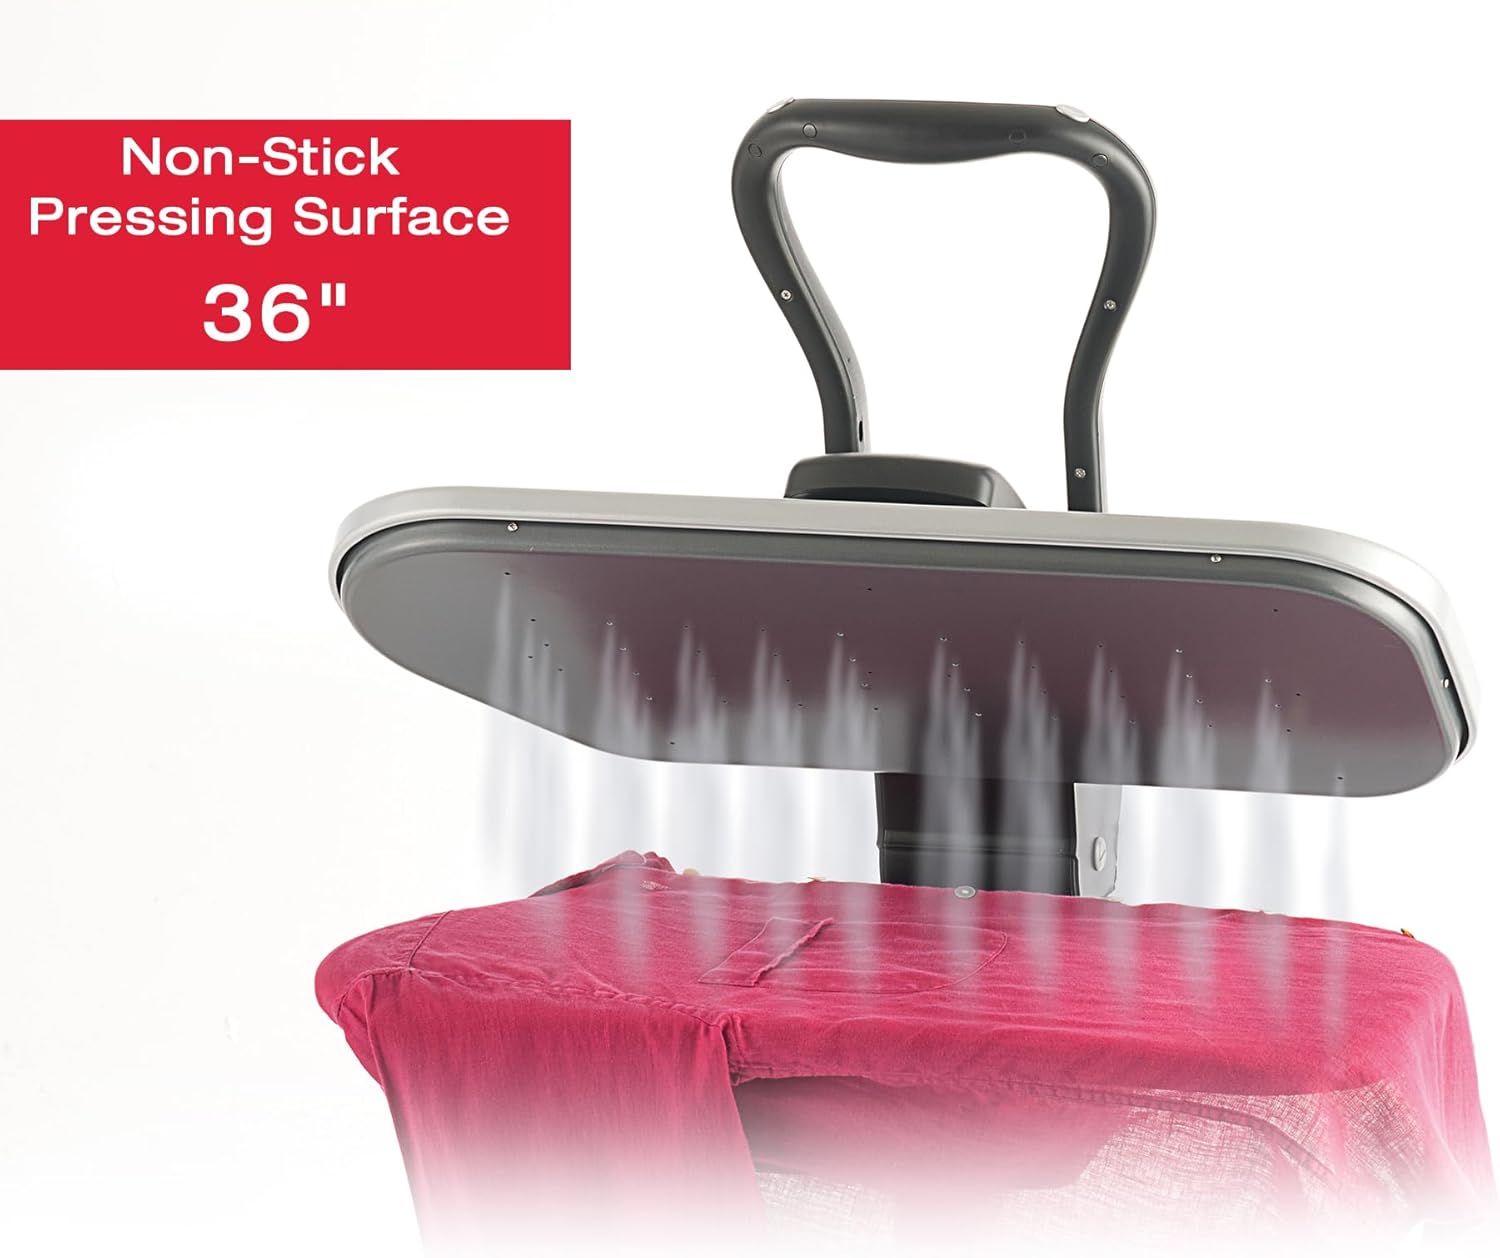
Figure 3: Non-Stick Pressing Surface in Use. This image illustrates the large 36-inch non-stick surface effectively steaming a garment. - Press the Garment:
- Lower the pressing plate onto the garment using the handle. Apply gentle pressure.
- Press the steam burst buttons on the handle to release steam as needed. Hold for a few seconds (typically 5-10 seconds depending on fabric and wrinkles).
- Lift the pressing plate and reposition the garment as necessary.
Video 2: How to Operate the Product. This video provides a visual guide on operating the steam press for various garments. - Finishing: Once pressing is complete, carefully remove the garment and allow it to cool before folding or hanging.
6. Maintenance
Proper maintenance ensures the longevity and optimal performance of your steam press.
- Cleaning the Pressing Surface:
- Ensure the unit is unplugged and completely cool.
- Wipe the non-stick pressing surface with a soft, damp cloth. Do not use abrasive cleaners or scouring pads.
- Draining the Water Tank:
- After each use, or when storing the unit, empty any remaining water from the reservoir.
- This prevents stagnant water and potential mineral buildup.
- Descaling (if applicable): Refer to the full product manual for specific descaling instructions if mineral buildup occurs, especially if using non-distilled water.
- Storage:
- Allow the unit to cool completely before storing.
- The compact design allows for easy storage. Consider using a compatible stand (Model ST-09H) for convenient use and storage.

Figure 4: Portable Design. The steam press is designed for easy transport and storage.
7. Troubleshooting
If you encounter issues, consult the following table for common problems and solutions.
| Problem | Possible Cause | Solution |
|---|---|---|
| No power | Unit not plugged in; power switch off; circuit breaker tripped. | Ensure power cord is securely plugged in. Turn power switch ON. Check household circuit breaker. |
| No steam | Water tank empty; unit not heated to steam temperature; steam buttons not pressed. | Fill water tank. Allow unit to fully heat up (indicator light will show). Press steam burst buttons. |
| Water leakage | Water tank not properly seated; overfilled tank. | Ensure water tank is securely in place. Do not overfill past the MAX line. |
| Wrinkles not removed | Incorrect fabric setting; insufficient steam; garment too dry. | Select appropriate fabric setting. Use more steam. Lightly mist garment with water before pressing. |
8. Specifications
- Model: ESP36T1
- Power: 1800W
- Pressing Surface Size: 36 inches
- Water Tank Capacity: 300 ml
- Heat-Up Time: Approximately 1.8 minutes (Nylon setting)
- Steam Rate: 80 g/min
- Safety Features: Auto Shutoff
- Compatible Stand: ST-09H (sold separately)
- Included Components: Pressing Cushion, Refill Container, Spray Bottle
9. Warranty and Support
The SINGER Intelligent Steam Press comes with a 1-year limited warranty. For warranty claims, technical support, or to purchase replacement parts, please visit the official SINGER website or contact customer service.
For additional resources and product information, visit: singer.com/support


