
SNOOKER commercial ice maker
Snooker Half Cube Commercial Ice Machine with Storage Bin - 280 lb.
Model: commercial ice maker
1. Introduction
This manual provides essential information for the safe and efficient operation, installation, and maintenance of your Snooker Half Cube Commercial Ice Machine. This air-cooled commercial ice maker is designed to produce 280 lbs of half cube ice per day and features an integrated storage bin with an 80 lbs capacity. It is suitable for mid-sized commercial kitchens, bars, or restaurants. The unit includes a digital control panel for status monitoring and ice thickness adjustment, and an in-line water filter for improved ice quality.

Figure 1.1: Front-side view of the Snooker Half Cube Commercial Ice Machine. This image shows the overall design of the ice machine, including the front panel with ventilation grilles and the top lid for the ice storage bin.
2. Important Safety Instructions
Please read all instructions carefully before operating the appliance to prevent injury or damage. Keep this manual for future reference.
- Electrical Safety: Ensure the power supply matches the machine's requirements (115V/60Hz/1-Phase, 6.3 Amps). Do not use extension cords. Always unplug the unit before cleaning or servicing.
- Water Connection: Connect to a potable water supply only. Ensure all water connections are secure to prevent leaks.
- Ventilation: This is an air-cooled unit. Maintain adequate clearance around the machine for proper airflow (minimum 6 inches on sides and rear). Do not block air vents.
- Placement: Install on a level, stable surface capable of supporting the machine's weight when full of ice. Avoid direct sunlight or heat sources.
- Cleaning: Use only food-grade cleaning solutions. Always wear appropriate personal protective equipment (PPE) during cleaning.
- Children and Pets: Keep children and pets away from the appliance.
- Service: All servicing should be performed by qualified personnel.
3. What's in the Box
Upon unpacking, verify that all components are present and undamaged:
- Snooker Half Cube Commercial Ice Machine Unit
- Integrated Ice Storage Bin
- In-line Water Filter
- Ice Scoop (typically included, though not explicitly listed in "whats_in_the_box", it's mentioned in description)
- Instruction Manual (this document)
4. Product Specifications
Detailed technical specifications for the Snooker Half Cube Commercial Ice Machine:
| Feature | Specification |
|---|---|
| Model Name | commercial ice maker |
| Dimensions (W x D x H) | 26" W x 27.8" D x 38.6" H |
| Weight | 204 Pounds |
| 24 hr Production Capacity | 280 lbs |
| Storage Bin Capacity | 80 lbs |
| Voltage | 115V / 60Hz / 1-Phase |
| Amperage | 6.3 Amps |
| Cooling Type | Air Cooled |
| Water Connection Required | Yes |
| Drain Required | Yes (floor drain recommended) |

Figure 4.1: Dimensional drawing of the Snooker Half Cube Commercial Ice Machine, showing width (26"), depth (27.8"), and height (38.6").
5. Setup and Installation
Proper installation is crucial for optimal performance and longevity of your ice machine. It is recommended that installation be performed by a qualified technician.
5.1. Unpacking and Placement
- Carefully remove all packaging materials. Inspect the unit for any shipping damage.
- Place the ice machine on a firm, level surface capable of supporting its weight (204 lbs empty, plus ice).
- Ensure adequate ventilation. As an air-cooled unit, it requires a minimum of 6 inches of clear space on the sides and rear for proper airflow. Do not install in an enclosed cabinet without proper ventilation.
- Avoid locations near heat-generating appliances or in direct sunlight. The ambient temperature should be between 50°F (10°C) and 90°F (32°C).
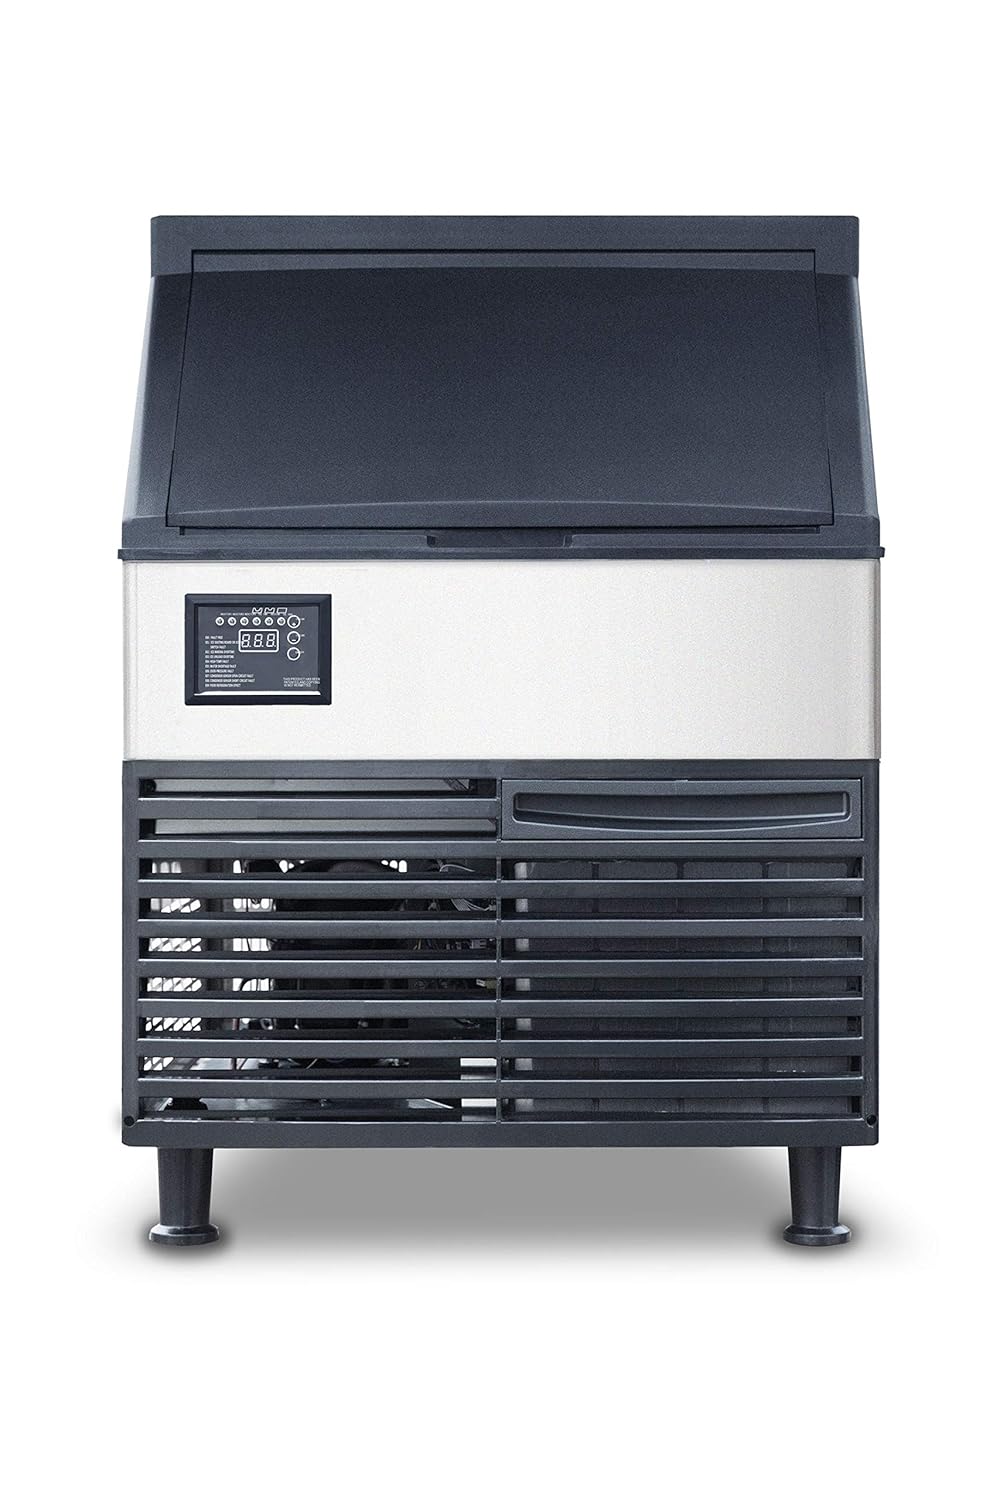
Figure 5.1: Front view of the ice machine, highlighting the ventilation grilles and control panel. Ensure these areas are not obstructed.
5.2. Water Connection
- Connect the ice machine to a cold, potable water supply with a pressure between 20 PSI and 80 PSI.
- Install the included in-line water filter according to its instructions to ensure clean water for ice production and to protect the machine.
- Use new water supply hoses; do not reuse old hoses.
5.3. Drain Connection
- The unit requires a floor drain or a drain pump (not included) for proper water drainage.
- Ensure the drain hose has a continuous downward slope to prevent standing water and blockages.
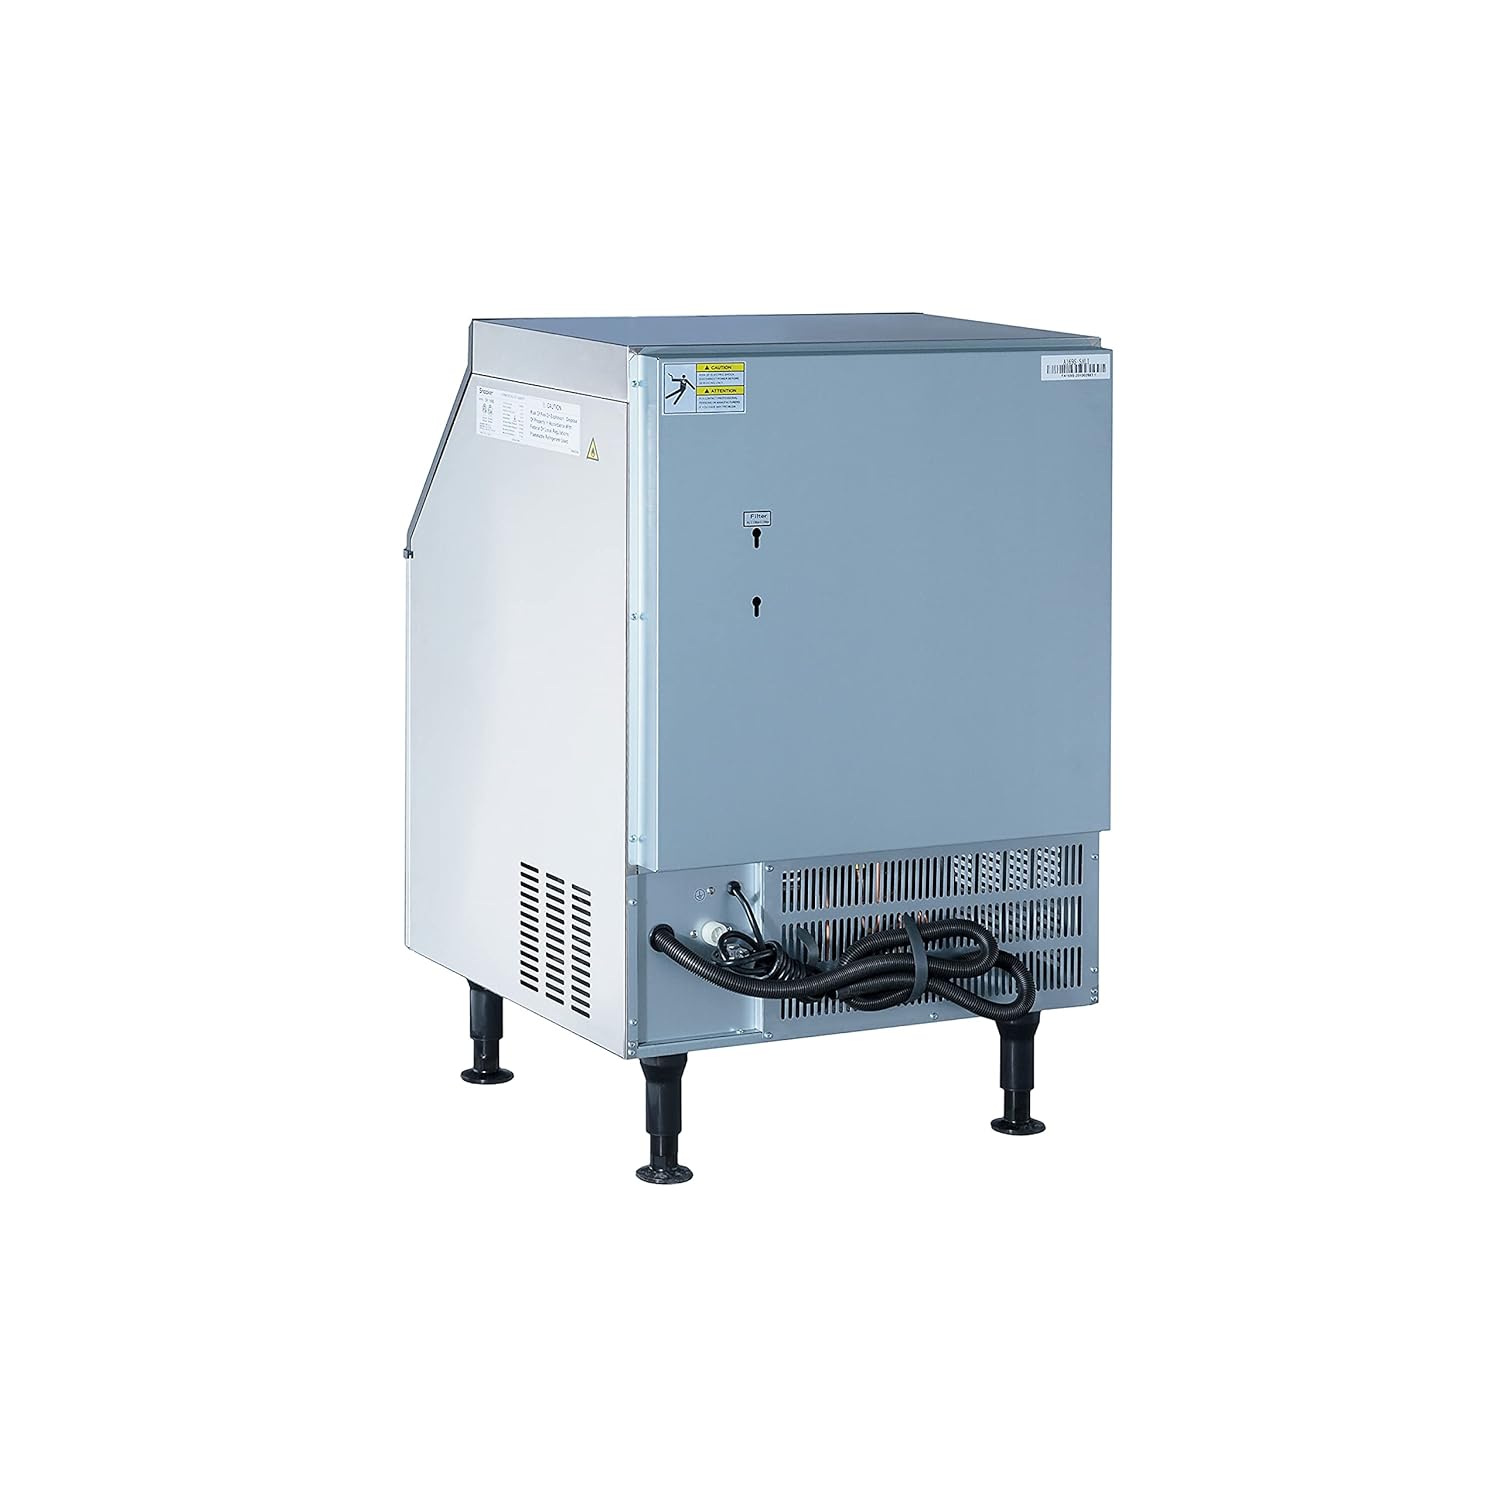
Figure 5.2: Rear view of the ice machine, illustrating the location of water inlet and drain connections, and the power cord.
5.4. Electrical Connection
- Plug the ice machine into a dedicated, grounded 115V/60Hz/1-Phase electrical outlet.
- Do not use adapter plugs or extension cords.
- Ensure the circuit is protected by a properly sized fuse or circuit breaker (rated for 6.3 Amps or higher).
5.5. Initial Cleaning
- Before first use, clean the ice storage bin and all surfaces that come into contact with water or ice. Refer to the "Maintenance" section for detailed cleaning instructions.
6. Operating Instructions
This section details the basic operation of your Snooker ice machine.
6.1. Control Panel Overview
The digital control panel provides status indicators and allows for basic adjustments.

Figure 6.1: Digital control panel showing status indicators (INIT, PREP, MAKE, DROP, INLET, E FAULT), a digital display, and buttons for thickness adjustment, clean cycle, and power (ON/OFF).
- INIT: Initialization phase.
- PREP: Preparation phase before ice making.
- MAKE: Ice making cycle in progress.
- DROP: Ice harvesting/dropping cycle.
- INLET: Water inlet status.
- E FAULT: Error indicator. Refer to the display for specific error codes (E01-E08).
- +/- Buttons: Adjust ice thickness.
- CLEAN Button: Initiates the cleaning cycle.
- ON/OFF Button: Powers the unit on or off.
6.2. Starting the Ice Machine
- Ensure the unit is properly installed and connected to water and power.
- Press the ON/OFF button on the control panel. The machine will begin its initialization sequence.
- The unit will automatically proceed through the PREP, MAKE, and DROP cycles to produce ice.
6.3. Adjusting Ice Thickness
- During the MAKE cycle, use the + or - buttons on the control panel to adjust the ice thickness. Increasing the value typically results in thicker ice, and decreasing it results in thinner ice.
- Allow several cycles for the adjustment to take full effect.
6.4. Ice Storage
- Ice is automatically dropped into the integrated 80 lb storage bin.
- The machine will stop producing ice when the bin is full (indicated by E01: ICE FULL). Production will resume automatically when ice is removed.
- Use the provided ice scoop to retrieve ice from the bin. The lift and slide lid stays open for convenience.

Figure 6.2: Interior view of the ice storage bin, showing the ice-making components and the blue LED light, which illuminates the bin for visibility.
7. Maintenance and Cleaning
Regular cleaning and maintenance are essential for hygienic ice production and extending the lifespan of your machine.
7.1. Daily Maintenance
- Wipe down the exterior surfaces with a clean, damp cloth.
- Ensure the ice scoop is clean and stored hygienically.
7.2. Weekly Maintenance
- Empty and clean the ice storage bin. Use a mild, food-grade detergent and rinse thoroughly.
- Check for any obstructions in the air vents and clean if necessary.
7.3. Monthly / Bi-Monthly Cleaning (or as needed)
Perform a thorough cleaning of the ice-making system and water circuit.
- Prepare: Ensure the ice bin is empty. Turn off the machine and unplug it from the power outlet.
- Clean Cycle: Plug the machine back in. Press and hold the CLEAN button for 3 seconds to initiate the automatic cleaning cycle. Follow the instructions on the display. This cycle typically circulates a cleaning solution through the system.
- Manual Cleaning: For deeper cleaning, you may need to manually clean components like the evaporator, water pump, and water tray. Consult a qualified technician if unsure.
- Descaling: Use a commercial ice machine descaling solution to remove mineral buildup. Follow the descaler manufacturer's instructions carefully.
- Rinse: After cleaning/descaling, run several rinse cycles (often part of the automatic clean cycle or by running ice cycles and discarding the first few batches of ice) to ensure all cleaning solution is flushed out.
7.4. Water Filter Replacement
- The in-line water filter should be replaced every 3-6 months, or more frequently depending on water quality and usage.
- Refer to the water filter's specific instructions for replacement procedures.
8. Troubleshooting
This section provides solutions to common issues. For problems not listed or if issues persist, contact qualified service personnel.
8.1. Error Codes (E FAULT)
The digital display will show specific error codes if a fault occurs:
| Code | Description | Possible Cause / Solution |
|---|---|---|
| E01 | ICE SKATING BOARD OR ICE FULL | Ice bin is full, or ice is stuck on the evaporator. Remove ice from bin. Check for ice buildup and clear. |
| E02 | SHORTAGE FAULT | Likely a refrigerant shortage. Contact qualified service personnel. |
| E03 | ICE UNLOAD OVERTIME | Ice is not dropping from the evaporator. Check water pump, harvest assist, or for excessive scale buildup. |
| E04 | HIGH TEMP FAULT | High ambient temperature or poor ventilation. Ensure adequate clearance around the machine and room temperature is within limits. Clean condenser coils. |
| E05 | WATER SHORTAGE FAULT | No water supply or low water pressure. Check water inlet valve, water filter, and water supply. |
| E06 | OVER-PRESSURE FAULT | High refrigerant pressure. Could be due to dirty condenser, poor ventilation, or overcharge. Contact qualified service personnel. |
| E07 | CONDENSER SENSOR OPEN CIRCUIT FAULT | Condenser temperature sensor issue. Contact qualified service personnel. |
| E08 | CONDENSER SENSOR SHORT CIRCUIT FAULT | Condenser temperature sensor issue. Contact qualified service personnel. |
8.2. General Troubleshooting
- No Power: Check power cord connection, wall outlet, and circuit breaker.
- No Ice Production: Ensure water supply is on, water filter is not clogged, and the unit is not in an error state. Check ambient temperature.
- Small or Soft Ice: Adjust ice thickness setting (increase). Check water pressure and temperature. Clean condenser coils.
- Water Leaks: Check all water connections for tightness. Inspect drain hose for kinks or blockages.
- Unusual Noise: Could indicate a fan issue, pump issue, or loose component. Turn off the unit and inspect. If noise persists, contact service.
9. Warranty and Support
For warranty information, please refer to the documentation provided at the time of purchase or contact the seller directly. This product is sold by Iron Mountain Refrigeration & Equipment LLC.
For technical support or service inquiries, please contact the manufacturer, Snooker, or the seller, Iron Mountain Refrigeration & Equipment LLC. Keep your purchase receipt and product model number (commercial ice maker) and ASIN (B0821TMBRM) ready when contacting support.
Seller Information:
- Name: Iron Mountain Refrigeration & Equipment LLC
- Amazon Seller Link: View Seller Profile on Amazon
Related documentscommercial ice maker


Ask a question about this manual
Ask about setup, troubleshooting, compatibility, parts, safety, or missing instructions. Manuals+ will review the question and use this page’s manual context to help answer it.