1. Introduction
This user manual provides comprehensive instructions for the safe and effective operation, maintenance, and troubleshooting of the Fluke FLUKE-BT520 Battery Analyzer. The FLUKE-BT520 is an essential tool designed for maintenance, troubleshooting, and performance testing of individual stationary batteries and battery banks, particularly those used in critical battery back-up applications.
It facilitates automatic or manual sequence testing of battery strings, with automatic measurement storage for voltage, resistance, and temperature (when used with the BTL21 intelligent test probe). All measured values are automatically captured during testing and can be reviewed on the instrument before downloading for analysis.
2. Safety Information
Always adhere to the following safety precautions to prevent personal injury and damage to the instrument or the equipment under test. Read all instructions before using the Fluke FLUKE-BT520 Battery Analyzer.
- Electrical Shock Hazard: Do not apply more than the rated voltage, as marked on the instrument, between terminals or between any terminal and earth ground.
- Battery Safety: Ensure proper battery installation and replacement. Use only specified battery types. Do not expose batteries to excessive heat or direct sunlight.
- Proper Use: Use the analyzer only as specified in this manual; otherwise, the protection provided by the analyzer might be impaired.
- Maintenance: Refer all servicing to qualified service personnel. Do not attempt to repair the instrument yourself.
- Environmental Conditions: Do not operate the analyzer in explosive atmospheres or in wet conditions.
3. Product Overview
The Fluke FLUKE-BT520 Battery Analyzer is a robust and precise instrument designed for comprehensive battery testing. It provides key measurements including internal battery resistance, DC and AC voltage, DC and AC current, ripple voltage, frequency, and temperature.
3.1. Components
The standard package for the Fluke FLUKE-BT520 Battery Analyzer includes the following items:
- Fluke FLUKE-BT520 Battery Analyzer Unit
- Lithium Ion Battery (pre-installed or included)
- Test Leads / Intelligent Test Probe (e.g., BTL21)
- User Manual (this document)


3.2. Key Features
- Comprehensive Measurements: Measures internal battery resistance, DC and AC voltage, DC and AC current, ripple voltage, frequency, and temperature.
- Sequence Measurement Mode: Offers automatic or manual sequence testing of battery strings with automatic measurement storage, eliminating the need for manual saving.
- Intelligent Test Probe Compatibility: Works seamlessly with the BTL21 intelligent test probe for enhanced temperature measurement capabilities.
- Extensive Data Logging: All measured values are automatically captured and can be reviewed on the instrument before downloading for detailed analysis.
- Ideal for Critical Applications: Specifically designed for performance testing and troubleshooting of stationary batteries and battery banks in critical back-up systems.

4. Setup
Before operating the Fluke FLUKE-BT520 Battery Analyzer, ensure it is properly set up according to these instructions.
4.1. Battery Installation
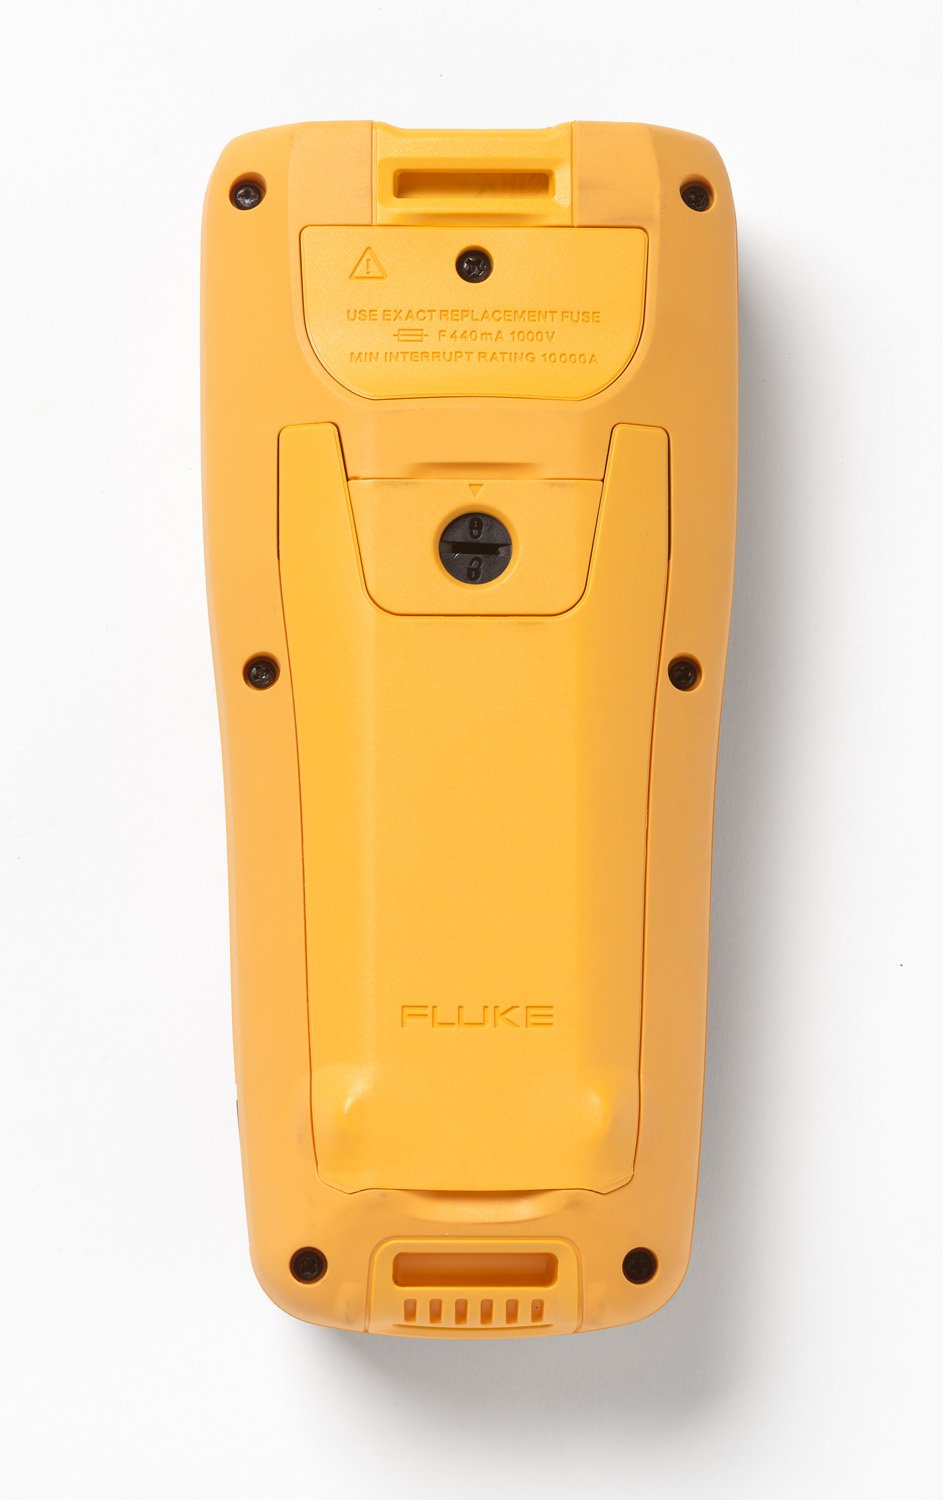
The FLUKE-BT520 comes with a Lithium Ion battery included. If the battery is not pre-installed or needs replacement:
- Locate the battery compartment on the rear of the analyzer (refer to Figure 3.4).
- Unscrew the battery compartment cover.
- Insert the Lithium Ion battery, ensuring correct polarity.
- Replace the cover and secure it with the screws.
4.2. Connecting Test Probes
Proper connection of the test probes is crucial for accurate measurements.
- Identify the input jacks on the analyzer.
- Connect the intelligent test probe (e.g., BTL21) or standard test leads to the appropriate jacks. Ensure a secure connection.
- For temperature measurements, ensure the BTL21 intelligent test probe is correctly connected and positioned.

5. Operating Instructions
This section details the operational procedures for the Fluke FLUKE-BT520 Battery Analyzer.
5.1. Powering On and Basic Measurements
- Press the power button to turn on the analyzer. The display will illuminate.
- Use the rotary dial and navigation buttons to select the desired measurement mode (e.g., Voltage, Resistance, Ripple Volts).
- Connect the test probes to the battery terminals. Ensure proper polarity (red to positive, black to negative).
- Read the measurement values displayed on the screen.

5.2. Sequence Measurement Mode
The sequence measurement mode allows for efficient testing of multiple batteries in a string.
- Select "Sequence Measurement" from the menu.
- Follow the on-screen prompts to connect to each battery in the string.
- The analyzer will automatically record voltage, resistance, and temperature (with BTL21 probe) for each battery.
- Measurements are automatically stored, eliminating the need to press a save button for each reading.

5.3. Data Logging and Review
All measured values are automatically logged. You can review them directly on the instrument.
- Navigate to the "Review" or "Logging" section in the menu.
- Browse through the stored measurements.
- For detailed analysis, connect the analyzer to a computer and download the data using the provided software (if applicable, software not specified in input).
6. Maintenance
Proper maintenance ensures the longevity and accuracy of your Fluke FLUKE-BT520 Battery Analyzer.
6.1. Cleaning
- Wipe the case with a damp cloth and mild detergent. Do not use abrasives or solvents.
- Clean the terminals with a cotton swab dampened with alcohol.
- Ensure the analyzer is completely dry before use.
6.2. Storage
- Store the analyzer in a dry, dust-free environment, away from direct sunlight and extreme temperatures.
- If storing for extended periods, remove the battery to prevent leakage.
6.3. Fuse Replacement
The analyzer uses a specific fuse for protection. If the fuse needs replacement:
- Ensure the analyzer is powered off and disconnected from any power source or battery.
- Locate the fuse compartment on the rear of the analyzer (refer to Figure 3.4).
- Unscrew the fuse compartment cover.
- Replace the fuse with an exact replacement: F440mA 1000V, MIN INTERRUPT RATING 10000A.
- Securely replace the fuse compartment cover.
7. Troubleshooting
This section provides solutions to common issues you might encounter with your Fluke FLUKE-BT520 Battery Analyzer.
| Problem | Possible Cause | Solution |
|---|---|---|
| Analyzer does not power on. | Dead or improperly installed battery. | Check battery installation. Recharge or replace battery. |
| No reading or incorrect reading. | Loose or faulty test leads; incorrect measurement mode selected; fuse blown. | Ensure test leads are securely connected. Select the correct measurement mode. Check and replace fuse if necessary. |
| Display is dim or flickering. | Low battery charge. | Recharge the battery. |
| Data not saving in sequence mode. | Memory full; software glitch. | Download data to clear memory. Restart the analyzer. |
8. Specifications
Detailed technical specifications for the Fluke FLUKE-BT520 Battery Analyzer:
| Specification | Detail |
|---|---|
| Model Number | 4489981 |
| Product Dimensions | 8.66 x 3.94 x 1.97 inches |
| Item Weight | 3 Kilograms (6.61 Pounds) |
| Power Source | Battery Powered |
| Batteries Required | 1 Lithium Ion battery (included) |
| Manufacturer | Fluke |
| Date First Available | August 29, 2014 |
| Style | BT520 |
9. Warranty Information
Fluke products are manufactured to the highest quality standards. For specific warranty terms and conditions applicable to your FLUKE-BT520 Battery Analyzer, please refer to the warranty card included with your product or visit the official Fluke website. Keep your purchase receipt as proof of purchase for warranty claims.
10. Customer Support
For technical assistance, service, or to inquire about accessories, please contact Fluke customer support. You can find contact information and additional resources by visiting the official Fluke website or their Amazon store page:
Visit the Fluke Store on Amazon
Please have your product model number (BT520) and serial number ready when contacting support.
11. Official Product Videos
No official product videos from the seller were found in the provided data for this model.


