
UpStart Components CSC-200PXBK041
20-Inch Chainsaw Guide Bar Instruction Manual
Brand: UpStart Components
Model: CSC-200PXBK041
1. Product Overview
This guide bar is a replacement component designed for various chainsaw models. It is engineered to provide a stable and durable platform for the chainsaw chain, facilitating efficient cutting operations. This product is manufactured by UpStart Components.
Key Features:
- Durable and lightweight construction for high performance.
- Designed to reduce kickback for increased safety.
- Easily replaces damaged guide rails.
2. Safety Information
WARNING: This saw chain may be capable of kickback that could result in serious injury to the chainsaw operator or bystanders. Always refer to your chainsaw User Manual for proper chain installation and maintenance procedures. Always wear appropriate personal protective equipment (PPE) including safety glasses, hearing protection, gloves, and protective footwear when operating or maintaining a chainsaw.
- Ensure the guide bar is correctly installed and secured before operation.
- Regularly inspect the guide bar for wear, damage, or bending. Replace immediately if any damage is observed.
- Maintain proper chain tension as specified by your chainsaw manufacturer.
- Keep hands and body clear of the chain and guide bar during operation.
3. Specifications
| Specification | Value |
|---|---|
| Manufacturer | UpStart Components |
| Part Number | CSC-200PXBK041 |
| Item Model Number | CSC-200PXBK041 |
| Length | 20 inches |
| Pitch | .325" Pitch |
| Gauge | .050" |
| Drive Links | 78 |
| Color | Grey |
| Power Source | Manual (for the bar itself) |
| Item Package Quantity | 1 |
| Chain Type | Low Profile |
4. Compatibility
This guide bar is compatible with a wide range of chainsaw models. Please verify the pitch, gauge, and drive links on your current bar to ensure compatibility, as the same saw model can sometimes use different bar lengths and specifications.
Known Compatible Models Include:
- Craftsman: 358.35020, 358.35021, 358.35119, 358.35120, 358.35121, 358.35492, 358.35607, 358.35628, 358.35633, 41146, 41920
- Hitachi: CS40EA18, CS51EAP
- Homelite: 25, 27, 4100, 4150, 4500, 4550, d4550b, i3850b, i4150b, i4550b, Super 240, TIMBERMAN, UT10518, UT10519, UT10520 (42cc/46cc), UT10522, UT10526, UT10550, UT10552, UT10896, UT10910, UT10927A, UT10942A, UT10946A, UT10946D, ZR10518, ZR10520, ZR10522
- Husqvarna: 136, 137, 141, 142, 243
- Jonsered: 2016, 2033, 2035, 2036, 2040 Turbo, 2041, 2045, 2050, 2050 Turbo, 2141, 2145, 2152, Cs 2137
- Poulan: Predator
- Shindaiwa: 360, 377, 488, 502s
- Tanaka: Tcs40ea, Tcs51eap, Ecv 4501
5. Setup and Installation
Replacing a chainsaw guide bar requires careful attention to detail. Always consult your chainsaw's specific user manual for detailed instructions, as procedures may vary slightly between models.
General Installation Steps:
- Safety First: Ensure the chainsaw engine is off and the spark plug cap is disconnected to prevent accidental starting. Engage the chain brake.
- Remove Chain Cover: Loosen and remove the nuts holding the chain cover (clutch cover) in place. Remove the chain cover.
- Loosen Chain Tension: If present, loosen the chain tensioning screw to allow the chain to slacken.
- Remove Old Bar and Chain: Carefully remove the old guide bar and chain from the chainsaw studs.
- Clean: Clean any sawdust, debris, or oil residue from the chainsaw's mounting area, oil port, and chain brake mechanism.
- Install New Bar: Position the new guide bar onto the chainsaw studs, ensuring the adjustment pin aligns with the hole in the bar.
- Install Chain: Loop the new chain around the drive sprocket and guide it into the groove of the new guide bar. Ensure the cutting edges of the chain are facing the correct direction.
- Replace Chain Cover: Reinstall the chain cover, ensuring the chain brake lever is in the disengaged position (if applicable) to allow the cover to seat properly. Hand-tighten the nuts.
- Adjust Chain Tension: While holding the tip of the guide bar up, tighten the chain tensioning screw until the chain is snug but can still be pulled freely around the bar by hand. The chain should not sag on the underside of the bar. Refer to your chainsaw manual for precise tensioning guidelines.
- Tighten Nuts: Fully tighten the chain cover nuts.
- Final Check: Verify that the chain moves freely and the tension is correct. Reconnect the spark plug cap.
 Figure 1: Top view of the 20-inch UpStart Components chainsaw guide bar, showing the brand logo and overall shape.
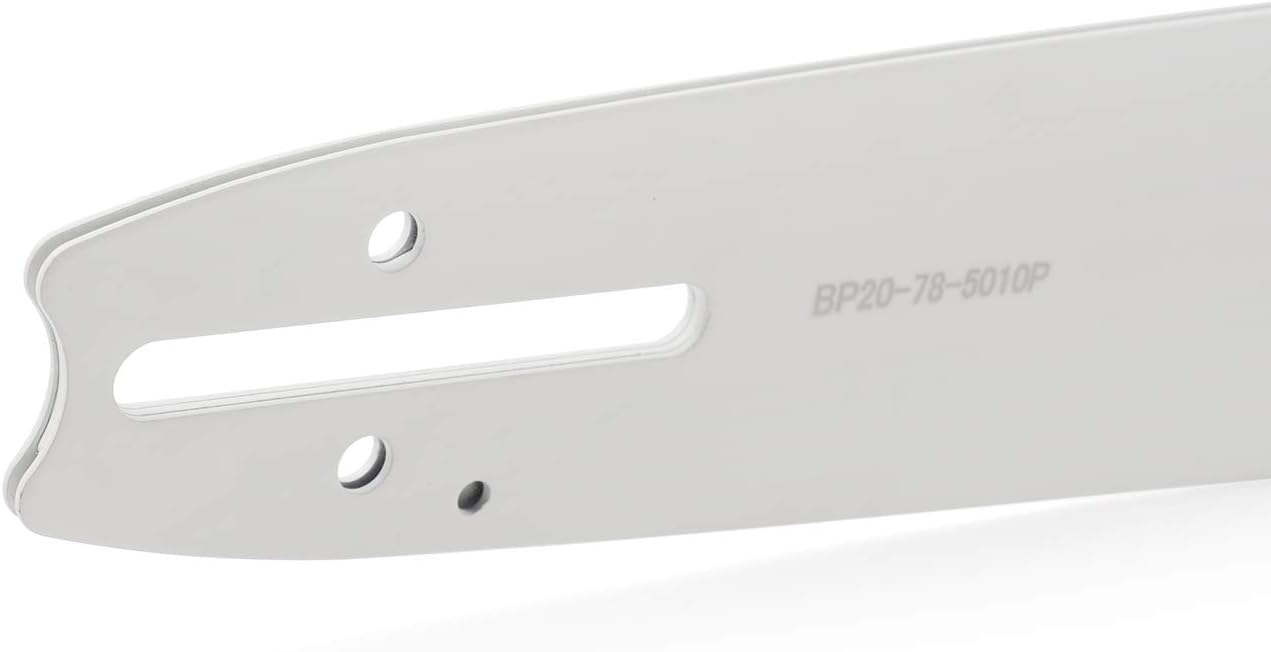 Figure 2: Close-up view of the mounting end of the guide bar, showing the slot for the chainsaw studs and the adjustment pin hole.
 Figure 3: Close-up view of the sprocket nose of the guide bar, illustrating the integrated sprocket for smooth chain movement.
6. Operating Guidelines
Once the guide bar and chain are properly installed and tensioned, operate your chainsaw according to the manufacturer's instructions. A properly installed guide bar contributes to safe and efficient cutting.
- Always ensure the chain is sharp and properly lubricated.
- Avoid striking the guide bar against hard objects, as this can cause damage.
- Do not force the chainsaw through cuts; let the chain do the work.
7. Maintenance
Regular maintenance of your guide bar will extend its lifespan and ensure optimal performance.
- Clean the Bar Groove: Periodically clean the guide bar groove to remove sawdust and debris that can impede chain movement and oil flow. A bar groove cleaner tool can be used for this purpose.
- Check for Burrs: Inspect the rails of the guide bar for burrs, especially on the top and bottom edges. These can be filed smooth with a flat file.
- Flip the Bar: To promote even wear, flip the guide bar over each time you sharpen the chain or replace it. This distributes wear more evenly on both sides of the rails.
- Lubrication: Ensure the oil hole on the guide bar is clear and that the chainsaw's oil pump is delivering adequate lubrication to the bar and chain. For guide bars with a sprocket nose, ensure the sprocket is lubricated regularly using a grease gun designed for guide bar sprockets.
- Inspect for Wear: Check the guide bar rails for excessive wear, widening of the groove, or discoloration from overheating. Replace the bar if significant wear or damage is present.
8. Troubleshooting
Common issues related to the guide bar and potential solutions:
- Chain Binds or Jumps:
- Check chain tension; it might be too tight or too loose.
- Inspect the guide bar groove for debris or burrs.
- Ensure the chain is correctly seated in the bar groove.
- Uneven Wear on Bar:
- Ensure you are regularly flipping the guide bar to distribute wear.
- Check for proper chain sharpening; an unevenly sharpened chain can cause uneven bar wear.
- No Oil to Chain:
- Check if the oil hole on the guide bar is clogged.
- Verify the chainsaw's oil pump is functioning correctly and the oil tank is filled.
- Excessive Vibration:
- Ensure the guide bar and chain are properly installed and tensioned.
- Inspect the guide bar for bending or damage.
- Check the chain for damaged or missing links.
9. Warranty and Support
This UpStart Components guide bar comes with a 1 Year Warranty from the date of purchase. This warranty covers defects in materials and workmanship under normal use.
For warranty claims or technical support, please contact UpStart Components customer service. Please have your product model number (CSC-200PXBK041) and proof of purchase ready when contacting support.
Contact Information:
- Refer to the packaging or the UpStart Components official website for the most current contact details.
- Online support resources may also be available.
Ask a question about this manual
Ask about setup, troubleshooting, compatibility, parts, safety, or missing instructions. Manuals+ will review the question and use this page’s manual context to help answer it.