1. Introduction
This manual provides detailed instructions for the safe and efficient operation, setup, and maintenance of your Jack Direct Drive Sewing Machine A5. This machine is designed for versatile use, capable of handling both light and heavy fabrics, including yarn and jeans, due to its enlarged sewing range. Please read this manual thoroughly before using the machine to ensure optimal performance and longevity.
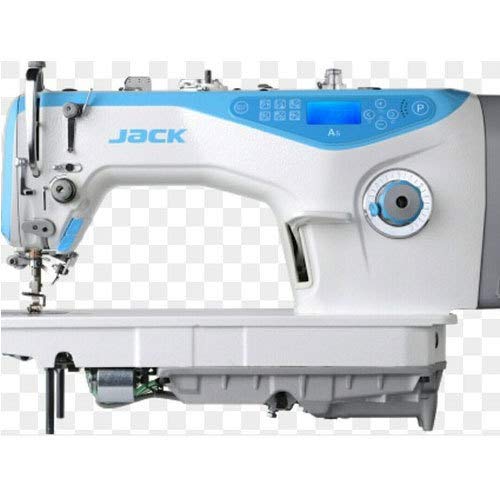
Figure 1.1: Front view of the Jack Direct Drive Sewing Machine A5. This image displays the main body of the sewing machine, highlighting its direct drive motor integration and the user interface panel.
2. Important Safety Instructions
Always follow basic safety precautions when using electrical appliances to reduce the risk of fire, electric shock, or injury to persons.
- Read all instructions before using the machine.
- Keep hands away from all moving parts. Never touch the needle, presser foot, or handwheel while the machine is operating.
- Always unplug the machine from the electrical outlet when removing covers, lubricating, or when making any other user servicing adjustments mentioned in the instruction manual.
- Do not operate the machine if the cord or plug is damaged, or if the machine is not working properly.
- Use only attachments recommended by the manufacturer as contained in this instruction manual.
- Never drop or insert any object into any opening.
- Do not use outdoors.
- Do not operate where aerosol (spray) products are being used or where oxygen is being administered.
- To disconnect, turn all controls to the off position, then remove plug from outlet.
3. Setup and Assembly
The Jack Direct Drive Sewing Machine A5 typically comes with the main unit pre-assembled. However, some components, such as the thread stand and table, may require assembly. Refer to the included components list for verification.
3.1 Unpacking
- Carefully remove all packaging materials.
- Verify all components listed in the 'Included Components' section are present. The product includes "One pices pack".
- Place the machine on a stable, level surface.

Figure 3.1: The Jack Direct Drive Sewing Machine A5 mounted on its dedicated table and stand, illustrating a complete setup. This view shows the thread stand, foot pedal, and the overall ergonomic design for industrial use.
3.2 Power Connection
- Ensure the machine's power switch is in the 'OFF' position.
- Connect the power cord securely to the machine and then to a suitable electrical outlet. The machine is electric.
3.3 Threading the Machine
Proper threading is crucial for consistent stitch quality. Follow the numbered guides on the machine for correct thread pathing from the spool to the needle.

Figure 3.2: Side view of the Jack A5 sewing machine, detailing the control panel and the threading path. This image helps in identifying key operational components and guides for proper thread installation.
4. Operating Instructions
The Jack Direct Drive Sewing Machine A5 is designed for ease of use with advanced features for precise sewing.
4.1 Basic Sewing
- Turn on the power switch. The display panel will illuminate.
- Place the fabric under the presser foot.
- Lower the presser foot using the lever.
- Gently press the foot pedal to start sewing. The direct drive motor provides immediate and precise control.
- Guide the fabric smoothly through the machine.
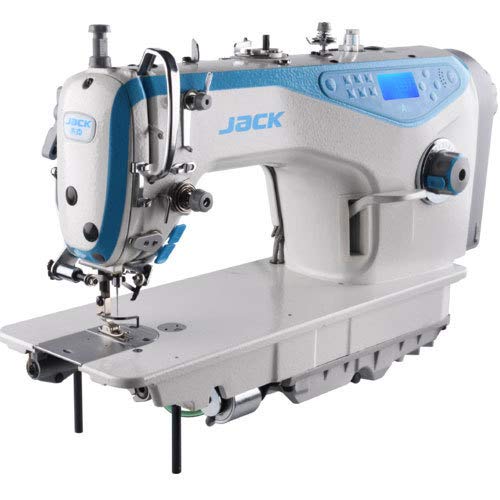
Figure 4.1: Angled view of the Jack Direct Drive Sewing Machine A5, showcasing its robust construction and the clear display panel. This perspective highlights the working area and the overall design.
4.2 Adjusting Stitch Settings
The A5 model features an intuitive control panel for adjusting stitch length, speed, and other parameters. Refer to the display for current settings.
- Stitch Length: Use the designated buttons on the control panel to increase or decrease stitch length.
- Sewing Speed: Adjust the maximum sewing speed via the control panel to match your comfort and fabric type.
- Needle Position: Some models allow for needle up/down positioning at stop.
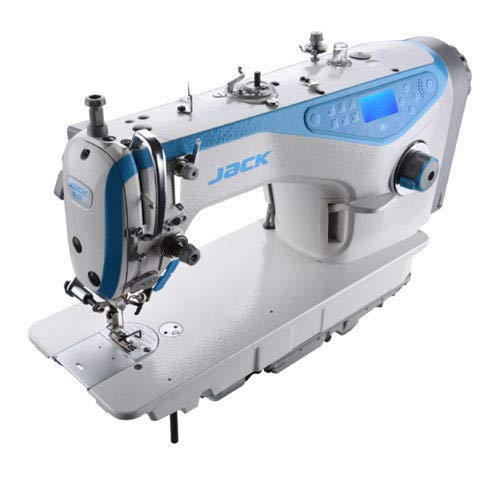
Figure 4.2: Close-up view of the Jack Direct Drive Sewing Machine A5's control panel and needle area. This image provides a detailed look at the buttons and display for adjusting sewing parameters.
5. Maintenance
Regular maintenance ensures the longevity and optimal performance of your sewing machine.
5.1 Cleaning
- Daily: Remove lint and dust from the bobbin case area and feed dogs using a small brush.
- Weekly: Clean the tension discs and needle bar area.
- Always unplug the machine before cleaning.
5.2 Lubrication (Oiling)
The Jack A5, being a direct drive machine, may have specific oiling points. Refer to the machine's internal diagrams or consult a qualified technician for precise lubrication instructions. Use only high-quality sewing machine oil.
5.3 Needle Replacement
- Turn off and unplug the machine.
- Loosen the needle clamp screw.
- Remove the old needle.
- Insert a new needle with the flat side facing the back, pushing it up as far as it will go.
- Tighten the needle clamp screw securely.
6. Troubleshooting Common Issues
This section provides solutions for common problems you might encounter.
| Problem | Possible Cause | Solution |
|---|---|---|
| Skipped Stitches | Incorrect needle, bent needle, improper threading. | Change needle, re-thread machine correctly. |
| Thread Breakage | Incorrect tension, poor quality thread, burrs on needle plate. | Adjust tension, use good quality thread, check for burrs. |
| Machine Not Starting | Power not connected, safety switch engaged. | Check power cord, ensure safety features are disengaged. |
| Uneven Stitches | Incorrect tension, worn needle, inconsistent fabric feeding. | Adjust tension, replace needle, ensure smooth fabric guidance. |
If problems persist after attempting these solutions, please contact customer support or a qualified service technician.
7. Product Specifications
| Feature | Detail |
|---|---|
| Model | A5 |
| ASIN | B081YRMYG6 |
| Brand | Generic (Jack) |
| Included Components | One piece pack |
| Color | White |
| Power Source | Electric |
| Fabric Compatibility | Light and heavy fabrics (yarn, jeans, etc.) |
8. Warranty and Support
For information regarding warranty coverage, please refer to the warranty card included with your purchase or contact the retailer. For technical support or service inquiries, please reach out to the manufacturer's authorized service centers.
Keep your purchase receipt as proof of purchase for any warranty claims.


