Introduction
Welcome to the instruction manual for your new BWE Shower System. This manual provides essential information for the proper setup, operation, and maintenance of your shower system. Please read it thoroughly before installation and keep it for future reference.
Safety Information
- Professional Installation Recommended: For optimal performance and safety, professional plumbing installation is highly recommended.
- Water Supply: Always turn off the main water supply before beginning any installation or maintenance.
- Handle with Care: Components are made of brass; handle with care to avoid damage.
- Cleaning Agents: Do not use abrasive cleaners, harsh chemicals, or scouring pads on the finish, as this may damage the surface.
- Temperature Control: The pressure balance valve is designed to protect against scalding from sudden changes in water pressure. Ensure proper calibration during installation.
Package Contents
Verify that all components are present before beginning installation:

- Rain Shower Head (10 Inch Square)
- Shower Arm
- Handheld Shower
- Handheld Holder
- Handheld Hose (59-inch)
- Pressure Balance Valve Body (Rough-in Valve)
- Control Panel and Handles
- Decorative Covers
- Installation Hardware (screws, anchors, plumber's tape, gloves, Allen wrenches)
Setup and Installation
Pre-Installation Checklist
- Ensure the main water supply is turned off.
- Confirm that your plumbing connections are standard NPT 1/2 inch. No adapters are required for standard American plumbing.
- Gather necessary tools: adjustable wrench, pipe sealant tape, drill, level, measuring tape.
Installation Steps
- Prepare the Wall: Ensure the wall where the shower system will be mounted is clean, dry, and structurally sound. Mark the desired positions for the rough-in valve, shower arm, and handheld holder.
- Install Rough-in Valve: Install the brass pressure balance valve body into the wall, ensuring it is level and at the correct depth (Total Embedded Depth 80mm / 3.15 inches). Connect the hot and cold water lines to the clearly marked inlets (H for Hot, C for Cold).
- Connect Shower Arm: Securely install the shower arm into the wall, ensuring it is firmly connected to the fixed shower head connector on the valve.
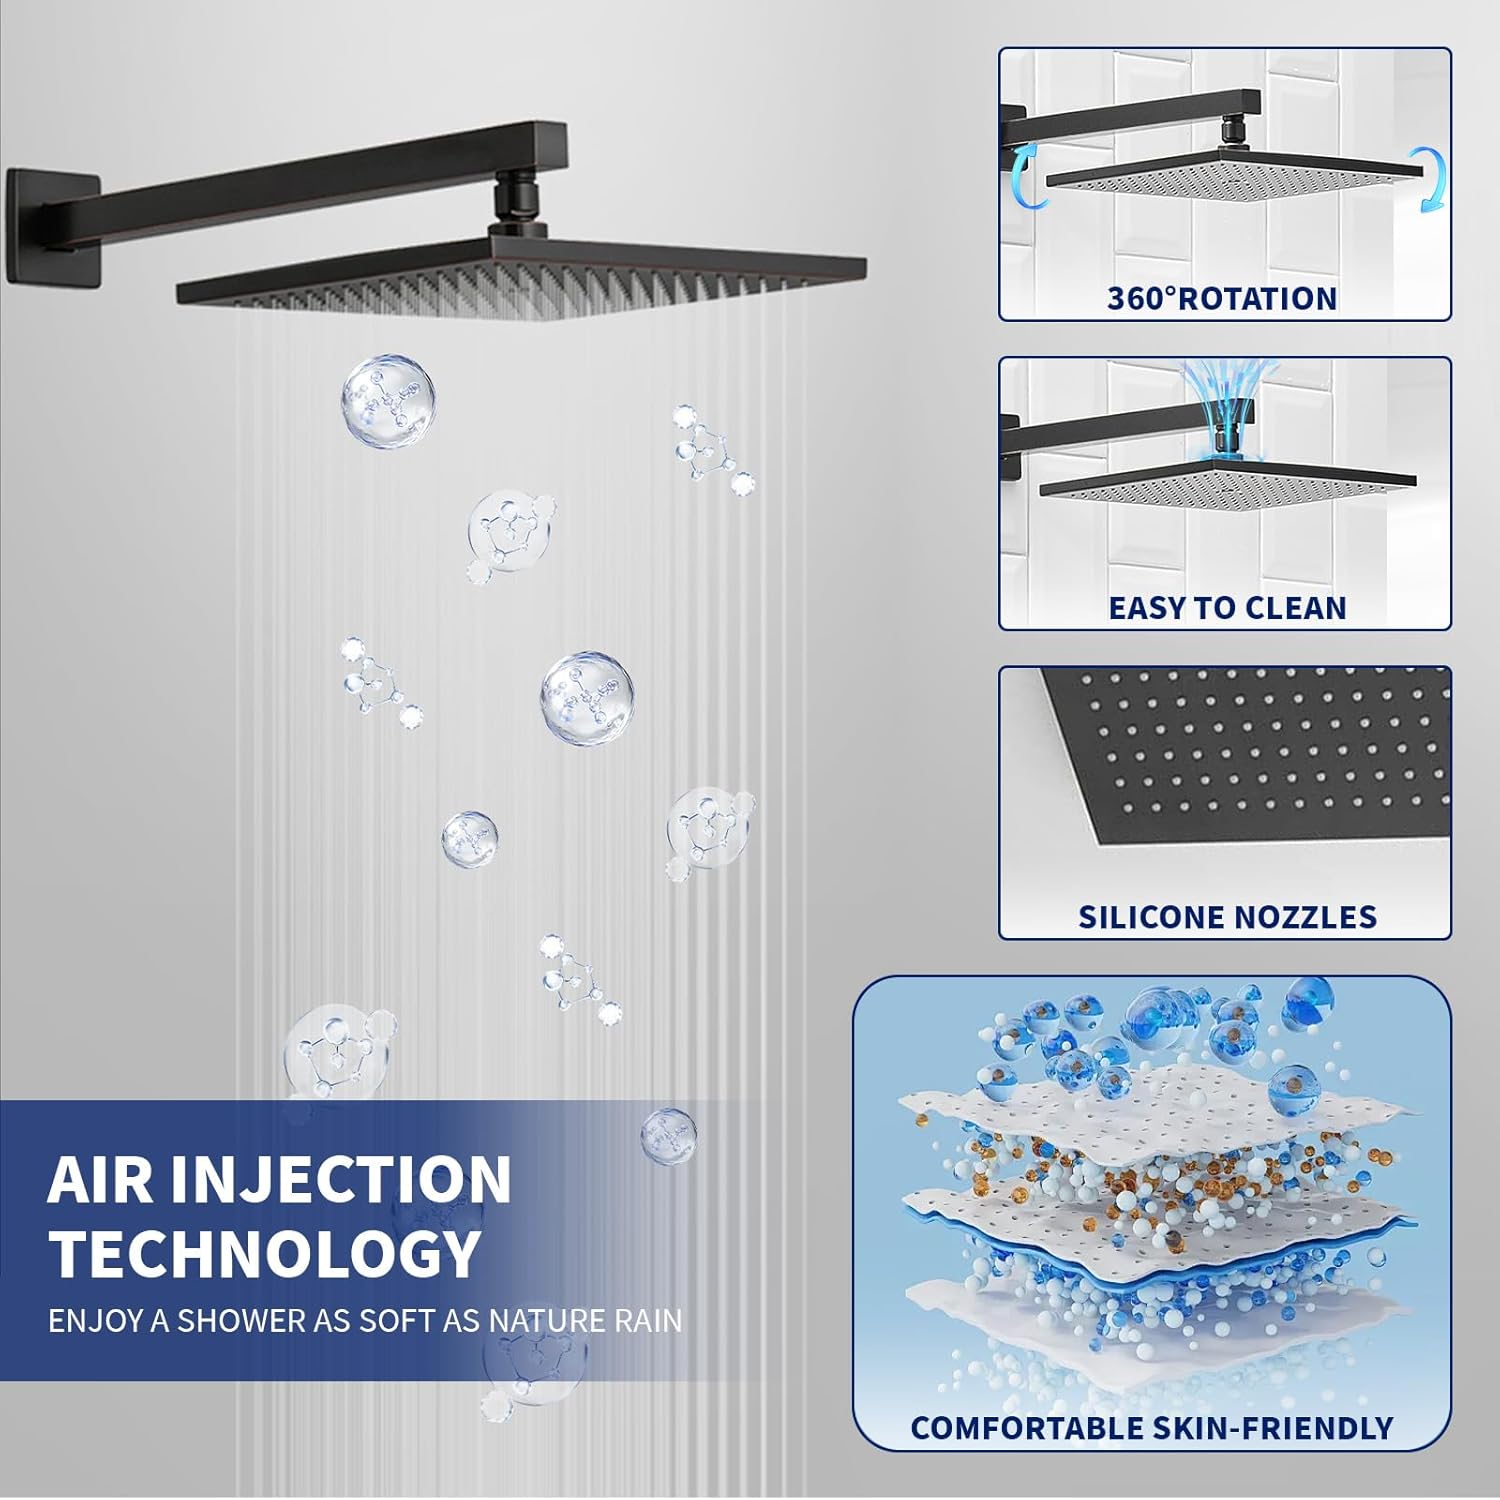
- Mount Shower Head: Attach the 10-inch square rain shower head to the shower arm. Ensure a tight, leak-free connection. The shower head features air injection technology for a soft, natural rain experience.
- Install Handheld Shower Components: Mount the handheld holder to the wall at a convenient height. Connect the 59-inch handheld hose to the handheld shower and then to the corresponding outlet on the rough-in valve.
- Attach Control Panel: Once all internal connections are secure and tested for leaks, attach the main control panel and handles to the rough-in valve.
- Final Check: Turn on the main water supply and check all connections for leaks. Test both the rain shower and handheld functions, as well as temperature control.


Installation Video Guide
Operating Instructions
Temperature Control
The single handle on the control panel is used to adjust the water temperature. Rotate the handle towards 'H' for hotter water and towards 'C' for colder water. The pressure balance valve cartridge monitors water pressure to maintain a consistent temperature, protecting against sudden changes.
Function Selection
The small handwheel (diverter) on the control panel allows you to switch between the two shower functions:
- Rain Shower: Turn the handwheel to activate the overhead rain shower head for a luxurious, full-body spray.
- Handheld Spray: Turn the handwheel to activate the handheld shower for targeted rinsing or cleaning.
Operation Video Guide
Maintenance and Care
Cleaning
To maintain the finish of your shower system, clean regularly with a soft, damp cloth and mild soap. Rinse thoroughly with warm water and dry with a soft cloth. Avoid using abrasive cleaners, ammonia-based products, or harsh chemicals, as these can damage the oil rubbed bronze finish.
Troubleshooting Common Issues
| Problem | Possible Cause | Solution |
|---|---|---|
| Low Water Pressure | Clogged shower head nozzles or debris in the valve. | Clean silicone nozzles on the shower head by gently rubbing them. Check for debris in the valve or supply lines. |
| Leaking | Loose connections or damaged O-rings/cartridge. | Tighten all connections. If leaking persists, inspect O-rings and the valve cartridge for damage. Contact manufacturer for replacement parts if necessary. |
| Inconsistent Water Temperature | Issue with the pressure balance valve cartridge. | Ensure the pressure balance valve is correctly installed and calibrated. If the issue continues, the cartridge may need replacement. (Note: Some users have reported issues with cartridge failure and difficulty obtaining replacements. Contact BWE customer support.) |
Specifications
| Feature | Detail |
|---|---|
| Brand | BWE |
| Model Number | 5010-ORB |
| Color | Oil Rubbed Bronze |
| Material | Brass |
| Finish Type | Oil Rubbed |
| Number of Handles | 1 |
| Mounting Type | Wall Mount |
| Item Weight | 12.92 pounds (5.87 Kilograms) |
| Product Dimensions | 17.72 x 13.62 x 4.72 inches |
| UPC | 810148590321 |
| Country of Origin | China |
Warranty and Support
Specific warranty details for the BWE Shower System are not provided in the available product information. For warranty claims, technical support, or replacement parts, please contact the manufacturer, BWE, directly through their official channels. It is advisable to retain your proof of purchase for any warranty-related inquiries.


