1. Introduction
Thank you for purchasing the Unic UC68 Multimedia Home Theatre LED Projector. This manual provides essential information for setting up, operating, and maintaining your projector to ensure optimal performance and longevity. Please read this manual thoroughly before using the product and keep it for future reference.
2. Safety Information
To ensure safe operation and prevent damage, please observe the following safety precautions:
- Do not look directly into the projector lens when the lamp is on, as the strong light can cause eye damage.
- Ensure adequate ventilation around the projector. Do not block any ventilation openings.
- Place the projector on a stable, level surface to prevent it from falling.
- Use only the power adapter supplied with the projector. Using an incorrect adapter may cause damage or fire.
- Keep the projector away from water, moisture, and other liquids. Do not operate in wet environments.
- Do not attempt to open or repair the projector yourself. Refer all servicing to qualified service personnel.
- Unplug the projector from the power outlet during lightning storms or when unused for long periods.
3. Package Contents
Please check that all items listed below are included in your package:
- Unic UC68 Projector Host
- Remote Controller
- Power Cable
- AV Cable
- Instruction Manual
- Lens Cap
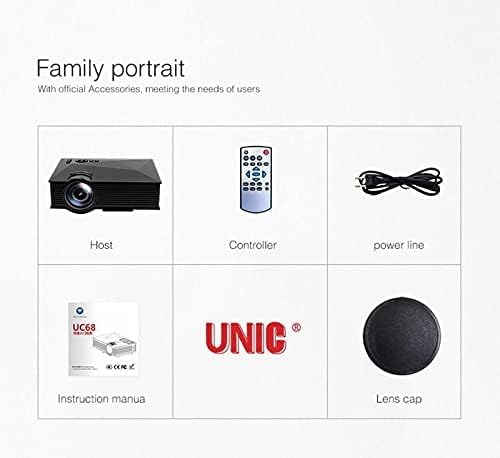
Image: The Unic UC68 projector package contents, showing the main unit, remote control, power cord, instruction manual, and lens cap.
4. Product Overview
Familiarize yourself with the various parts and ports of your Unic UC68 projector.

Image: A detailed view of the Unic UC68 projector, highlighting its lens, control buttons on top, and various input/output ports on the side.
Input/Output Ports

Image: A visual representation of the Unic UC68 projector's rear and side panels, indicating ports for HDMI, USB, SD card, AV, VGA, and audio out, along with examples of devices that can be connected.
| Port | Description |
|---|---|
| HDMI | Connect to devices like laptops, Blu-ray players, game consoles. |
| USB 2.0 (x2) | Connect USB flash drives for media playback or power external devices (5Vout-500mA). |
| SD Card Slot | Insert SD cards for direct media playback. |
| VGA | Connect to older computers or laptops. |
| AV | Connect to devices with composite video and stereo audio output (e.g., DVD players). |
| Headphone Port (3.5mm) | Connect external speakers or headphones. |
5. Setup
Follow these steps for initial setup of your projector:
- Placement: Place the projector on a stable, flat surface. Ensure there is enough space around the projector for proper ventilation. The ideal projection distance is between 1.07m and 3.8m.
- Power Connection: Connect the power cable to the projector's power input and then plug it into a wall outlet.
- Connect Input Source: Connect your desired input device (e.g., laptop, game console, USB drive) to the appropriate port on the projector (HDMI, VGA, USB, AV, SD card).
- Power On: Press the power button on the projector or the remote control to turn on the projector. The LED indicator will light up.
- Focus Adjustment: Once an image is displayed, rotate the focus ring on the projector lens until the image appears clear and sharp.
- Keystone Correction: If the projected image appears trapezoidal, adjust the keystone correction (if available on your model, typically a manual slider near the lens) to square the image.
6. Operating Instructions
Power On/Off
- To Power On: Press the power button on the projector or the remote control.
- To Power Off: Press the power button again. Wait for the fan to stop completely before unplugging the power cable.
Input Source Selection
Use the 'Source' button on the remote control or the projector's control panel to cycle through available input sources (HDMI, VGA, AV, USB, SD).
Menu Navigation
Use the arrow keys on the remote or projector to navigate through the on-screen menu. Press 'OK' or 'Enter' to confirm selections. Adjust settings such as picture mode, aspect ratio, and sound.
Media Playback (USB/SD)
Insert a USB flash drive or SD card into the respective port. The projector will typically prompt you to select the media type (Movie, Music, Photo, Text). Navigate to your desired file and press 'OK' to play.
7. Maintenance
Proper maintenance ensures the longevity and performance of your projector:
- Lens Cleaning: Use a soft, lint-free cloth specifically designed for optical lenses. Do not use abrasive cleaners or excessive force.
- Dust Filter Cleaning: Regularly check and clean the dust filter (if accessible) to maintain proper airflow and prevent overheating. Refer to the specific location in your manual if applicable.
- Exterior Cleaning: Wipe the projector's exterior with a soft, dry cloth. For stubborn marks, a slightly damp cloth can be used, but ensure no moisture enters the device.
- Storage: When not in use for extended periods, store the projector in a cool, dry, dust-free environment. Use the lens cap to protect the lens.
8. Troubleshooting
If you encounter issues with your projector, please refer to the following common problems and solutions:
| Problem | Possible Cause | Solution |
|---|---|---|
| No Power | Power cable not connected; Power outlet faulty; Projector in standby mode. | Check power cable connection; Try a different outlet; Press power button. |
| No Image | Incorrect input source selected; Input device not connected properly; Lens cap on. | Select correct input source; Reconnect input cable; Remove lens cap. |
| Image is Blurry | Focus not adjusted; Projection distance too far/close. | Adjust focus ring; Adjust projection distance. |
| No Sound | Volume too low; Muted; External speakers not connected/configured. | Increase volume; Unmute; Check external speaker connection. |
| Remote Control Not Working | Batteries dead/incorrectly inserted; Obstruction between remote and projector. | Replace batteries; Ensure clear line of sight to IR receiver. |
| Projector Overheating | Ventilation blocked; Dusty filters. | Ensure clear ventilation; Clean dust filters. |
9. Specifications
| Feature | Specification |
|---|---|
| Model Number | UC68 |
| Brightness | 1800 Lumens (80 ANSI) |
| Native Resolution | 800 x 480 RGB |
| Resolution Support | Up to 1920 x 1080 pixels (1080p) |
| Aspect Ratio | 4:3 / 16:9 |
| LCD Contrast Ratio | 800:1 |
| LED Lamp Life | More than 20,000 hours |
| Lens | F=125 |
| Viewing Distance | 1.07 - 3.8 meters |
| Projection Size | 34 - 130 inches |
| Management | Manual |
| Power Consumption | 55 W Max |
| USB Output | 5 Vout-500 mA |
| Power Supply | 100 V - 240 V / 0.9A (50/60Hz) |
| Input/Output Ports | 1 AV, 1 Headphone (3.5mm), 2 USB 2.0, 1 SD Card Slot, 1 HDMI, 1 VGA |
| Color | Black |
| Item Weight | 1.34 Kilograms |
| Package Dimensions | 30 x 19.3 x 10.6 cm |
10. Warranty and Support
This product comes with a standard manufacturer's warranty. For warranty claims, technical support, or service inquiries, please refer to the contact information provided with your purchase documentation or visit the official UNIC website. Do not attempt to repair the device yourself, as this may void your warranty.


