
Introduction
This manual provides detailed instructions for the safe and efficient operation, setup, and maintenance of your Avalon A6SC-BLK Self Cleaning Touchless Bottom Loading Water Cooler Dispenser. Please read this manual thoroughly before using the appliance and retain it for future reference.
Safety Information
- Child Safety Lock: The hot water spout is equipped with a child safety lock to prevent accidental burns. Always ensure the child safety lock is engaged when not dispensing hot water, especially in households with children.
- UL Approved: This water cooler dispenser is UL Approved, ensuring it meets recognized safety standards.
- Placement: Position the dispenser on a flat, stable surface. Ensure adequate ventilation around the unit.
- Power Source: Connect the dispenser to a grounded 120 Volt electrical outlet.
- Water Bottles: Use only 3 or 5-gallon water bottles with this bottom-loading dispenser.
What's Included
The Avalon A6SC-BLK package includes:
- Avalon A6SC-BLK Water Cooler Dispenser
- User Manual (this document)

Figure 1: Front view of the Avalon A6SC-BLK water cooler dispenser.
Setup
- Unpacking: Carefully remove the water cooler from its packaging. Inspect for any damage.
- Placement: Place the dispenser on a level, stable surface, ensuring it is away from direct sunlight and heat sources. Allow at least 4 inches of clearance from walls for proper ventilation.
- Power Connection: Plug the power cord into a grounded 120V electrical outlet.
- Loading Water Bottle:
- Open the lower cabinet door.
- Insert the probe into a new 3 or 5-gallon water bottle.
- Slide the water bottle into the cabinet.
- Close the cabinet door.
- Initial Fill: Before dispensing, allow the internal tanks to fill completely. This may take a few minutes. Dispense water from both hot and cold spouts until water flows steadily to ensure air is purged from the system.
- Activate Heating/Cooling: Turn on the hot and cold water switches located on the back of the unit. Allow approximately 15-30 minutes for the water to reach optimal temperatures.

Figure 2: The bottom-loading design allows for easy placement of 3 or 5-gallon water bottles.
Operating Instructions
- Dispensing Cold Water: Place your cup under the blue paddle spout. Press the cup against the paddle to dispense cold water. Release the paddle to stop the flow.
- Dispensing Hot Water: For hot water, first engage the child safety lock by sliding it to the unlock position (if applicable, or press the safety button). Place your cup under the red paddle spout and press the cup against the paddle. Release the paddle to stop the flow and re-engage the child safety lock.
- Indicator Lights: The control panel features indicator lights for "Self Clean" and "Filter" (if applicable). A "Replace Bottle" indicator light will illuminate when the water bottle needs to be changed.
- Nightlight: A built-in nightlight illuminates the dispensing area, making it visible in low-light conditions.
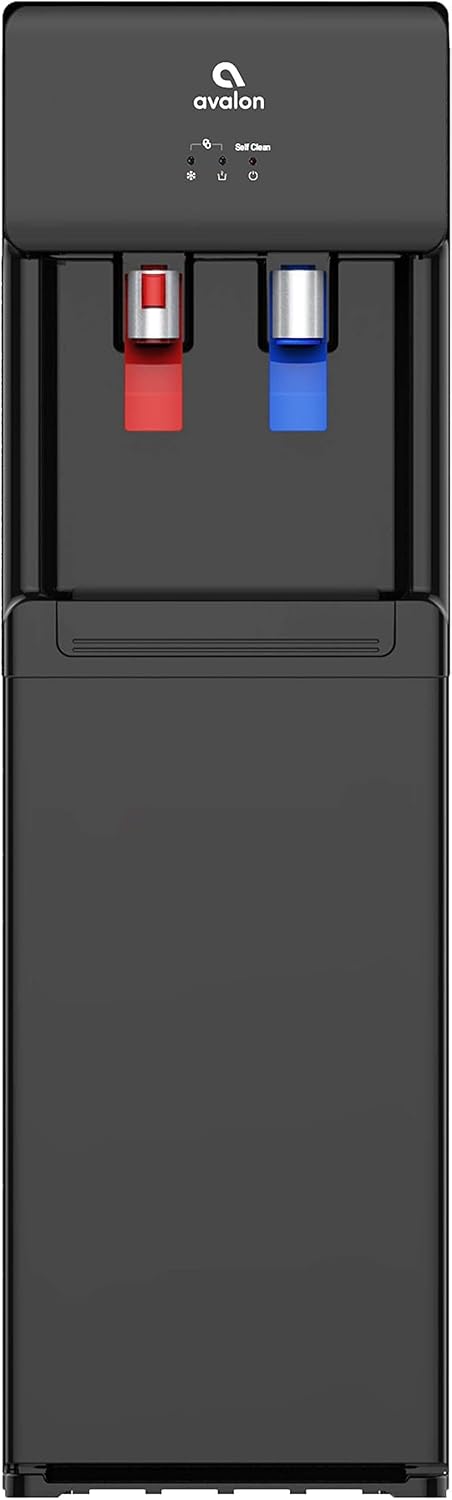
Figure 3: Dispensing area with hot and cold water paddles and status indicators.
Maintenance
- Self-Cleaning Feature: The dispenser includes a self-clean function that automatically sanitizes the internal water tank. Refer to the specific instructions on the unit's control panel or a separate quick-start guide for activating this feature.
- BioGuard Coating: The spouts and drip tray are treated with a BioGuard coating to inhibit bacterial growth. Regular cleaning of these surfaces is still recommended.
- Drip Tray: Regularly empty and clean the drip tray to prevent overflow and maintain hygiene. The drip tray is removable for easy cleaning.
- Exterior Cleaning: Wipe the exterior of the dispenser with a soft, damp cloth. Avoid abrasive cleaners or solvents.
Troubleshooting
If you encounter any issues with your water cooler, please review the following common problems and solutions:
- No Water Dispensing:
- Ensure the water bottle is correctly installed and not empty.
- Check if the power cord is securely plugged in.
- Verify that the dispenser is turned on.
- Water Not Hot/Cold Enough:
- Confirm that the hot/cold switches on the back of the unit are turned on.
- Allow sufficient time (15-30 minutes) for the water to reach the desired temperature after initial setup or bottle change.
- Ensure the unit has proper ventilation and is not placed near heat sources.
- Leaking:
- Check the water bottle for cracks or damage.
- Ensure the bottle probe is properly seated in the bottle.
- Verify the drip tray is correctly installed.
If the problem persists, please contact Avalon customer support for assistance.
Specifications
| Model Number | A6SC-BLK |
| Brand | Avalon |
| Color | Black |
| Material | Stainless Steel |
| Capacity | 5 Gallons (compatible with 3-5 gallon bottles) |
| Product Dimensions (D x W x H) | 15"D x 12"W x 41"H |
| Item Weight | 39.3 pounds |
| Upper Temperature Rating (Hot) | Approximately 185°F |
| Lower Temperature Rating (Cold) | Approximately 47°F |
| Power Source | Corded Electric (120 Volts) |
| Certification | Energy Star, UL |

Figure 4: Product dimensions of the water cooler dispenser.
Warranty and Support
For warranty information or technical support, please refer to the warranty card included with your product or visit the official Avalon website. You may also contact Avalon customer service directly for assistance with product registration, troubleshooting, or parts replacement.


