
1. Introduction
Thank you for choosing the EROMMY Mini Walk-in Greenhouse. This manual provides essential information for the safe assembly, operation, and maintenance of your greenhouse. Please read these instructions carefully before assembly and retain them for future reference.
This greenhouse is designed to provide a protected environment for your plants, promoting growth and extending growing seasons. It features a sturdy frame, a transparent polyethylene cover, and integrated shelving for organized plant display.

Image 1.1: Fully assembled EROMMY Mini Walk-in Greenhouse in an outdoor setting.
2. Safety Information
- Ensure all components are securely fastened during assembly. Loose parts can lead to instability.
- Do not climb on or hang from the greenhouse frame.
- Place the greenhouse on a level, stable surface.
- Secure the greenhouse to the ground using the provided ground ropes and stakes, especially in windy conditions, to prevent tipping or damage.
- Keep children and pets away from the assembly area.
- Do not use sharp objects near the polyethylene cover to avoid punctures or tears.
- In heavy snow or extreme weather, consider temporarily disassembling or reinforcing the structure to prevent collapse.
3. Package Contents
Before beginning assembly, verify that all parts are present and undamaged. If any parts are missing or damaged, please contact customer support.
- Powder-coated heavy-duty steel framework (various lengths and connectors)
- Transparent reinforced polyethylene cover
- Wire shelving units (2 tiers, 6 shelves total)
- Ground ropes and ground stakes
- Zippered roll-up door mechanism

Image 3.1: Diagram illustrating key components such as the PE grid cover, fixed drawstring, ground nail, zipper roll door, flower stand, and support rod.
4. Assembly Instructions
Assembly typically requires two people and approximately 1-2 hours. Follow these steps carefully:
- Unpack and Identify Parts: Lay out all frame pieces, connectors, shelves, and the cover. Refer to the parts list to ensure everything is accounted for.
- Assemble the Base Frame: Connect the shortest frame poles using the appropriate corner connectors to form the rectangular base of the greenhouse.
- Build the Vertical Supports: Attach vertical poles to the base frame connectors. Ensure they are oriented correctly for the shelving and roof structure.
- Install Shelving Supports: Insert the horizontal poles that will support the wire shelves at the desired heights. The greenhouse features a double-layer net frame, with each single layer bearing approximately 11 lbs.
- Construct the Roof Frame: Assemble the roof section by connecting the angled poles to the top of the vertical supports.
- Place Wire Shelves: Carefully place the wire shelving units onto the installed supports. Ensure they are stable and level. The design allows for flexible use, with options for small potted flowers on shelves or tall potted plants on the ground.
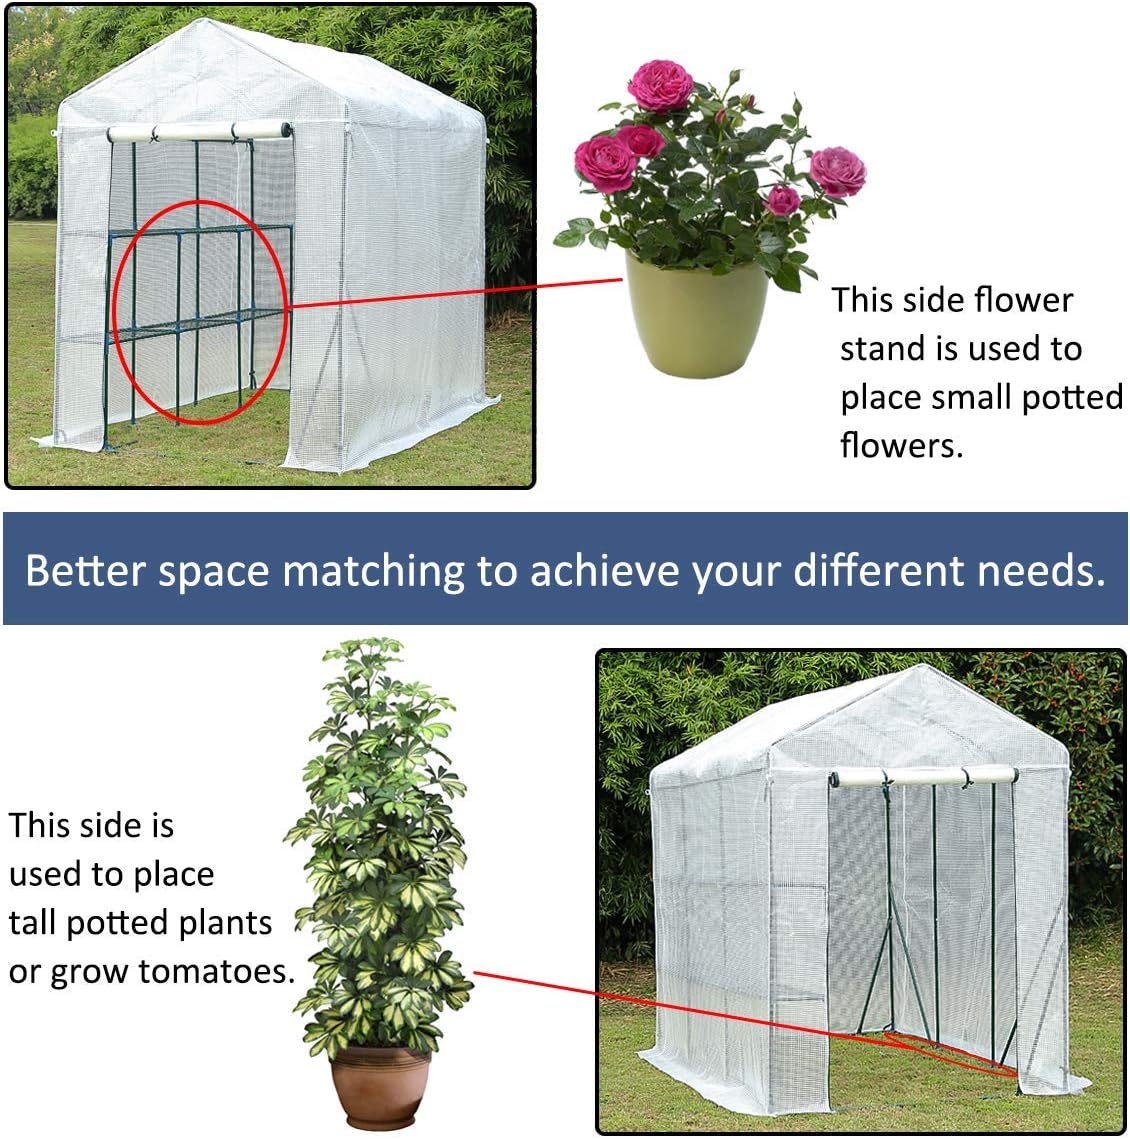
Image 4.1: Illustration of flexible shelving options, accommodating both small potted flowers and taller plants.
- Drape the Cover: Carefully drape the transparent reinforced polyethylene cover over the assembled frame. Align the zippered door opening with the front of the greenhouse.
- Secure the Cover: Pull the cover down evenly and secure it to the frame using any integrated ties or fasteners. Ensure the overlong PE cover at the bottom is spread out for soil coverage and enhanced sealing.
- Anchor the Greenhouse: Use the provided ground ropes and stakes to firmly anchor the greenhouse to the ground. This is crucial for stability, especially in outdoor environments.
5. Operating Instructions
To maximize the benefits of your EROMMY Mini Walk-in Greenhouse:
- Ventilation: The zippered roll-up door provides convenient access and allows for good ventilation. Open the door during warm periods to prevent overheating and ensure adequate airflow for your plants. Close it during cooler temperatures or at night to retain warmth.
- Plant Placement: Utilize the two-tier, six-shelf design to organize your plants. Place smaller potted plants on the shelves and taller plants or vegetables directly on the ground within the greenhouse.
- Sunlight: Position the greenhouse in an area that receives optimal sunlight for the plants you are growing. The transparent cover allows nourishing sunlight to pass through while protecting plants.
- Watering: Water plants as needed. Ensure proper drainage to prevent waterlogging.

Image 5.1: Close-up view of plants arranged on the greenhouse shelving.
6. Maintenance
- Cleaning: Periodically clean the polyethylene cover with mild soap and water to remove dirt and debris, ensuring maximum light penetration. Avoid abrasive cleaners.
- Frame Inspection: Regularly check the steel framework and connectors for any signs of rust, damage, or loosening. Tighten connections as necessary.
- Cover Inspection: Inspect the cover for tears or holes. Small repairs can be made with greenhouse repair tape.
- Anchoring: Verify that ground ropes and stakes remain securely fastened, especially after strong winds or storms.
- Seasonal Storage: If storing the greenhouse for off-season, disassemble it carefully, clean all parts, and store them in a dry, protected area to prolong product life.
7. Troubleshooting
- Greenhouse Instability: Ensure all frame connections are tight and the ground stakes are fully inserted. Consider adding additional weights or anchors in very windy areas.
- Poor Plant Growth: Check for adequate sunlight, proper ventilation, and consistent watering. Ensure the greenhouse is not overheating or becoming too cold.
- Cover Damage: Small tears can be patched with specialized greenhouse repair tape. For significant damage, a replacement cover may be necessary.
- Shelves Not Fitting: Double-check that the correct poles are used for the shelving supports and that the shelves are oriented properly. Ensure the frame is fully assembled and square.
8. Specifications
| Feature | Detail |
|---|---|
| Model Number | Mini Greenhouse |
| Product Dimensions | 84"L x 56"W x 77"H |
| Frame Material | Alloy Steel (Powder Coated) |
| Cover Material | Polyethylene (PE) |
| Number of Doors | 1 (Zippered Roll-up) |
| Shelving | 2 Tiers, 6 Shelves (Wire Net Frame) |
| Shelf Bearing Capacity | Approx. 11 lbs per single layer |
| Item Weight | 26 Pounds |

Image 8.1: Detailed dimensions of the greenhouse structure.
9. Warranty and Support
For warranty information, replacement parts, or technical support, please contact EROMMY customer service through your original point of purchase. Please have your product model number and purchase date available when contacting support.