
1. Introduction
This manual provides detailed instructions for the operation and maintenance of your Docooler BT-508 Wireless Bluetooth 5.0 Speaker. The BT-508 is a versatile device featuring Bluetooth 5.0 connectivity, a time display, alarm clock functionality, FM radio, support for TF cards and U-disks, AUX input, hands-free calling, and wireless phone charging. Please read this manual thoroughly before use to ensure proper functionality and to maximize your user experience.
2. Package Contents
Verify that all items listed below are present in your package:
- 1x Docooler BT-508 Wireless Bluetooth Speaker
- 1x Type-C Charging Cable
- 1x 3.5mm AUX Cable
- 1x English-Chinese User Manual
3. Product Overview
Familiarize yourself with the various components and controls of your BT-508 speaker.

Figure 3.1: Front View. This image displays the front of the Docooler BT-508 speaker, highlighting its prominent LED screen which shows the current time and active mode indicators such as BT (Bluetooth), TF (TF Card), AU (AUX), and FM (FM Radio). An alarm clock icon is also visible on the right side of the display.
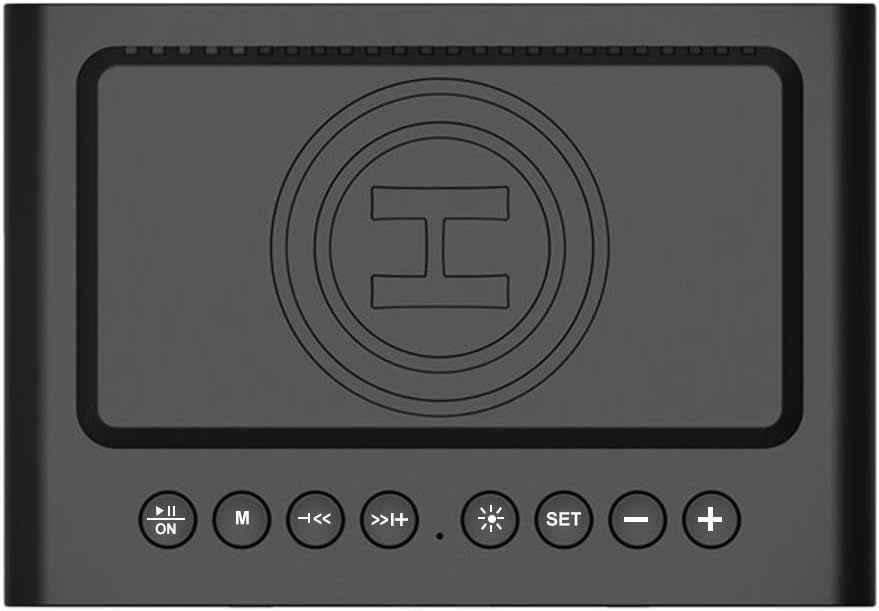
Figure 3.2: Top View with Controls. This image shows the top panel of the BT-508 speaker. Clearly visible are the control buttons: Play/Pause/Power, Mode (M), Previous Track/Volume Down, Next Track/Volume Up, Brightness Adjustment, Set button, and Volume Down (-) and Volume Up (+). The central circular area indicates the wireless charging pad.

Figure 3.3: Side View with Ports. This image illustrates the side of the Docooler BT-508 speaker, revealing the various input ports. From top to bottom, these include a USB port for U-disk playback, a TF card slot, and a 3.5mm AUX input jack.
3.1. Control Buttons and Ports
- Power/Play/Pause Button: Press and hold to power on/off. Short press to play/pause music.
- Mode (M) Button: Short press to switch between Bluetooth, TF Card, U-Disk, AUX, and FM Radio modes.
- Previous Track / Volume Down (◀◀): Short press for previous track. Long press to decrease volume.
- Next Track / Volume Up (▶▶): Short press for next track. Long press to increase volume.
- Brightness Adjustment (☀): Short press to cycle through display brightness levels.
- SET Button: Used for setting time and alarm.
- Volume Down (-): Short press to decrease volume.
- Volume Up (+): Short press to increase volume.
- TF Card Slot: Insert a TF card (up to 32GB) for music playback.
- USB Port: Insert a U-disk for music playback.
- AUX Input: Connect external audio devices using the 3.5mm AUX cable.
- Type-C Charging Port: Connect the Type-C cable for charging the speaker.
- Wireless Charging Pad: Place Qi-compatible smartphones here for wireless charging.
4. Setup
4.1. Initial Charging
Before first use, fully charge the speaker. Connect the provided Type-C charging cable to the speaker's charging port and the other end to a DC5V 3A power adapter (not included). The charging indicator will show the charging status. A full charge provides up to 6 hours of music playback.
4.2. Power On/Off
Press and hold the Power/Play/Pause button for approximately 3 seconds to power the speaker on or off.
5. Operating Instructions
5.1. Bluetooth Pairing
- Power on the speaker. It will automatically enter Bluetooth pairing mode, indicated by a flashing 'BT' icon on the display.
- Enable Bluetooth on your smartphone or other device.
- Search for available Bluetooth devices and select "BT-508" from the list.
- Once paired, the 'BT' icon will stop flashing, and a confirmation sound may be heard. You can now play audio wirelessly from your device.

Figure 5.1: Bluetooth Connection. This image shows a user's hand holding a smartphone, with the Docooler BT-508 speaker in the foreground, illustrating the wireless connection process via Bluetooth 5.0 technology.
5.2. TF Card / U-Disk Playback
- Insert a TF card (up to 32GB) or a U-disk containing audio files into the respective slot/port on the side of the speaker.
- The speaker will automatically switch to TF Card or U-Disk mode and begin playback. If not, press the Mode (M) button to select the correct mode.
- Use the Previous Track and Next Track buttons to navigate through your music.

Figure 5.2: Multiple Playback Modes. This diagram visually represents the three primary audio playback modes supported by the Docooler BT-508 speaker: Bluetooth 5.0, TF Card, and 3.5mm AUX IN, indicating its versatility.
5.3. AUX Mode
- Connect one end of the 3.5mm AUX cable to the speaker's AUX input port and the other end to the audio output jack of your external device (e.g., MP3 player, computer).
- Press the Mode (M) button until 'AU' is displayed on the screen.
- Control playback and volume from your connected device.
5.4. FM Radio Operation
- Press the Mode (M) button to switch to FM Radio mode ('FM' will be displayed).
- Long press the Play/Pause button to automatically scan and save available FM stations.
- Use the Previous Track and Next Track buttons to switch between saved stations.
5.5. Alarm Clock Setup
- In time display mode, long press the SET button to enter time setting. The hour digits will flash.
- Use the Previous Track and Next Track buttons to adjust the hour.
- Short press SET to move to minute setting, then adjust minutes.
- Short press SET again to enter alarm setting. The alarm hour digits will flash.
- Adjust alarm hour and minute using the Previous Track and Next Track buttons.
- Short press SET to confirm and activate the alarm. An alarm icon will appear on the display.
- To disable the alarm, short press the SET button until the alarm icon disappears.
5.6. Wireless Phone Charging
The BT-508 speaker features a wireless charging pad on its top surface.
- Ensure the speaker is powered on and connected to a power source.
- Place your Qi-standard compatible smartphone directly onto the wireless charging pad.
- The phone's display should indicate that charging has begun. If not, adjust the phone's position on the pad.
Note: Only phones that support the Qi wireless charging standard can be charged wirelessly by this speaker.
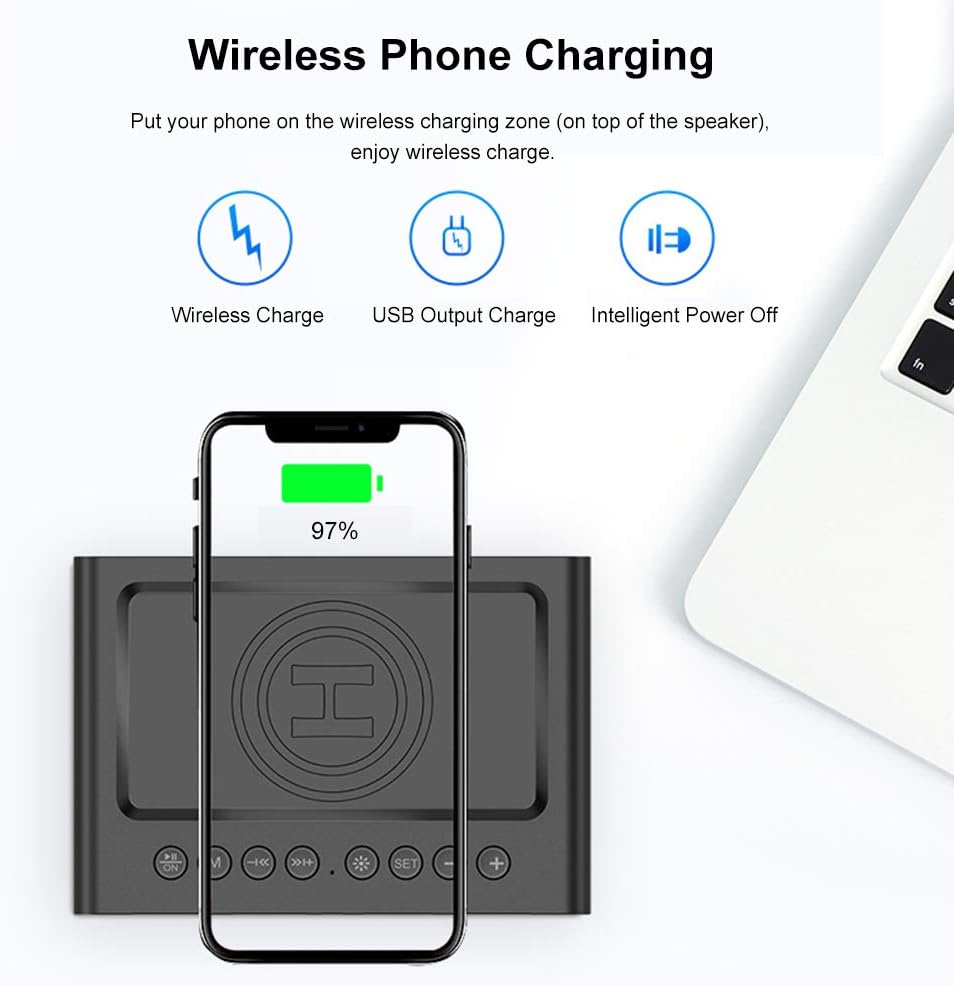
Figure 5.3: Wireless Charging. This image demonstrates a smartphone being wirelessly charged by placing it on the designated charging area on the top surface of the Docooler BT-508 speaker. The phone's screen shows a charging indicator.
5.7. Hands-free Calling
When connected via Bluetooth, the speaker supports hands-free calling.
- Answer Call: Short press the Play/Pause button when an incoming call rings.
- End Call: Short press the Play/Pause button during a call.
- Reject Call: Long press the Play/Pause button when an incoming call rings.
5.8. Time Display and Brightness
The clear LED screen displays the current time. To adjust the display brightness, short press the Brightness Adjustment (☀) button to cycle through three available brightness levels.

Figure 5.4: LED Screen Features. This graphic highlights the key features of the speaker's LED screen, including its full-size display, clear time indication, and the option for three adjustable brightness levels to suit different environments.
6. Maintenance
- Clean the speaker with a soft, dry cloth. Do not use abrasive cleaners or solvents.
- Avoid exposing the speaker to extreme temperatures, direct sunlight, or high humidity.
- Do not disassemble the speaker. This will void the warranty and may cause damage.
- Store the speaker in a cool, dry place when not in use for extended periods.
7. Troubleshooting
| Problem | Possible Cause | Solution |
|---|---|---|
| Speaker does not power on. | Low battery or no power. | Charge the speaker using the provided Type-C cable. |
| Cannot pair via Bluetooth. | Bluetooth not enabled on device; speaker not in pairing mode; too far from device. | Ensure Bluetooth is enabled on your device. Make sure the speaker is in Bluetooth pairing mode (flashing 'BT'). Move device closer to the speaker (within 10m/33ft). |
| No sound from TF card/U-disk. | Incorrect mode selected; corrupted files; card/disk not inserted correctly. | Press the Mode (M) button to select the correct mode. Ensure audio files are in a compatible format. Reinsert the TF card/U-disk. |
| Wireless charging not working. | Phone not Qi-compatible; phone not positioned correctly; speaker not powered. | Verify your phone supports Qi wireless charging. Adjust phone position on the charging pad. Ensure the speaker is powered on and connected to a power source. |
| FM radio reception is poor. | Weak signal; environmental interference. | Try repositioning the speaker. Perform an auto-scan for stations again. |
8. Specifications
| Model Number | BT-508 |
| Bluetooth Version | BT 5.0 |
| Transmitting Range | 10m / 33ft |
| Frequency Response | 100Hz-20KHz |
| Signal-to-Noise Ratio (SNR) | >85dB |
| Horn Diameter | Φ45mm |
| Power Output | 5W * 2 |
| Charging Voltage | DC5V 3A |
| Music Play Time | Up to 6 hours (depends on volume) |
| Battery Type | 2000mAh 3.7V Lithium Battery |
| Material | Plastic |
| Item Dimensions (L*W*H) | 13.0 * 9.0 * 6.5 cm / 5.11 * 3.54 * 2.55 in |
| Item Weight | 333g / 11.75oz |
| Connectivity Technology | Auxiliary, Bluetooth, Micro SD |
| Audio Output Mode | Stereo |
| Speaker Type | Subwoofer |
| Special Features | Alarm, Radio, Wireless Charging, Hands-free Calling |
| Compatible Devices | Smartphone |
9. Warranty and Support
For warranty information or technical support, please refer to the documentation provided with your purchase or contact your retailer. Keep your proof of purchase for any warranty claims.