
1. Introduction
Welcome to the user manual for your BenQ MX525A DLP Video Projector. This document provides essential information for the safe and efficient operation, setup, and maintenance of your projector. Please read this manual thoroughly before using the device.
The BenQ MX525A is designed for clear and vibrant presentations, featuring a bright 3300 ANSI lumens display, XGA (1024 x 768) resolution, and a remarkable 13,000:1 contrast ratio. It is also 3D-Ready and offers versatile connectivity with HDMI and VGA inputs.
2. Safety Instructions
To ensure safe operation and prevent damage to the projector, please observe the following safety guidelines:
- Power Supply: Use only the power cord and adapter supplied with the projector. Ensure the power outlet meets the specified voltage requirements.
- Ventilation: Do not block the ventilation openings. Ensure adequate space around the projector for proper airflow to prevent overheating.
- Placement: Place the projector on a stable, level surface. Avoid placing it in direct sunlight, near heat sources, or in environments with high humidity or excessive dust.
- Handling: Do not drop or subject the projector to strong impacts. Avoid looking directly into the lens when the lamp is on, as the bright light can cause eye damage.
- Cleaning: Disconnect the power cord before cleaning. Use a soft, dry cloth. Do not use liquid or aerosol cleaners.
- Servicing: Do not attempt to service the projector yourself. Refer all servicing to qualified service personnel.
3. Product Overview
Familiarize yourself with the main components of your BenQ MX525A projector.
3.1 Front and Angled View
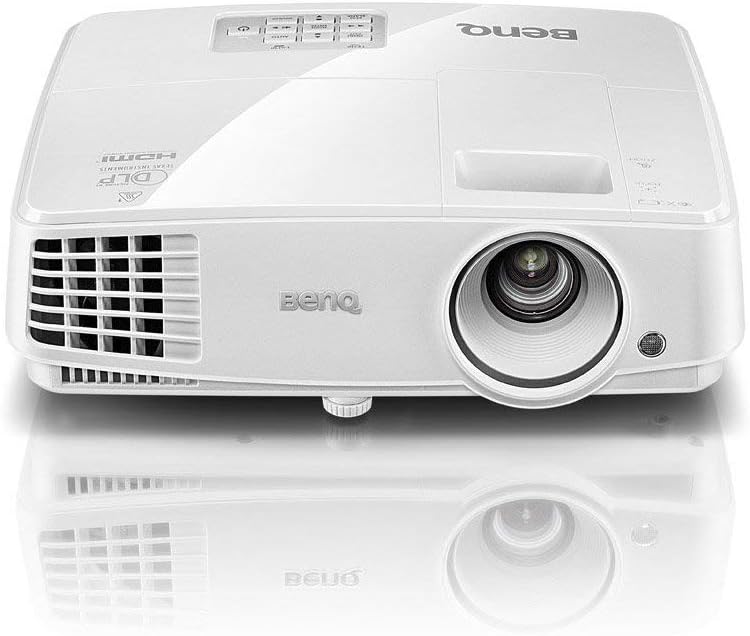
Figure 1: Front-top angled view of the BenQ MX525A DLP Projector. This image shows the projector's lens, front ventilation, and the BenQ logo on the top casing.
3.2 Side View with Ventilation
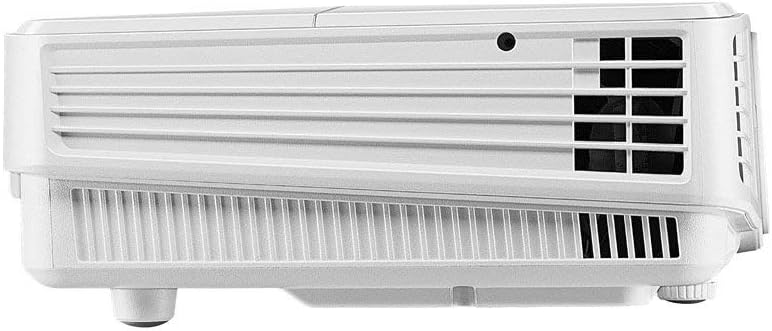
Figure 2: Side view of the BenQ MX525A DLP Projector, highlighting the ventilation grilles essential for heat dissipation.
3.3 Top View with Control Panel

Figure 3: Top view of the BenQ MX525A DLP Projector, displaying the integrated control panel buttons for navigation and settings, along with the focus and zoom rings.
4. Setup
4.1 Unpacking
Carefully remove the projector and all accessories from the packaging. Retain the original packaging for future transport or storage.
4.2 Placement
Position the projector on a flat, stable surface. Ensure the projection path is clear of obstructions. Adjust the projector's height and angle using the adjustable feet to achieve the desired image position on your screen or wall.
4.3 Connecting Power
- Connect the power cord to the projector's power inlet.
- Plug the other end of the power cord into a grounded electrical outlet.
4.4 Connecting Video Sources
The BenQ MX525A supports multiple input sources:
- HDMI: For high-definition digital video and audio. Connect an HDMI cable from your source device (e.g., laptop, Blu-ray player) to the HDMI port on the projector.
- VGA (x2): For analog video input. Connect a VGA cable from your computer to one of the VGA ports on the projector.
5. Operating the Projector
5.1 Powering On/Off
- To Power On: Press the power button on the projector's control panel or remote control. The power indicator light will turn green.
- To Power Off: Press the power button again. A confirmation message may appear. Press the power button a second time to confirm shutdown. The power indicator will turn red.
5.2 Adjusting Focus and Zoom
Use the focus and zoom rings located around the lens (refer to Figure 3) to adjust the image clarity and size:
- Zoom Ring: Rotate to increase or decrease the image size.
- Focus Ring: Rotate until the projected image appears sharp and clear.
5.3 Selecting Input Source
Press the 'Source' button on the control panel or remote control to cycle through available input sources (HDMI, VGA1, VGA2). Alternatively, use the menu to select the desired input.
5.4 Picture Adjustments
Access the projector's OSD (On-Screen Display) menu to fine-tune picture settings:
- Brightness: Adjusts the overall lightness or darkness of the image.
- Contrast: Controls the difference between the lightest and darkest parts of the image.
- Color: Adjusts the intensity of colors.
- Aspect Ratio: Select the appropriate aspect ratio (e.g., 4:3, 16:9) to match your content.
5.5 3D Functionality
The BenQ MX525A is 3D-Ready. To enjoy 3D content, you will need compatible 3D glasses and a 3D-enabled source device. Refer to your 3D source device's manual for specific setup instructions.
5.6 SmartEco Power Saving Technology
The projector features SmartEco technology, which dynamically adjusts lamp power to conserve energy and extend lamp life up to 10,000 hours. This mode is automatically engaged to optimize power consumption based on content brightness.
6. Maintenance
Regular maintenance helps ensure optimal performance and extends the lifespan of your projector.
6.1 Cleaning the Lens
Use a soft, lint-free cloth specifically designed for optical lenses to gently wipe the projector lens. Avoid using abrasive materials or harsh chemicals.
6.2 Lamp Replacement
The projector lamp has a life of up to 10,000 hours. When the lamp reaches the end of its life, a warning message will appear, and the lamp indicator light may flash. Refer to the full service manual for detailed lamp replacement instructions or contact qualified service personnel.
6.3 Filter Cleaning
Periodically check and clean the air filter to prevent dust buildup, which can affect performance and cause overheating. Consult the full service manual for instructions on accessing and cleaning the air filter.
7. Troubleshooting
If you encounter issues with your projector, refer to the following common problems and solutions:
| Problem | Possible Cause | Solution |
|---|---|---|
| No image on screen | Power cord disconnected, incorrect input source, lamp issue | Check power connection, select correct input source, check lamp status indicator |
| Dim or blurry image | Out of focus, low brightness setting, dirty lens | Adjust focus/zoom rings, increase brightness in OSD, clean the lens |
| Projector overheats | Blocked ventilation, dirty air filter | Ensure clear space around vents, clean air filter |
| No sound | Volume too low, incorrect audio input, mute enabled | Adjust volume, check audio cable connection, disable mute function |
8. Specifications
Detailed technical specifications for the BenQ MX525A DLP Video Projector:
- Display Technology: DLP
- Native Resolution: XGA (1024 x 768)
- Brightness: 3300 ANSI Lumens
- Contrast Ratio: 13,000:1
- Lamp Life: Up to 10,000 hours (SmartEco Mode)
- Connectivity: HDMI, VGA (x2)
- Special Features: 3D-Ready, Portable, SmartEco Power Saving Technology
- Product Dimensions: 8.7 x 3.7 x 11.1 inches
- Item Weight: 6.29 pounds
- Date First Available: November 13, 2019
9. Warranty and Support
The BenQ MX525A DLP Video Projector comes with a 1-year warranty for parts and labor. This warranty covers manufacturing defects and ensures your product functions as intended under normal use.
For technical support, warranty claims, or further assistance, please visit the official BenQ support website or contact their customer service department. Refer to your product packaging or the BenQ website for the most current contact information.


