1. Introduction
This manual provides detailed instructions for the safe and effective use of your Huepar B03CG 3D Laser Level. This advanced tool features three 360° green laser lines, offering comprehensive coverage for various leveling and alignment tasks. It is equipped with a self-leveling system, multiple power options, and a durable design for reliable performance in diverse working conditions.
Please read this manual thoroughly before operating the device and retain it for future reference.
2. Package Contents
Verify that all items listed below are included in your package:
- 1x Huepar B03CG 3D Laser Level
- 1x Li-ion Battery (5200mAh)
- 1x Type-C Charging Port
- 1x Magnetic Bracket
- 1x Target Plate
- 1x Type-C Power Cord
- 1x Power Adapter
- 1x User Manual
- 1x Hard Carry Case

Image 2.1: The Huepar B03CG 3D Laser Level with its complete set of accessories, including the hard carry case, magnetic bracket, target plate, and charging components.

Image 2.2: A visual representation of all items included in the Huepar B03CG product package, neatly arranged.
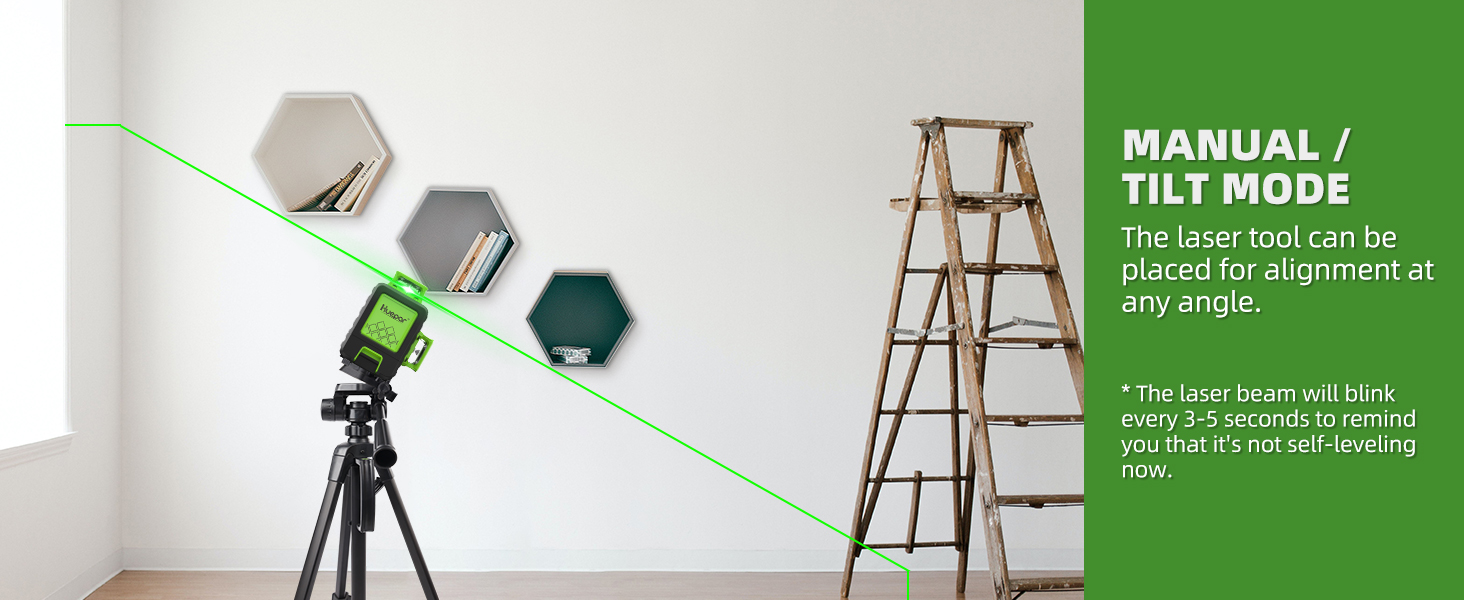
Image 2.3: The durable hard carry case designed for the Huepar B03CG, providing protection and portability for the laser level and its accessories.
3. Product Features
- 3 x 360° Line Lasers: One 360° horizontal and two 360° vertical planes provide full room coverage for floor, wall, and ceiling applications. Laser lines can be selected individually.
- Self-Leveling System: The smart pendulum system automatically self-levels and indicates out-of-level conditions.
- Manual Mode: When the pendulum is locked, the tool switches to manual mode, allowing lines to be locked at any angle.
- Dual Power Methods: Operates with a 3.7V / 5200mAh lithium battery or directly via the Type-C charging port when the battery is removed.
- Type-C Charging Port: The lithium battery features a Type-C port for separate charging.
- Battery Indicators: Four battery indicators on the keypad display current battery volume.
- Green Laser Technology: Utilizes bright Osram’s green laser unit for higher stability and visibility, twice as bright as red lasers at the same power.
- Outdoor Pulse Mode: Extends the working range up to 200 feet with a Huepar Line Laser Detector (sold separately). Activated via the Pulse Mode Button.
- Multiple Installation Methods: Features a 1/4"-20 thread for tripods or laser mounting poles. Includes a magnetic pivoting base for attachment to metal surfaces and two nail holes for additional fixing.
- Durable Design: Fully covered by TPR soft rubber for enhanced protection. IP54 water/dust resistance ensures functionality in challenging environments.

Image 3.1: A comparison highlighting the superior brightness, 90% TPU protection, three charging methods, and extended warranty/service of the Huepar B03CG.
4. Setup and Operation
4.1 Battery Installation and Power On/Off
- Ensure the pendulum lock is in the locked position before installing or removing the battery.
- Insert the fully charged Li-ion battery into the battery compartment.
- To power on, slide the pendulum lock to the unlocked position. The laser lines will activate.
- To power off, slide the pendulum lock to the locked position. The laser lines will turn off.
4.2 Operating Modes
The Huepar B03CG offers three primary operating modes:
- Self-Leveling Mode: Activated when the pendulum is unlocked. The laser tool will automatically level itself within ±4°. If the tool is beyond this range, the laser beam will flash continuously at 2Hz to indicate an out-of-level condition.
- Manual Mode: Activated when the pendulum is locked. This mode allows the user to project laser lines at any desired angle. The laser beam will blink every 3-5 seconds to remind you that it is not self-leveling.
- Pulse Mode: Can be activated in either self-leveling or manual mode by pressing the Pulse Mode Button. This mode is designed for use with a Huepar Line Laser Detector (sold separately) to extend the working range up to 200 feet, especially in bright outdoor conditions.

Image 4.1: Visual explanation of the three operation modes: Self-leveling (pendulum unlocked, auto-leveling within ±4°), Manual (pendulum locked, lines at any angle), and Pulse mode (extends range with receiver).

Image 4.2: The laser level in self-leveling mode, projecting a stable horizontal line. The image also illustrates the blinking warning when the tool is beyond its self-leveling range.

Image 4.3: The laser level operating in manual or tilt mode, projecting a diagonal line for alignment at various angles. A ladder is visible in the background, suggesting construction use.
4.3 Line Switching
Short press the operation button on the top of the device to cycle through different laser line combinations (e.g., horizontal only, vertical only, all lines). The device offers 5 line switching modes.
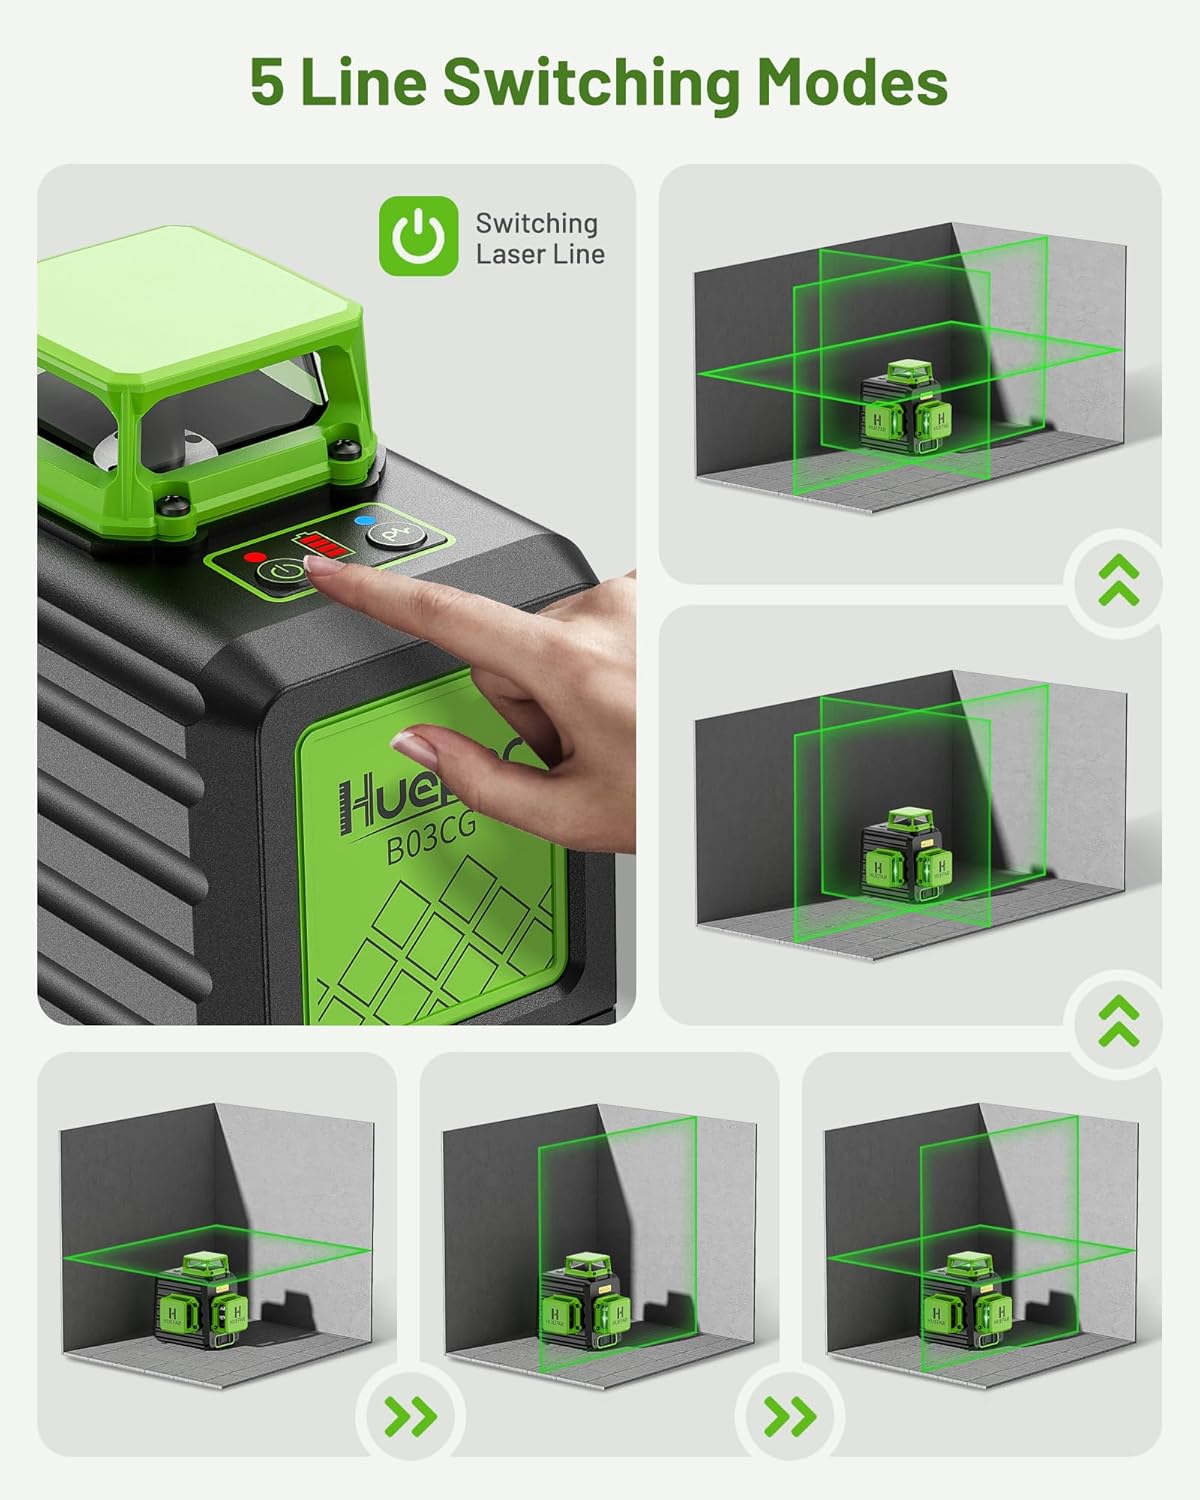
Image 4.4: A visual guide to the five different laser line switching modes available on the Huepar B03CG, showing how to select horizontal, vertical, or combined lines.
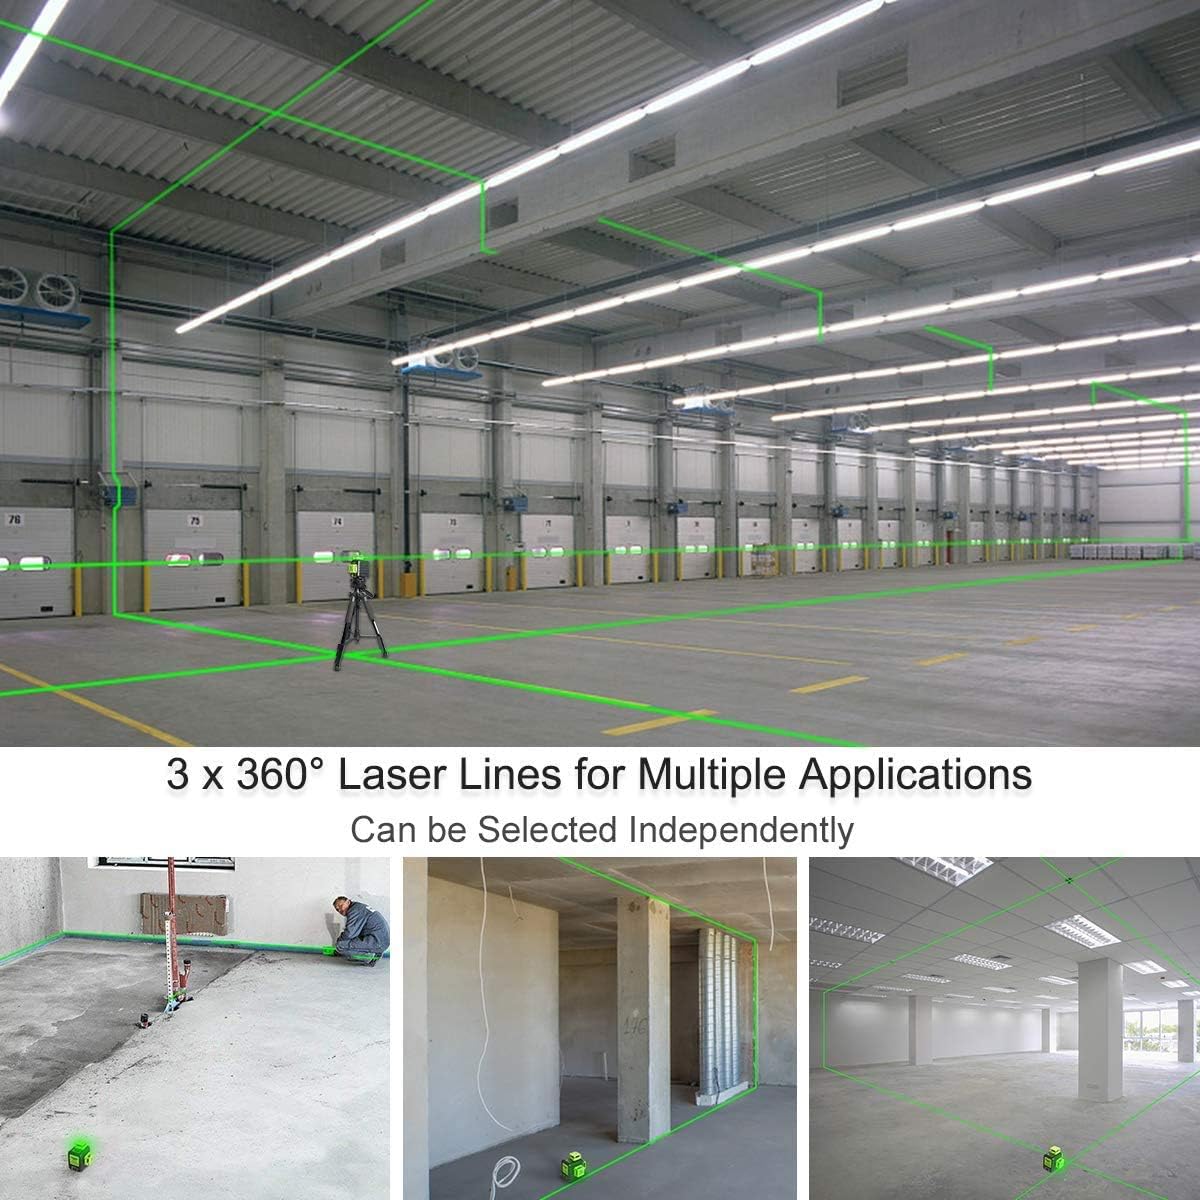
Image 4.5: Examples of the 3x360° laser lines being used for various applications, including floor, wall, and ceiling layouts in a large indoor space.
4.4 Mounting Options
The Huepar B03CG offers versatile mounting options:
- Tripod/Pole Mounting: Use the 1/4"-20 thread on the bottom of the device to attach it to a standard tripod or laser mounting pole.
- Magnetic Pivoting Base: The included magnetic bracket allows for attachment to metal tracks and steel surfaces, providing 360° rotation for precise alignment.
- Nail Holes: Two integrated nail holes offer additional fixing methods for non-magnetic surfaces.

Image 4.6: Illustrations of various placement methods, including mounting on a tripod, hanging on support, and installation on a 360° rotatable base. Note that some accessories may need to be purchased separately.
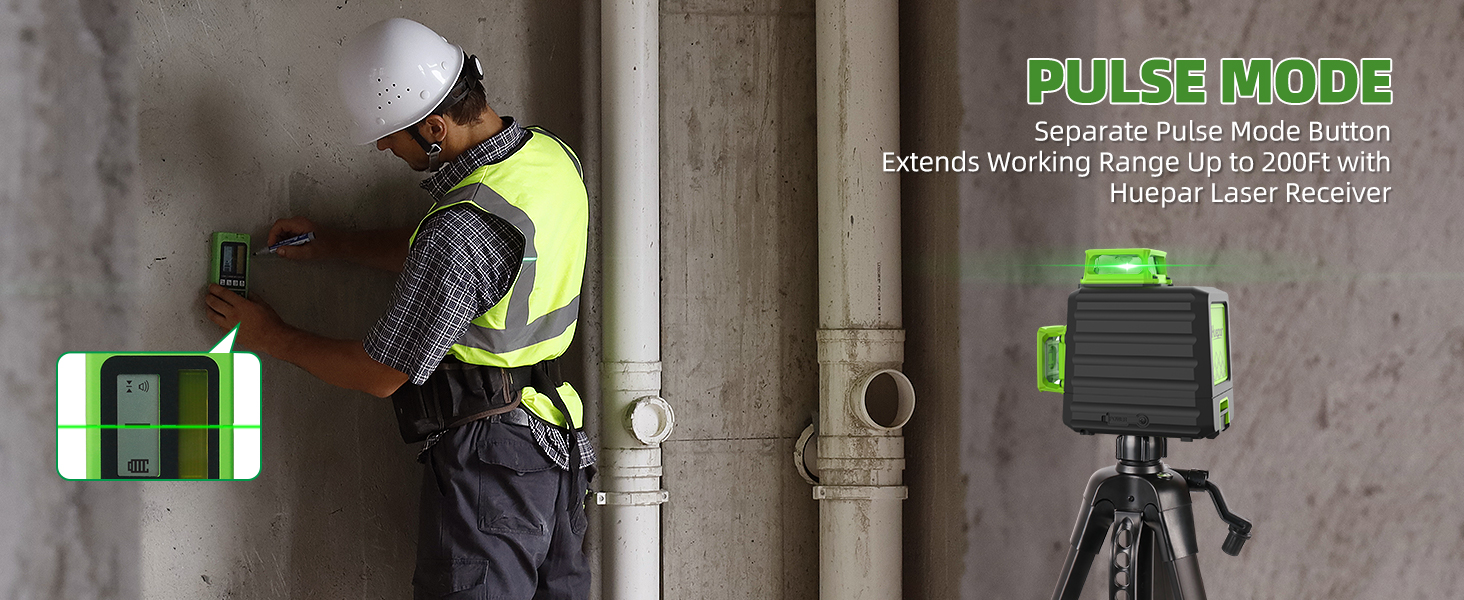
Image 4.7: A visual guide to the various mounting options for the Huepar B03CG, including tripod mounting, hanging on a support, and using the 360° rotatable base.
Video 4.1: This video demonstrates the use of the multifunction magnetic bracket (PV10+) with the Huepar B03CG laser level, showing how it can be attached to various surfaces and adjusted for precise alignment.
5. Charging
The Huepar B03CG laser level offers flexible charging options for its Li-ion battery:
5.1 Charging Methods
- Method 1: Charging with Battery Installed: Connect the Type-C power cord to the charging port on the laser level and to the power adapter. The battery indicators on the keypad will show charging status.
- Method 2: Charging the Battery Independently: The Li-ion battery has its own Type-C charging port. Remove the battery from the device and connect it directly to the Type-C power cord and adapter. A power indicator on the battery will light up red during charging and turn green when fully charged.
The laser tool can also be used directly by plugging it into a power source via the Type-C port, even without the battery installed.
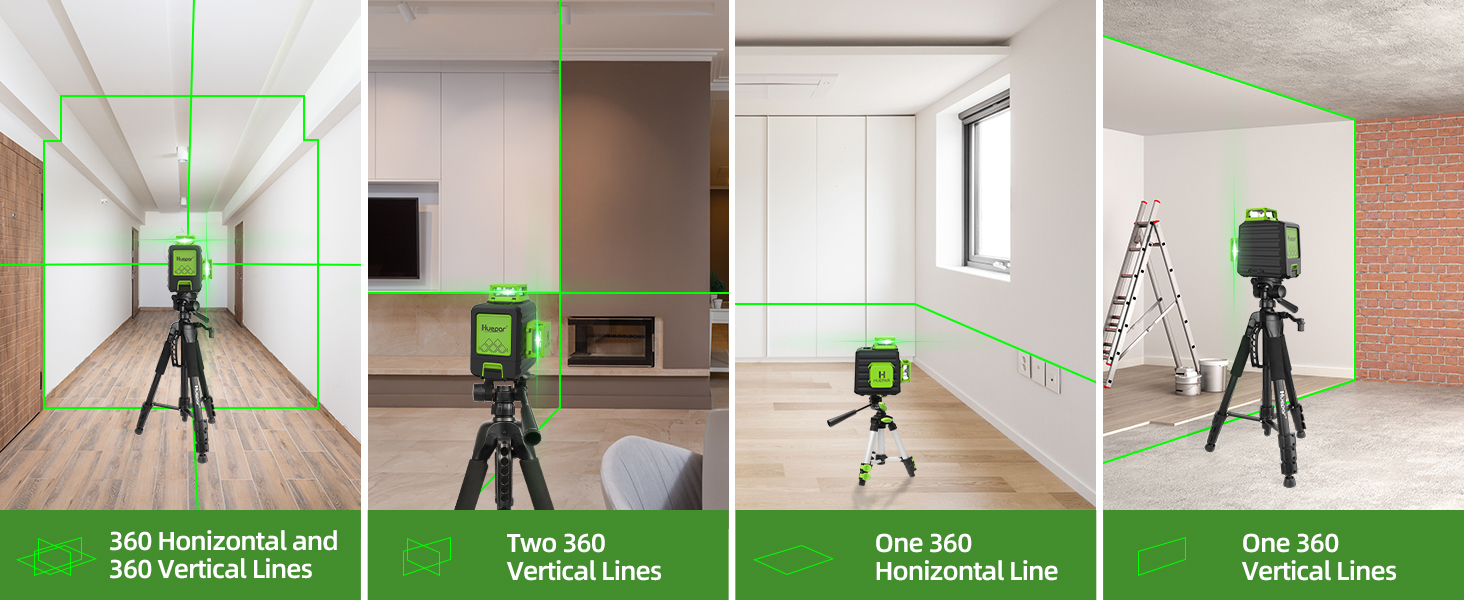
Image 5.1: This image illustrates the dual power methods: using the large-capacity Li-ion battery with Type-C charging, and direct plug-in operation without the battery. It also shows the power display indicators.
5.2 Charging Precautions
- The initial charging time for a new battery should be more than 8 hours.
- For daily use, ensure charging time is more than 5 hours but less than 24 hours to maintain battery health.
- Charging protection helps prevent overcharging.
Video 5.1: This video demonstrates the charging process for the Huepar B03CG laser level, including both methods: charging with the battery installed in the tool and charging the battery independently via its Type-C port. It also highlights charging precautions.
6. Maintenance
- Cleaning: Regularly clean the laser windows and the device body with a soft, dry cloth. Avoid using harsh chemicals or abrasive materials.
- Storage: Store the laser level in its hard carry case in a dry, dust-free environment when not in use. Ensure the pendulum is locked during storage and transport.
- Battery Care: If storing for extended periods, charge the battery to approximately 50% and recharge every 3-6 months to prolong its lifespan.
- Durability: The device features IP54 water/dust resistance and a TPR soft rubber covering for enhanced protection against environmental factors and minor impacts.

Image 6.1: The Huepar B03CG demonstrating its IP54 water and dust resistance, highlighting its robust design for challenging work environments.
7. Specifications
| Feature | Specification |
|---|---|
| Model Number | B03CG |
| Laser Class | Class 2 (IEC/EN60825-1/2014) |
| Laser Wavelength | 505-520nm (Green Beam) |
| Leveling Accuracy | ±1/9 Inch at 33 Feet (±2.5mm at 10m) |
| Self-Leveling Range | ±4° |
| Working Range (Line) | 85 feet (300LUX) |
| Working Range (with Detector) | 200 feet |
| Power Source | 3.7V / 5200mAh Li-ion Battery (included) |
| Operating Time | Up to 8 hours |
| Mount Size | 1/4"-20 Thread |
| IP Rating | IP54 (Water/Dust Resistant) |
| Operating Temperature | -10℃ to 50℃ (14℉ to 122℉) |
| Storage Temperature | -20℃ to 70℃ (-4℉ to 158℉) |
| Item Weight | 1.63 kg |
8. Warranty and Support
Huepar is committed to providing excellent customer service and product support.
- Warranty: The Huepar B03CG 3D Laser Level comes with a 5-year warranty for the device and a 2-year warranty for the battery (non-human damage).
- Replacement Policy: Within the first year, free replacement of a brand-new full set (device, battery, accessories) is provided. For years 2-5, free replacement with refurbished or equivalent for any non-repairable issues.
- Customer Service: Lifetime customer service and worldwide maintenance center support are available. Contact the 24/7 Service Team for assistance (response within 24 hours, solution within 48 hours).

Image 8.1: Detailed information regarding Huepar's 5-year warranty for 3D/4D models and 2-year warranty for other products, along with lifetime free technical support.


