1. Introduction
This manual provides comprehensive instructions for the installation, operation, and maintenance of the Byron DBY-22316 Wireless Doorbell Kit. This kit ensures you are always alerted to visitors with its reliable wireless signal and versatile chime options.
Product Overview
The Byron DBY-22316 Wireless Doorbell Kit includes a weatherproof doorbell push button, a plug-in chime unit, and a portable chime unit. It offers a wireless range of up to 150 meters, 16 selectable melodies, and 4 adjustable volume levels.
Key Features
- Maximum 150m wireless range.
- 16 selectable melodies.
- 4 adjustable volume levels.
- IP44 weatherproof doorbell push button.
- Includes both a plug-in chime and a portable chime for flexible placement.
- Easy installation.
2. Package Contents
Please check the package contents to ensure all items are present:
- 1x Doorbell Push Button
- 1x Plug-in Chime Unit
- 1x Portable Chime Unit
- 1x CR2032 Battery (for Push Button)
- Double-sided Tape
- User Manual
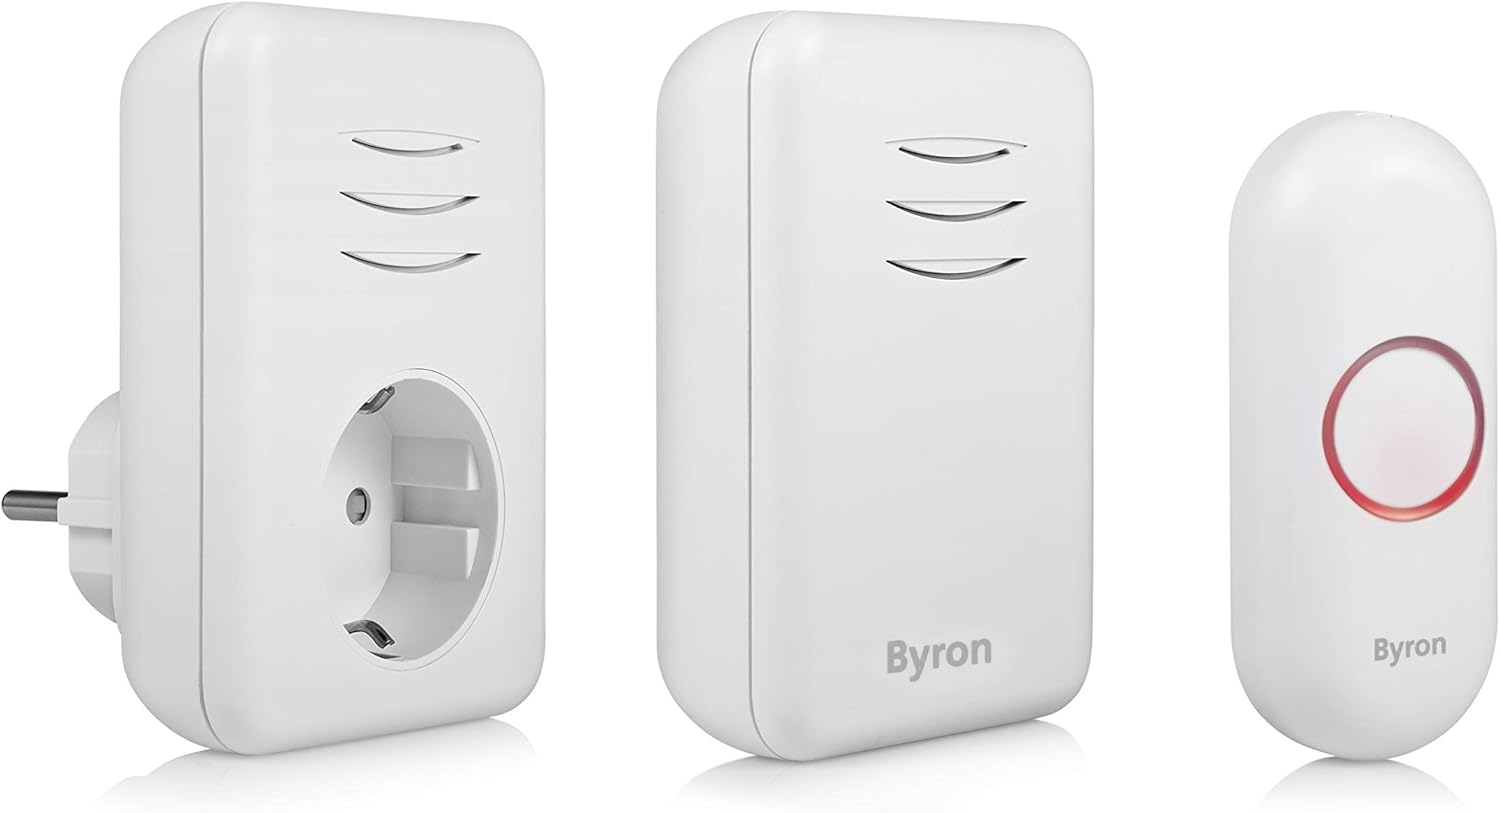
Image 2.1: All components of the Byron DBY-22316 Wireless Doorbell Kit.
3. Setup
3.1. Installing the Doorbell Push Button
- Insert Battery: Open the battery compartment on the back of the doorbell push button. Insert the supplied CR2032 battery, ensuring correct polarity (+/-). Close the compartment securely.
- Choose Location: Select a suitable location near your door or gate, ensuring it is easily accessible to visitors. The push button is IP44 weatherproof, suitable for outdoor use.
- Mounting: Clean the mounting surface thoroughly. Use the provided double-sided tape to firmly attach the push button to the desired location. Alternatively, you can use screws (not included) for a more permanent fixture.

Image 3.1: Doorbell push button installed on a door frame, demonstrating its weatherproof capability.
3.2. Installing the Plug-in Chime
- Select Outlet: Choose a standard wall outlet within the 150m wireless range of the push button.
- Plug In: Insert the plug-in chime unit directly into the wall outlet. Ensure it is securely seated.

Image 3.2: Plug-in chime unit connected to a wall socket.
3.3. Setting Up the Portable Chime
- Insert Batteries: Open the battery compartment on the back of the portable chime. Insert the required batteries (type not specified in product data, typically AA or AAA, refer to product packaging if available). Ensure correct polarity. Close the compartment securely.
- Placement: Place the portable chime in any desired location within the wireless range. It can be moved freely around your home.

Image 3.3: Portable chime unit on a shelf.
3.4. Pairing Additional Chimes/Push Buttons (Optional)
The Byron DBY-22316 kit supports up to 6 chimes. If you have purchased additional chimes or push buttons, follow the pairing instructions provided with those specific units. Generally, pairing involves pressing a pairing button on the chime and then activating the push button within a short timeframe.
4. Operating Instructions
4.1. Changing Melodies
To change the melody, locate the melody selection button on the chime unit (both plug-in and portable chimes typically have one). Press this button repeatedly to cycle through the 16 available melodies until you find your preferred one.
4.2. Adjusting Volume
To adjust the volume, locate the volume control button on the chime unit. Press this button to cycle through the 4 available volume levels (low, medium, high, mute) until you reach your desired setting.
4.3. Testing the System
After installation, press the doorbell push button to test the system. Both chime units should sound the selected melody and illuminate (if applicable). If they do not, refer to the Troubleshooting section.
5. Maintenance
5.1. Battery Replacement (Doorbell Push Button)
When the doorbell push button's indicator light no longer illuminates or the chime units do not respond, it may be time to replace the battery.
- Carefully remove the push button from its mounting location.
- Open the battery compartment on the back.
- Remove the old CR2032 battery and dispose of it responsibly.
- Insert a new CR2032 battery, ensuring correct polarity.
- Close the battery compartment and re-mount the push button.
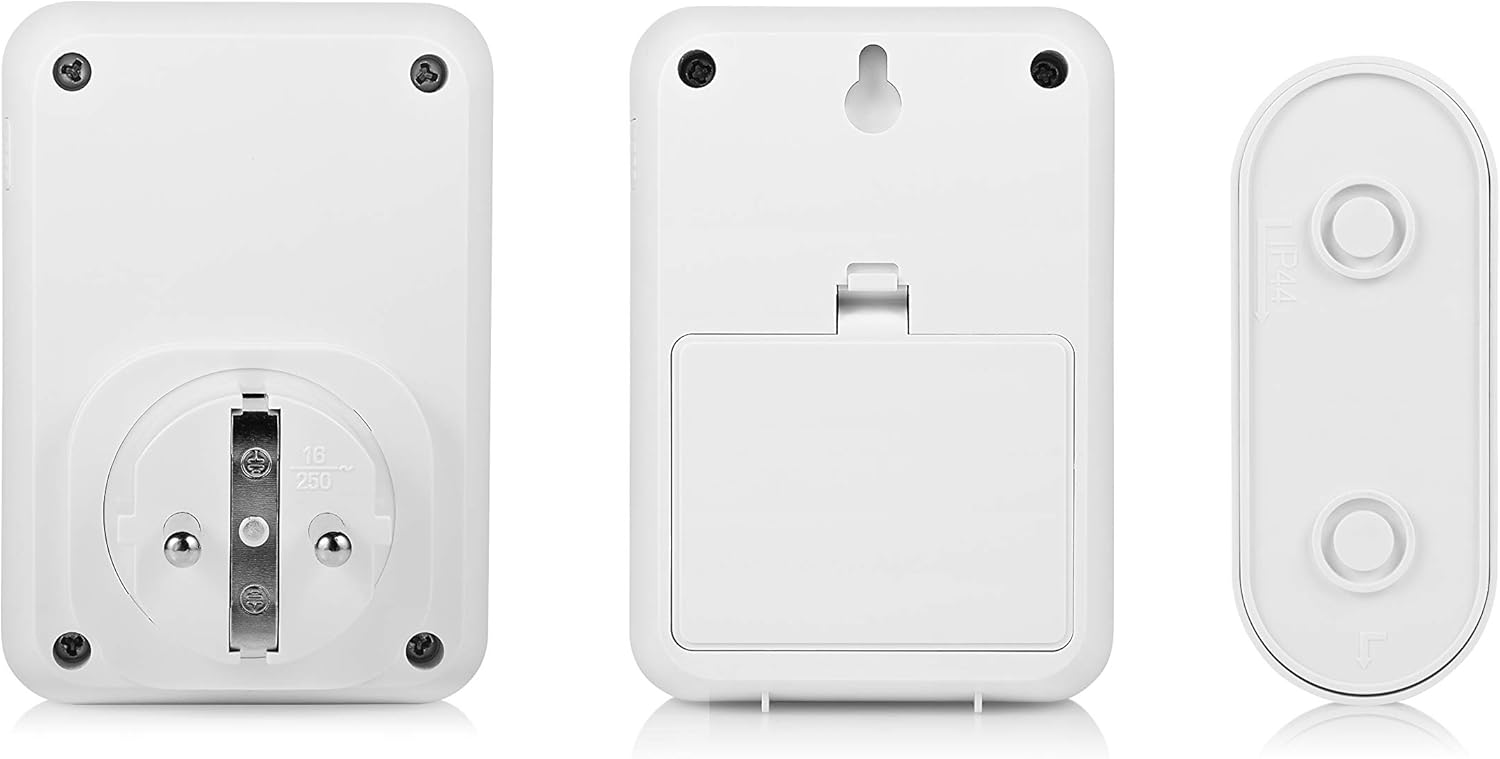
Image 5.1: Back view of the doorbell components, showing battery access.
5.2. Cleaning
Wipe the doorbell push button and chime units with a soft, damp cloth. Do not use abrasive cleaners or solvents, as these can damage the finish or internal components.
6. Troubleshooting
- Chime not sounding:
- Check if the chime unit is plugged in and powered on (for plug-in chime).
- Check the batteries in the portable chime and doorbell push button. Replace if necessary.
- Ensure the chime is not set to mute. Adjust the volume.
- Verify that the push button and chime units are within the specified wireless range (150m maximum). Obstacles like thick walls or metal structures can reduce range.
- Re-pair the push button and chime units if they have lost connection (refer to specific pairing instructions if provided with your product).
- Poor wireless range:
- Relocate the chime units closer to the push button.
- Avoid placing units near large metal objects, concrete walls, or other electronic devices that may cause interference.
- Interference from other devices:
- If experiencing false alarms or inconsistent operation, try changing the operating frequency or pairing code if your model supports this feature (consult product-specific documentation).
7. Specifications
| Manufacturer | Byron |
| Model Number | DBY-22316 |
| Product Dimensions (L x W x H) | 6.98 x 23.8 x 19.3 cm |
| Product Weight | 170 grams |
| Wireless Range | Up to 150 meters (open air) |
| Melodies | 16 |
| Volume Levels | 4 |
| Doorbell Push Button Weather Rating | IP44 |
| Push Button Battery | 1x CR2032 (Lithium, included) |
| Plug-in Chime Voltage | 220 Volts |
| Country of Origin | China |
8. Warranty and Support
For warranty information and customer support, please refer to the documentation included with your purchase or visit the official Byron website. Specific warranty terms may vary by region and retailer.


