
1. Introduction
This manual provides essential instructions for the safe operation, maintenance, and troubleshooting of your Amazon Basics 2.1-Qt Electric Deep Fryer. Please read this manual thoroughly before first use and retain it for future reference.

Image 1: The Amazon Basics 2.1-Qt Electric Deep Fryer with its lid closed, showcasing its compact design and black finish.
2. Important Safety Instructions
When using electrical appliances, basic safety precautions should always be followed to reduce the risk of fire, electric shock, and/or injury to persons, including the following:
- Read all instructions before operating the deep fryer.
- Do not touch hot surfaces. Use handles or knobs.
- To protect against electrical shock, do not immerse cord, plugs, or the deep fryer body in water or other liquid.
- Close supervision is necessary when any appliance is used by or near children.
- Unplug from outlet when not in use and before cleaning. Allow to cool before putting on or taking off parts, and before cleaning the appliance.
- Do not operate any appliance with a damaged cord or plug, or after the appliance malfunctions or has been damaged in any manner. Contact customer service for examination, repair, or adjustment.
- The use of accessory attachments not recommended by the appliance manufacturer may cause injuries.
- Do not use outdoors.
- Do not let cord hang over edge of table or counter, or touch hot surfaces.
- Do not place on or near a hot gas or electric burner, or in a heated oven.
- Extreme caution must be used when moving an appliance containing hot oil or other hot liquids.
- Always attach plug to appliance first, then plug cord into the wall outlet. To disconnect, turn any control to "off", then remove plug from wall outlet.
- Do not use appliance for other than intended use.
- Ensure the oil level is between the MIN and MAX marks inside the oil container. Overfilling or underfilling can be hazardous.
- Always ensure the lid is properly closed during operation to prevent oil splatters.
3. Product Components
Familiarize yourself with the parts of your deep fryer:
- Main Unit: Houses the oil container and heating element.
- Control Panel: Features temperature dial, timer dial, power indicator, and ready indicator.
- Frying Basket: Mesh basket with a handle for lowering and lifting food.
- Lid: Features a viewing window and handle.
- Removable Oil Container: Holds the frying oil.
- Power Cord: Detachable for safety and storage.

Image 2: The deep fryer with the frying basket inserted, ready for use. The basket includes a handle for safe food handling.

Image 3: A detailed view of the control panel, showing the temperature dial, timer dial, and indicator lights for power and readiness.
4. Setup and First Use
- Unpack: Carefully remove all components from the packaging. Remove any protective films or stickers.
- Clean: Wash the frying basket, lid, and removable oil container with warm, soapy water. Rinse thoroughly and dry completely. Wipe the exterior of the main unit with a damp cloth.
- Assemble: Place the removable oil container into the main unit. Insert the heating element assembly into the designated slots. Ensure it is securely seated.
- Add Oil: Pour cooking oil into the removable oil container. Ensure the oil level is between the MIN and MAX fill lines indicated inside the container. The fryer has an 8-cup (2.0L) oil capacity.
- Connect Power: Attach the detachable power cord to the fryer's power inlet. Then, plug the power cord into a standard electrical outlet.

Image 4: The detachable power cord connected to the back of the deep fryer, illustrating proper power connection.
5. Operating Instructions
- Preheat Oil: Turn the temperature dial to your desired frying temperature (e.g., 350°F / 175°C). The power indicator light will illuminate. The fryer will begin heating the oil.
- Wait for Ready Indicator: The ready indicator light will turn on when the oil has reached the set temperature. This typically takes several minutes.
- Prepare Food: While the oil is heating, prepare your food for frying. Ensure food is dry to minimize splattering.
- Load Basket: Carefully place food into the frying basket. Do not overload the basket, as this can lower oil temperature and result in uneven cooking.
- Lower Basket: Slowly lower the frying basket into the hot oil. Use the basket handle to avoid direct contact with hot oil.
- Set Timer: Use the timer dial to set the desired cooking time. The timer will alert you when cooking is complete.
- Monitor Cooking: The transparent viewing window allows you to monitor the cooking progress without opening the lid, which helps maintain oil temperature and reduces splattering.
- Remove Food: Once cooking is complete, carefully lift the frying basket out of the oil. Use the hooks on the basket to rest it on the edge of the fryer, allowing excess oil to drain back into the container.
- Serve: Transfer fried food to a plate lined with paper towels to absorb any remaining oil.
- Turn Off: After use, turn the temperature dial to "OFF" and unplug the appliance from the wall outlet.

Image 5: The deep fryer actively frying food, demonstrating the basket's position for draining and the clear viewing window.
6. Maintenance and Cleaning
Regular cleaning ensures optimal performance and extends the life of your deep fryer.
- Cool Down: Always allow the oil and fryer to cool completely before cleaning. This may take several hours.
- Remove Oil: Once cooled, carefully pour the oil from the removable oil container into a suitable storage container for reuse or disposal.
- Disassemble: Remove the frying basket, lid, and removable oil container. The heating element assembly can also be detached for easier cleaning of the oil container.
- Wash Parts: Wash the frying basket, lid, and removable oil container with warm, soapy water. These parts are generally dishwasher-safe, but hand washing is recommended for longevity.
- Clean Main Unit: Wipe the exterior of the main unit and the control panel with a damp cloth. Do not immerse the main unit or power cord in water.
- Dry Thoroughly: Ensure all parts are completely dry before reassembling or storing the fryer.
7. Troubleshooting
| Problem | Possible Cause | Solution |
|---|---|---|
| Fryer does not turn on. | Not plugged in; power cord not properly connected; circuit breaker tripped. | Ensure power cord is securely plugged into both the fryer and the wall outlet. Check household circuit breaker. |
| Oil not heating. | Temperature dial not set; ready indicator light not yet on. | Ensure temperature dial is set to a desired temperature. Wait for the ready indicator light to illuminate. |
| Food not cooking evenly or taking too long. | Oil temperature too low; basket overloaded; food too wet. | Ensure oil is preheated to the correct temperature. Fry food in smaller batches. Pat food dry before frying. |
| Excessive smoking. | Oil is old or contaminated; oil temperature too high. | Replace old oil. Ensure temperature dial is set correctly and not exceeding the oil's smoke point. |
8. Specifications
- Model Name: DF5429A-UL
- Brand: Amazon Basics
- Material: Metal, Plastic
- Color: Black
- Product Dimensions: 13.35"D x 12.91"W x 9.02"H
- Item Weight: 6.5 Pounds
- Wattage: 1500 watts
- Oil Capacity: 2.1-Qt (2.0L)
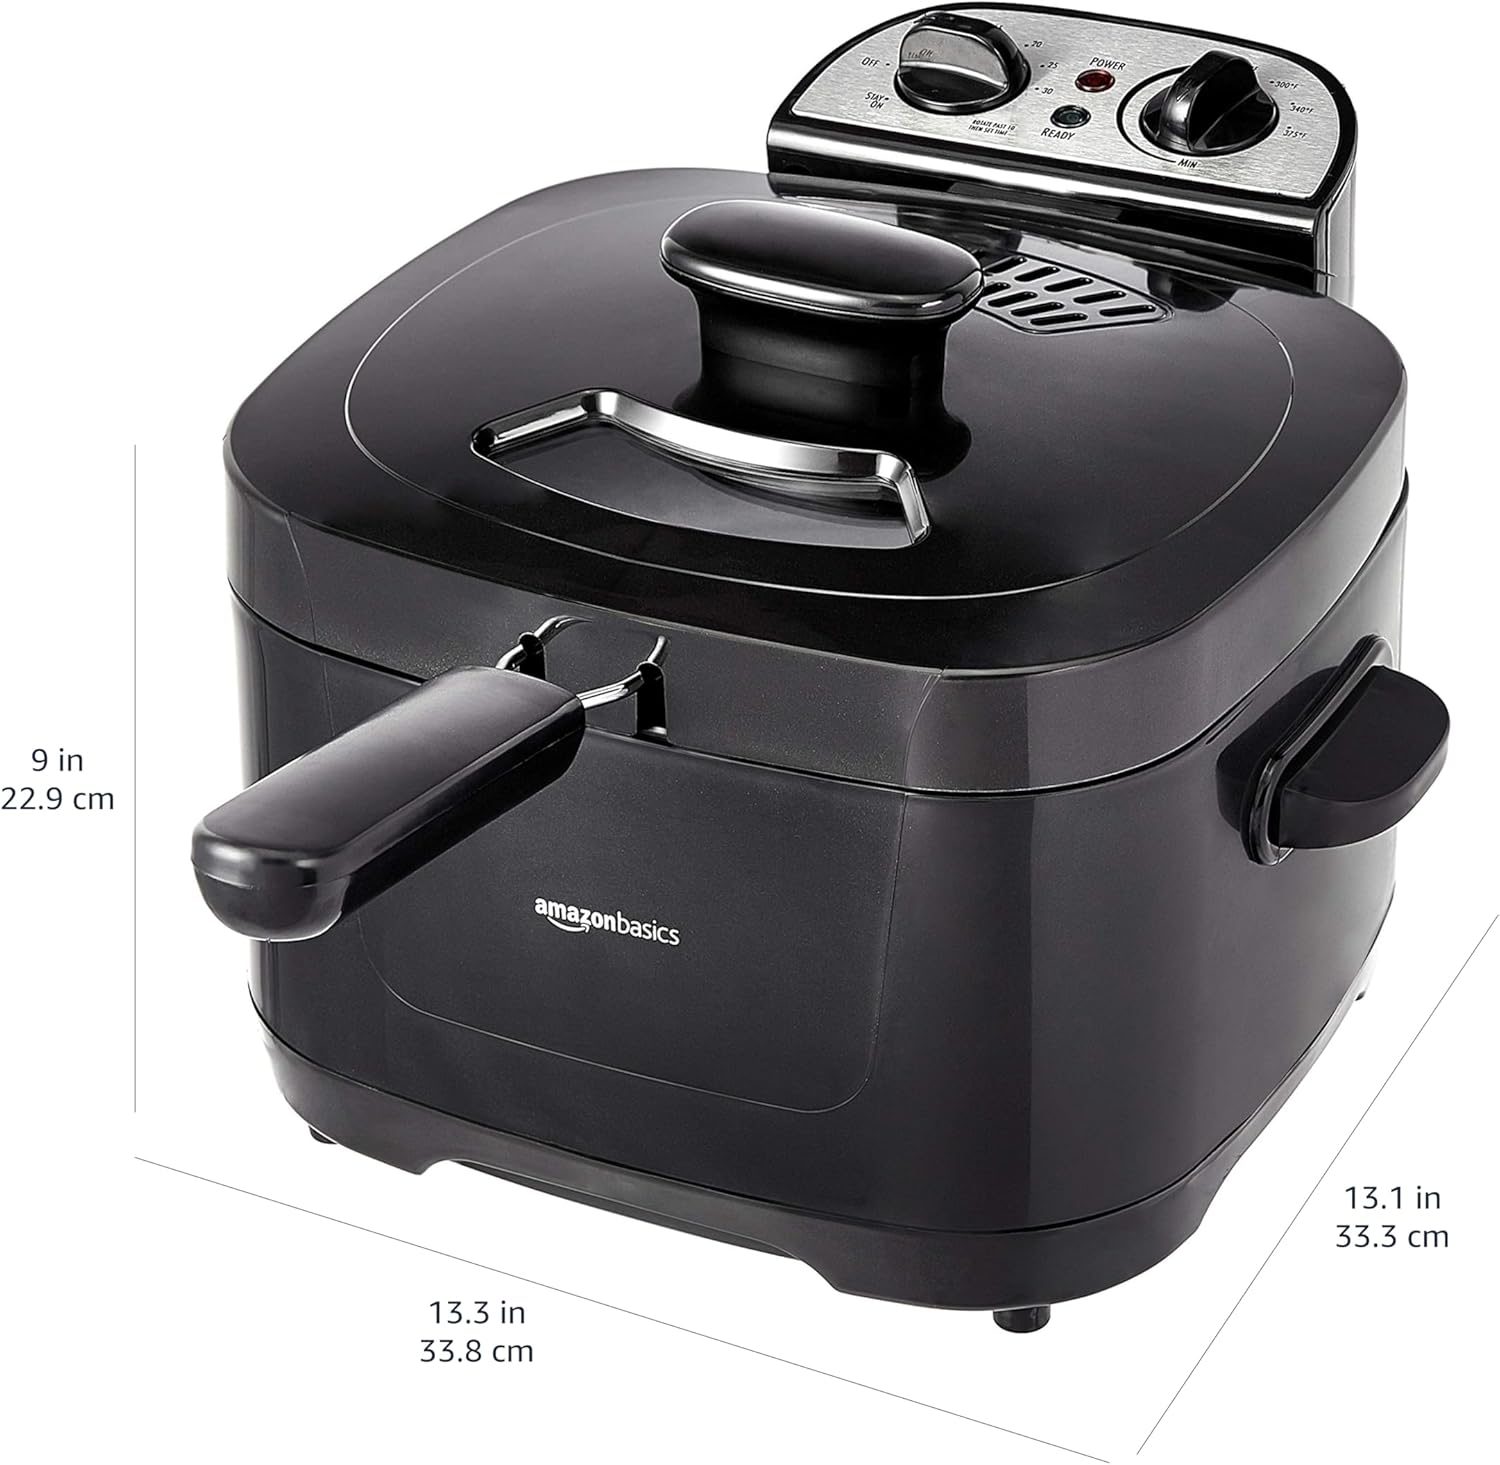
Image 6: Diagram illustrating the dimensions of the Amazon Basics 2.1-Qt Electric Deep Fryer.
9. Warranty and Support
For warranty information and customer support, please refer to the documentation included with your purchase or visit the official Amazon Basics website. You may also contact Amazon customer service for assistance with your product.
Online Support: Amazon Customer Service
