Introduction
Thank you for choosing the HONEY JOY 6V Ride On ATV. This manual provides important information for the safe assembly, operation, and maintenance of your new ride-on toy. Please read it thoroughly before use and retain it for future reference.
This 4-wheel quad off-road vehicle is designed for children aged 37-72 months, offering features such as working headlights, music effects, and forward/backward functions. It includes an MP3 player with AUX input and USB port for personalized entertainment.
Important Safety Information
WARNING: To reduce the risk of injury, adult supervision is required. Never use in roadways, near motor vehicles, on or near steep inclines or steps, swimming pools or other bodies of water. Always wear shoes, and never allow more than one rider.
- This product is intended for children aged 37-72 months (3-6 years) with a maximum weight capacity of 55 lbs (25 kg).
- Always ensure the child wears appropriate safety gear, including a helmet, when operating the ATV.
- Operate the vehicle only on flat, level surfaces. Avoid rough terrain, sand, gravel, or wet areas.
- Keep hands, hair, and clothing away from moving parts.
- Do not modify the electrical system. Alterations can cause fire, explosion, or electric shock.
- The product is ASTM certified, ensuring it meets safety standards.
Product Overview
The HONEY JOY 6V Ride On ATV is designed to provide an engaging and safe riding experience for young children. Key features include:
- Realistic Design: Features a cool ATV appearance with working headlights.
- Interactive Controls: Easy-to-use foot pedal for acceleration and a forward/backward switch.
- Entertainment System: Built-in music, AUX input, and USB port for connecting external devices.
- Comfort & Safety: Extended seat for comfort and stable four-wheel design with skid-resistant tires.
- Durable Construction: Made from high-quality PP and iron material.

Figure 1: HONEY JOY 6V Ride On ATV in use.

Figure 2: Detailed features of the ATV, including headlights, seat, foot pedal, and charging port.

Figure 3: Control panel layout with labeled functions.
Setup and Assembly
Before first use, adult assembly is required. Please ensure all parts are present and undamaged before beginning assembly. Refer to the included assembly instructions for detailed steps.
Parts List (Typical)
- Main ATV Body
- Wheels (4)
- Handlebars
- Seat
- 6V 4.5AH Battery (pre-installed or separate)
- Charger
- Axles and Fasteners
Assembly Steps (General)
- Attach the wheels to the axles, ensuring they are securely fastened.
- Install the handlebars onto the steering column.
- Connect the battery terminals (if not pre-connected). Ensure correct polarity.
- Secure the seat in place.
- Perform an initial charge of the battery for 8-10 hours before first use.
Battery Charging
The ATV is powered by a 6V 4.5AH rechargeable battery. Proper charging ensures optimal performance and battery longevity.
- Locate the charging port on the ATV (refer to Figure 2).
- Plug the charger into a standard wall outlet.
- Connect the charger plug to the ATV's charging port.
- Charge the battery for approximately 8-10 hours for a full charge. Do not overcharge.
- Disconnect the charger once charging is complete.
A full charge provides up to 60 minutes of play time, depending on usage conditions.
Operating Instructions
Starting the ATV
- Ensure the ATV is on a flat, safe surface.
- Press the Power switch (labeled '5' in Figure 3) to turn on the ATV.
- The headlights will illuminate, and a startup sound may play.
Driving the ATV
- Select the desired direction using the Forward/Reverse switch (labeled '3' in Figure 3).
- Press the foot pedal (refer to Figure 2) to accelerate. Release the pedal to brake.
- Steer the ATV using the handlebars.
Using the Music Player
- Built-in Music: The ATV has pre-programmed music. Use the music player controls (labeled '4' in Figure 3) to cycle through tracks and adjust volume.
- AUX Input: Connect an external audio device (e.g., smartphone, MP3 player) to the AUX input (labeled '2' in Figure 3) using a 3.5mm audio cable.
- USB Port: Insert a USB memory card into the USB interface (labeled '1' in Figure 3) to play audio files.
- Adjust the volume using the dedicated volume buttons on the control panel.
Maintenance
General Care
- Regularly inspect the ATV for loose parts, damaged wiring, or worn components. Tighten any loose fasteners.
- Clean the ATV with a damp cloth. Do not use abrasive cleaners or solvents. Avoid spraying water directly onto electrical components.
- Store the ATV in a dry, covered area when not in use. Protect it from direct sunlight and moisture.
Battery Care
- Recharge the battery after each use.
- If storing the ATV for an extended period, charge the battery fully every 30 days to prevent deep discharge and prolong battery life.
- Do not store the battery in temperatures below 0°C (32°F) or above 40°C (104°F).
- Only use the charger provided with the ATV.
Troubleshooting
| Problem | Possible Cause | Solution |
|---|---|---|
| ATV does not move | Battery is low or not connected; Power switch is off; Forward/Reverse switch is in neutral (Stop); Motor issue. | Charge the battery; Check battery connections; Ensure Power switch is ON; Select Forward or Reverse; Contact customer support if motor issue suspected. |
| Lights or music not working | Battery is low; Loose wiring; Component failure. | Charge the battery; Check wiring connections; Contact customer support. |
| Short run time | Battery not fully charged; Old battery; Overloaded vehicle. | Ensure full charge (8-10 hours); Replace battery if old; Ensure rider weight is within limits (max 55 lbs). |
| Vehicle runs slowly | Low battery; Overloaded; Operating on rough terrain. | Charge the battery; Reduce load; Operate on flat, smooth surfaces. |
Specifications
| Feature | Detail |
|---|---|
| Model Number | 3201-A-RED |
| Main Material | PP, Iron |
| Overall Dimensions (L×W×H) | 27" × 16" × 19.5" (68.58 cm × 40.64 cm × 49.53 cm) |
| Net Weight | 11 lbs (5 kg) |
| Weight Capacity | 55 lbs (25 kg) |
| Speed | 3 km/h (2 MPH) |
| Battery | 6V 4.5AH Rechargeable |
| Charge Time | 8-10 hours |
| Recommended Age | 37-72 months (3-6 years) |
| Certifications | ASTM Certified |
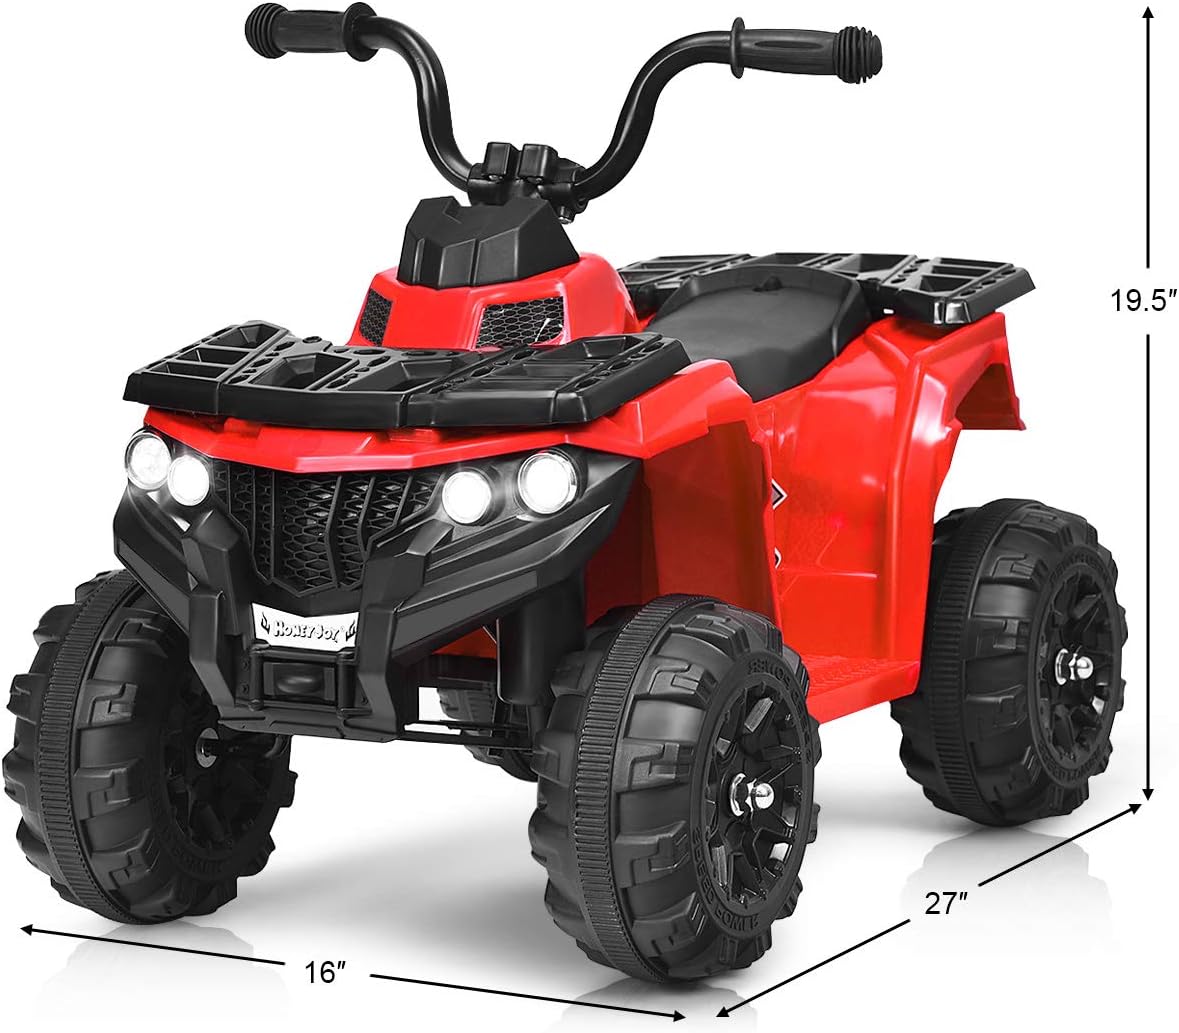
Figure 4: Product dimensions.
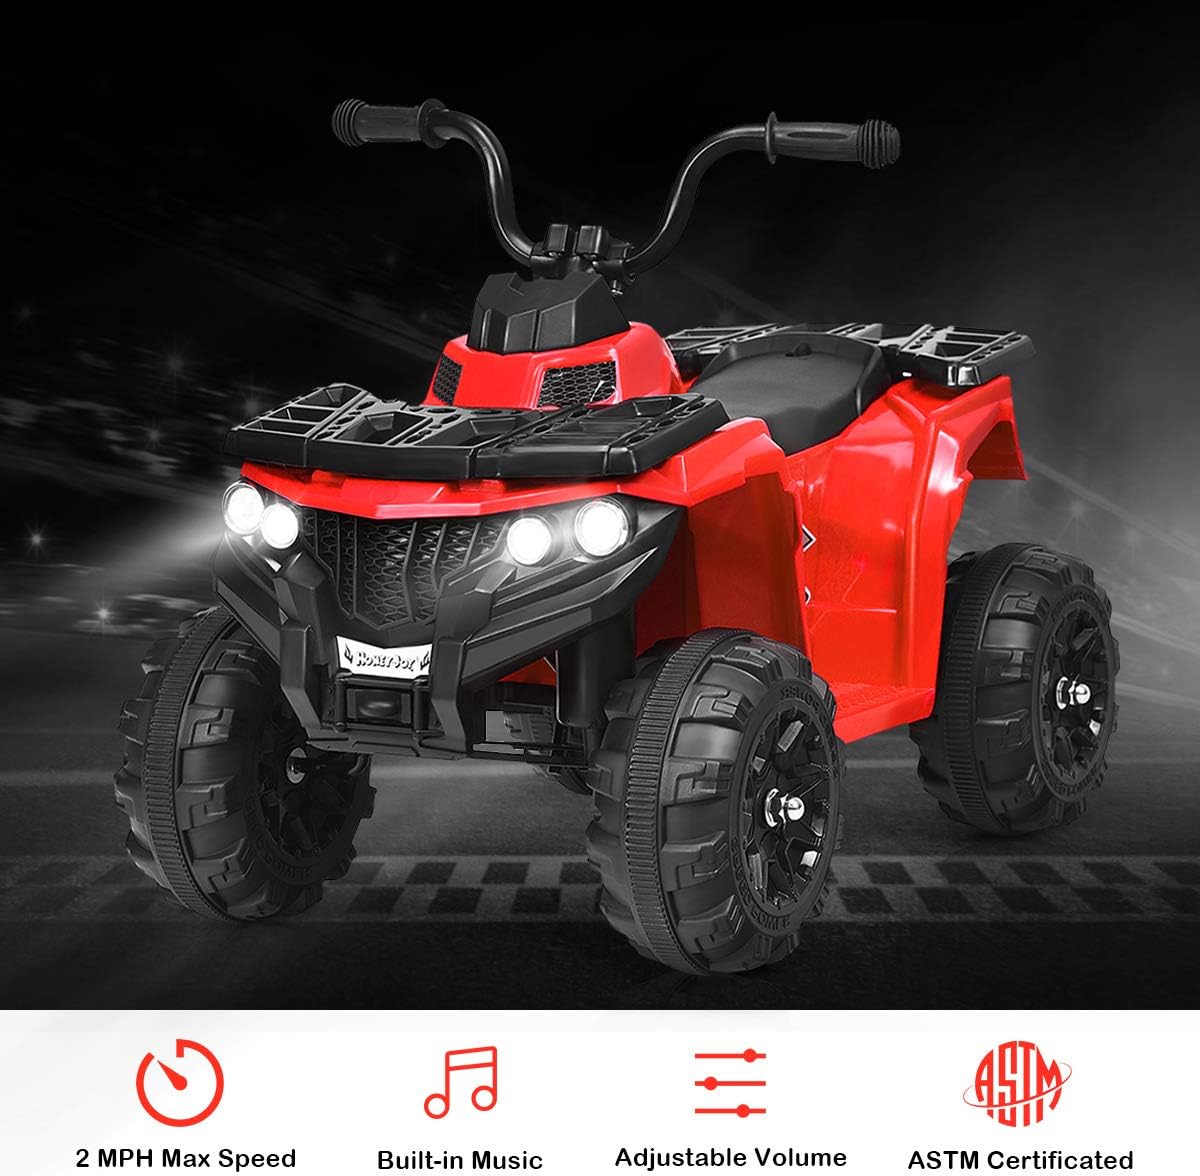
Figure 5: Key features summary.
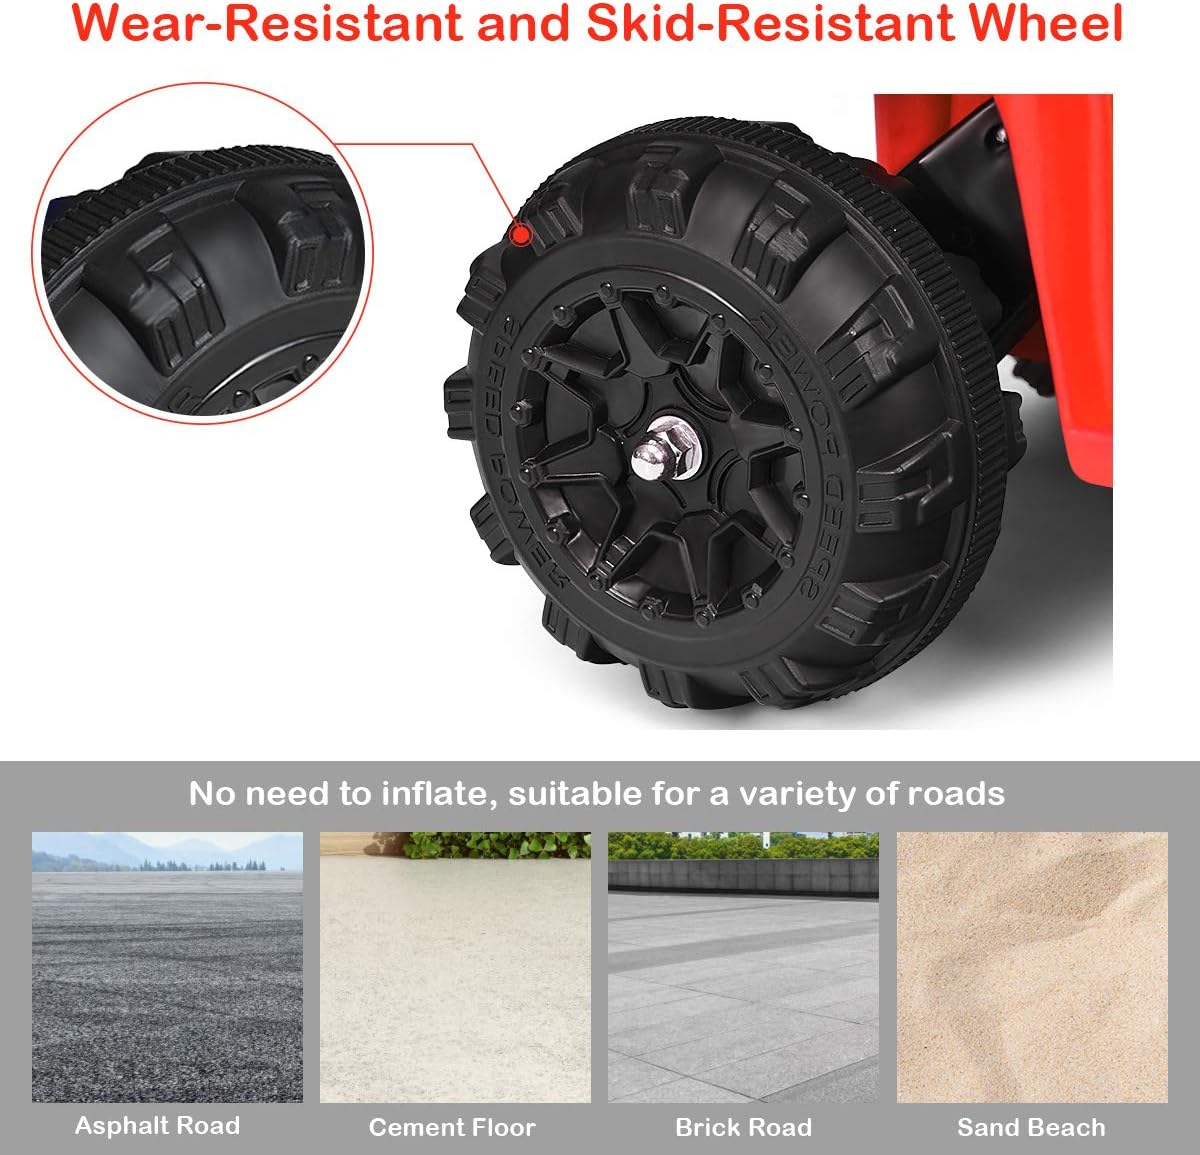
Figure 6: Wheel design and suitable operating surfaces.
Warranty and Support
For warranty information or technical support, please refer to the specific warranty card included with your product or contact HONEY JOY customer service. Please have your model number (3201-A-RED) and purchase details ready when contacting support.
Manufacturer: HONEY JOY


