1. Introduction
This manual provides comprehensive instructions for the setup, operation, and maintenance of your Western Digital Easystore 5TB External USB 3.0 Portable Hard Drive. This device offers high-capacity storage and fast data transfer speeds, designed for reliable data backup and storage.
2. Package Contents
Verify that all items are present in your product packaging:
- Western Digital Easystore 5TB Portable Hard Drive
- USB 3.0 Cable
- Quick Install Guide (or similar documentation)
3. Product Overview
Familiarize yourself with the components of your Easystore portable hard drive.

Figure 3.1: Front view of the Western Digital Easystore 5TB Portable Hard Drive, showcasing its sleek black design and the WD Easystore logo.
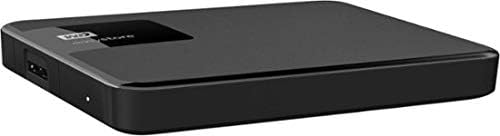
Figure 3.2: Side view of the Easystore hard drive, highlighting the USB 3.0 port for connectivity and the power indicator light.

Figure 3.3: Retail packaging for the Western Digital Easystore Portable Hard Drive, showing product branding and compatibility information.
4. Setup Instructions
4.1 Connecting the Hard Drive
- Connect one end of the provided USB 3.0 cable to the USB port on the Western Digital Easystore portable hard drive.
- Connect the other end of the USB 3.0 cable to an available USB port on your computer (PC or Mac). For optimal performance, use a USB 3.0 port. The drive is backward compatible with USB 2.0 ports, but data transfer speeds will be reduced.
- The drive will power on automatically. The power indicator light on the drive will illuminate.
4.2 Initial Setup for Windows
The Western Digital Easystore drive is pre-formatted for Windows operating systems (NTFS). It should be recognized automatically by your computer and appear as a new drive letter in 'This PC' or 'My Computer'.
- No additional drivers are typically required for Windows.
- You can begin transferring files immediately.
4.3 Initial Setup for Mac
For Mac users, the drive may require reformatting to HFS+ (Mac OS Extended) or APFS for full compatibility and optimal performance with macOS. Reformatting will erase all data on the drive, so ensure it is empty or back up any pre-loaded software if desired.
- Connect the drive to your Mac.
- Open 'Disk Utility' (Applications > Utilities > Disk Utility).
- Select the Western Digital Easystore drive from the sidebar.
- Click 'Erase'.
- Choose a format (e.g., 'Mac OS Extended (Journaled)' or 'APFS') and a scheme (e.g., 'GUID Partition Map').
- Click 'Erase' again to confirm.
Alternatively, you can install the WD Discovery software for Mac, which may offer tools for managing the drive without reformatting, though reformatting is generally recommended for native Mac performance.
5. Operating Instructions
5.1 Transferring Files
To transfer files, simply drag and drop them to and from the Easystore drive icon on your desktop or in your file explorer/finder window, similar to using any other folder.
- For Windows: Open 'This PC' or 'File Explorer', locate the drive, and drag files.
- For Mac: The drive icon will appear on your desktop. Drag files to and from it.
5.2 Using Backup Software
The Western Digital Easystore drive supports backup software for scheduling regular automatic file transfers. Refer to the included software or download WD Discovery from the official Western Digital website for backup solutions. WD Discovery also allows management of drive settings, including LED control.
5.3 Safely Ejecting the Drive
Always safely eject the hard drive before disconnecting it to prevent data corruption.
- Windows: Click the 'Safely Remove Hardware and Eject Media' icon in the system tray, then select the Easystore drive.
- Mac: Drag the drive icon from your desktop to the Trash, or right-click (Control-click) the drive icon and select 'Eject'.
6. Maintenance
- Physical Care: Keep the drive in a clean, dry environment. Avoid extreme temperatures, direct sunlight, and high humidity.
- Protection: The drive is portable but contains moving parts. Avoid dropping or subjecting it to strong impacts.
- Regular Backups: While the Easystore drive is excellent for storage, it is recommended to maintain multiple copies of critical data across different storage solutions.
- Cleaning: Use a soft, dry cloth to clean the exterior of the drive. Do not use liquid cleaners or solvents.
7. Troubleshooting
7.1 Drive Not Recognized
- Ensure the USB cable is securely connected to both the drive and the computer.
- Try connecting the drive to a different USB port on your computer.
- Test the drive with a different USB cable, if available.
- Restart your computer.
- For Mac users, ensure the drive has been formatted correctly (see Section 4.3).
7.2 Slow Data Transfer Speeds
- Ensure the drive is connected to a USB 3.0 port on your computer. USB 2.0 ports will result in significantly slower speeds.
- Verify that your computer's USB 3.0 drivers are up to date.
- Avoid transferring many small files simultaneously; large files transfer more efficiently.
- Close other applications that might be using system resources or performing disk operations.
7.3 Drive Light Not On
- Check the USB cable connection. The drive is USB-powered, so a secure connection is essential for power.
- Try a different USB port or computer to rule out a port issue.
8. Specifications
| Feature | Detail |
|---|---|
| Brand | Western Digital |
| Model Number | WDBKUZ0050BBK-WESN |
| Digital Storage Capacity | 5 TB (5000 GB) |
| Connectivity Technology | USB 3.0 (backward compatible with USB 2.0) |
| Hard Disk Form Factor | 3.5 Inches (Internal drive type, external enclosure is portable) |
| Hard Disk Description | Mechanical Hard Disk |
| Hardware Platform | Mac, PC |
| Color | Black |
| Item Weight | 8.1 ounces |
| Product Dimensions (LxWxH) | 4.6 x 6 x 1.6 inches |
| Special Feature | Portable |
9. Warranty and Support
For detailed warranty information and technical support, please visit the official Western Digital support website. You will typically need your product's model number (WDBKUZ0050BBK-WESN) and serial number (located on the drive itself or its packaging) when contacting support.
Online Support: support.wdc.com


