1. Introduction
This manual provides detailed instructions for the setup, operation, and maintenance of your Sharp Atomic Analog Wall Clock. Designed for precision and ease of use, this clock automatically synchronizes with the US Atomic Clock, ensuring accurate timekeeping and automatic adjustment for Daylight Saving Time.

Figure 1: Sharp Atomic Analog Wall Clock (Front View)
This image displays the Sharp Atomic Analog Wall Clock, highlighting its 12-inch diameter, silver brushed finish, and clear, easy-to-read black numbers against a white background. The clock features hour, minute, and second hands, and the "SHARP" logo along with an "ATOMIC" symbol indicating its atomic timekeeping capability.
2. Product Features
- Atomic Precision: Integrated receiver automatically synchronizes with the WWVB radio transmission from the US Government's National Institute of Standards and Technology (NIST) in Fort Collins, Colorado. Ensures accuracy within one second.
- Automatic Time Adjustment: Clock regularly resets via radio control to match the US Atomic Clock and automatically adjusts for Daylight Saving Time (DST) in spring and autumn.
- Elegant Design: Features an attractive brushed silver frame that adds style and longevity to any decor.
- Battery Operated: Requires 1 AA battery (not included) for convenient placement anywhere.
- Easy to Read: Large, clear numbers and a simple style make it easy to read from a distance, suitable for any room including studies, offices, kitchens, children's rooms, or garages.
3. Package Contents
Please check the package for the following items:
- Sharp Atomic Analog Wall Clock
- User Manual (this document)
Note: 1 AA battery is required for operation and is not included.
4. Setup and Initial Operation
4.1 Battery Installation
- Locate the battery compartment on the back of the clock.
- Insert one (1) fresh AA alkaline battery, ensuring the polarity (+/-) matches the diagram inside the compartment.
4.2 Setting the Time Zone
After inserting the battery, you must select your desired time zone. There is a time zone switch or button on the back of the clock. Refer to the diagram below to identify your time zone.

Figure 2: US Time Zones Map
This image displays a map of the United States divided into its four main time zones: Pacific, Mountain, Central, and Eastern. Users should identify their location on this map to select the correct time zone on the clock's setting.
Set the time zone switch/button to your local time zone (e.g., Pacific, Mountain, Central, Eastern).
4.3 Initial Synchronization
Once the battery is installed and the time zone is set, the clock will attempt to receive the WWVB atomic time signal. This process may take some time.
- In most areas, the signal is best received at night due to less electronic interference.
- If the clock does not receive the WWVB signal immediately, place it near a window and allow it to sit overnight. It may take up to 48 hours for the clock to set itself.
- Once the signal is received, the clock hands will automatically move to the correct time.

Figure 3: Quick Start Guide and Key Features
This image illustrates the main advantages and quick setup steps for the Sharp Atomic Clock. It highlights that the clock automatically sets and updates atomic time, features an easy-to-read dial, is accurate to the second, and operates on one AA battery (not included).
5. Understanding Atomic Time
Your Sharp Atomic Analog Wall Clock is equipped with an internal receiver that picks up the WWVB radio signal broadcast from Fort Collins, Colorado, by the National Institute of Standards and Technology (NIST).
- This signal transmits the precise atomic time, ensuring your clock is always accurate to within one second.
- The clock automatically synchronizes itself daily to maintain this accuracy.
- Signal reception can be affected by geographical location, atmospheric conditions, and electronic interference. For optimal reception, place the clock away from large metal objects, electronic devices, and in an area with clear access to the signal (e.g., near a window).
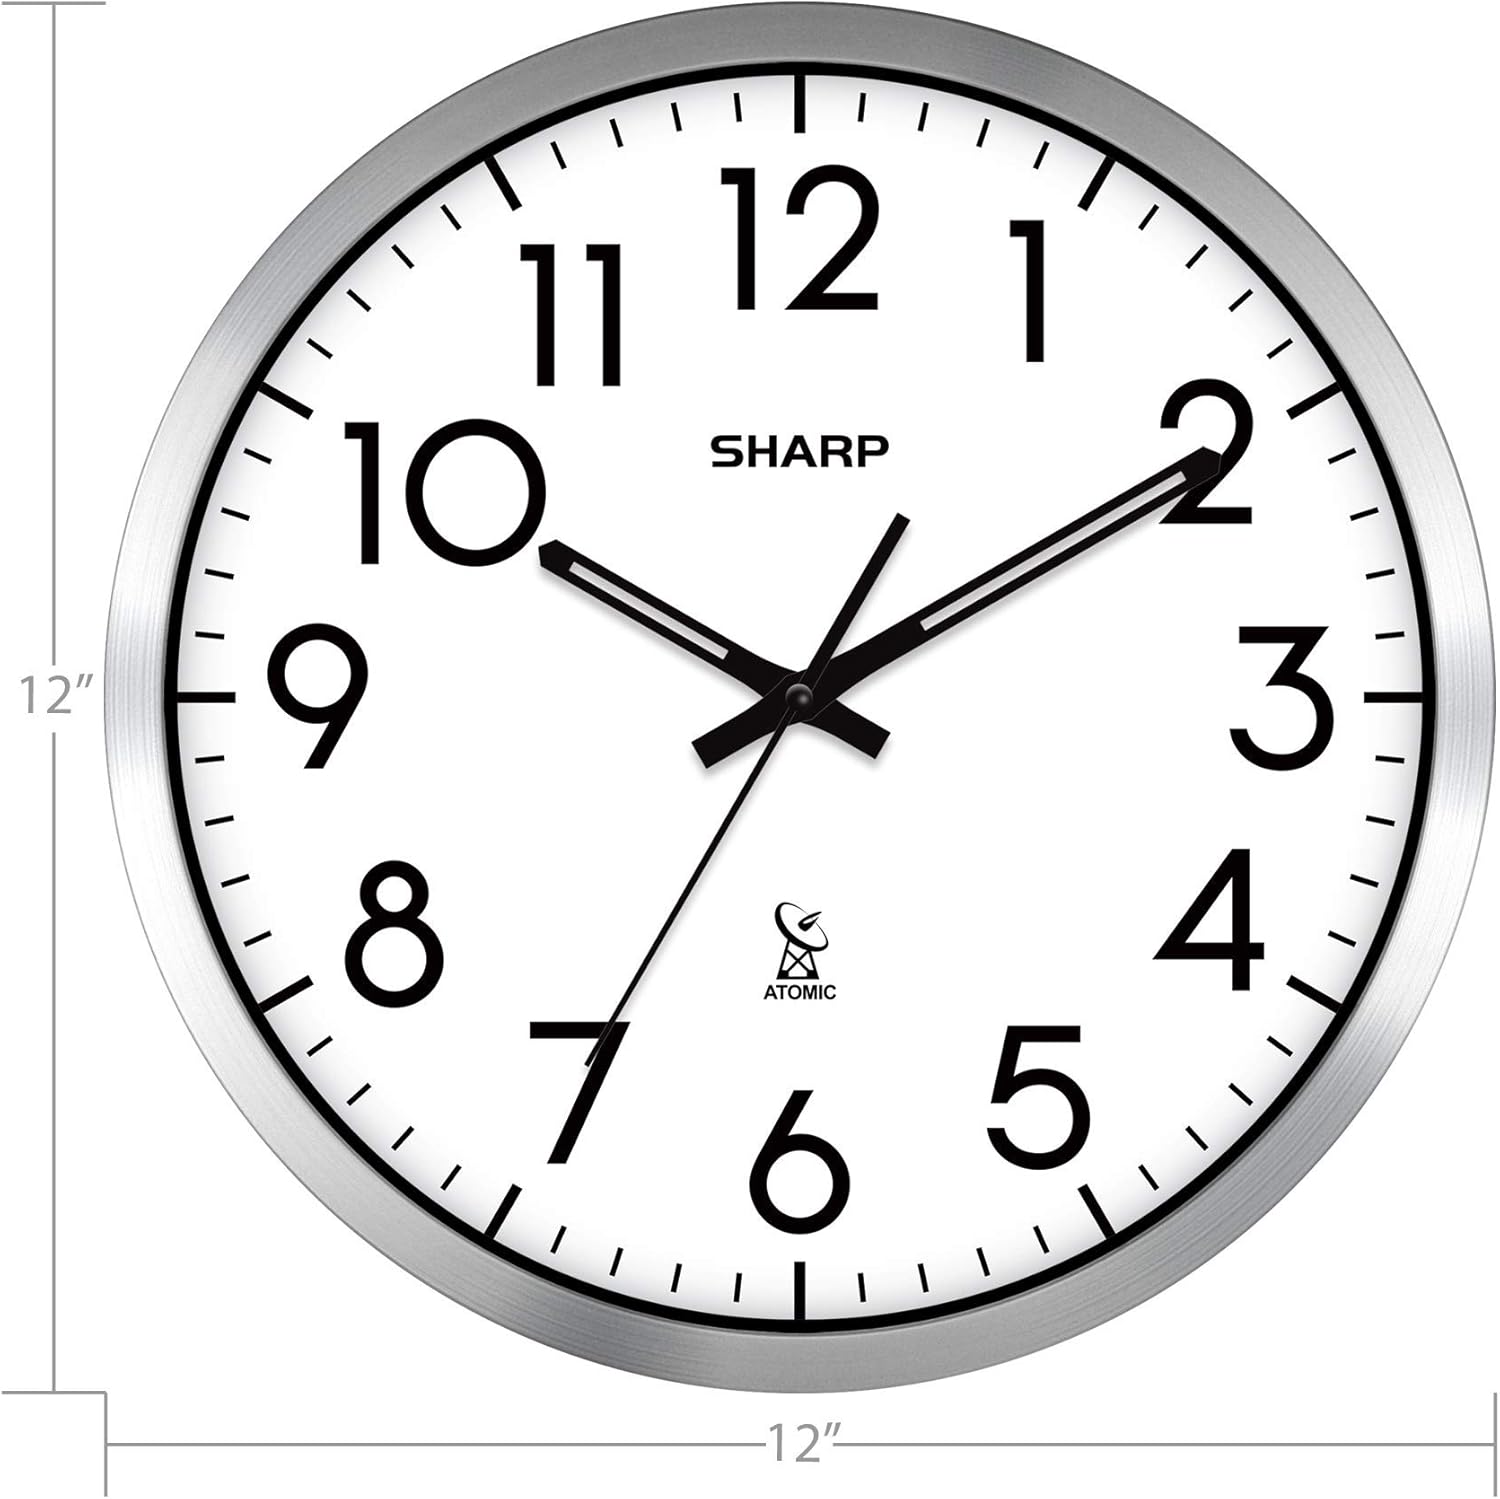
Figure 4: How Atomic Clocks Work
This graphic illustrates the principle behind atomic clocks. It shows the WWVB radio broadcast originating from Fort Collins, Colorado, which transmits the atomic time signal. The diagram also indicates that the signal is typically received more effectively at night due to reduced electronic interference, allowing the clock to set itself by morning.
6. Daylight Saving Time (DST) Adjustment
One of the key benefits of your Sharp Atomic Analog Wall Clock is its automatic adjustment for Daylight Saving Time.
- The clock's internal receiver detects the DST signal from the WWVB broadcast.
- In spring, the clock will automatically move forward one hour.
- In autumn, the clock will automatically move back one hour.
- No manual intervention is required for DST changes.
7. Care and Maintenance
7.1 Cleaning
To clean your clock, use a soft, dry cloth. Do not use abrasive cleaners, solvents, or chemical sprays, as these may damage the clock's finish or internal components.
7.2 Battery Replacement
When the clock hands stop moving or the time becomes inaccurate, it is likely time to replace the battery. Replace with a fresh AA alkaline battery, following the instructions in Section 4.1.
7.3 Placement Considerations
For optimal performance and signal reception, avoid placing the clock:
- Near large metal objects or structures (e.g., metal doors, refrigerators, steel beams) that can block the radio signal.
- Near other electronic devices (e.g., televisions, computers, microwaves) that may cause electromagnetic interference.
- In direct sunlight or areas with extreme temperature fluctuations.
8. Troubleshooting
- Problem: Clock does not set to the correct time.
- Ensure a fresh AA battery is installed correctly.
- Verify that the correct time zone is selected on the back of the clock.
- Place the clock near a window or in an open area, away from electronic interference and large metal objects.
- Allow up to 48 hours for the clock to receive the WWVB signal and set itself, especially during initial setup or after a battery change. Signal reception is often better at night.
- If the clock has been moved, it may need to re-synchronize.
- Problem: Clock hands are stuck or moving erratically.
- Replace the battery with a new, high-quality AA alkaline battery.
- Ensure there are no obstructions preventing the hands from moving freely.
- Problem: Clock does not adjust for Daylight Saving Time.
- Ensure the clock is receiving the atomic signal. Follow the steps for "Clock does not set to the correct time" if needed.
- The DST adjustment is part of the atomic signal; if the signal is not received, DST will not update automatically.
9. Specifications
| Brand | Sharp |
| Model Number | SPC971 (Derived from product link) |
| Color | Silver and White |
| Display Type | Analog |
| Style | Modern |
| Special Feature | Atomic Timekeeping |
| Power Source | Battery (1 x AA, not included) |
| Product Dimensions | 30.48 x 3.81 x 30.48 cm (12 x 1.5 x 12 inches) |
| Item Weight | 1.02 kg (2.25 lbs) |
| Material | Silver (frame) |
| Room Type | Home Office, Kitchen, Living Room, Bedroom, Garage |

Figure 5: Product Dimensions
This image provides a visual representation of the clock's dimensions, indicating that it is 12 inches in both height and width, confirming its compact and standard wall clock size.
10. Warranty and Support
Sharp products are manufactured to high-quality standards. For information regarding warranty coverage, please refer to the warranty card included with your purchase or visit the official Sharp website.
If you encounter any issues not covered in this manual or require further assistance, please contact Sharp customer support. Contact details can typically be found on the product packaging or the official Sharp support website.
Please retain your proof of purchase for warranty claims.


