
Introduction
Thank you for choosing the MOUNTUP MU0008 Tilting TV Wall Mount. This manual provides detailed instructions for safe and proper installation, operation, and maintenance of your TV wall mount. Please read all instructions carefully before beginning installation to ensure a secure and optimal viewing experience. If you have any questions or require assistance, please contact our customer support.
Safety Information
WARNING: Failure to read and follow these instructions may result in personal injury, property damage, or voiding your warranty. This product is designed for installation by qualified personnel only. If you do not understand these instructions or have doubts about the safety of the installation, please consult a qualified installer.
- Do not install this product on drywall alone. It must be mounted to wood studs, solid concrete, or brick walls.
- Ensure the mounting surface can safely support the combined weight of the mount and your television.
- Do not exceed the maximum weight capacity of 132 lbs (60 kg).
- Use only the hardware provided or specified by MOUNTUP.
- Always check for electrical wires, water pipes, and gas lines in the wall before drilling.
- Keep children and pets away during installation.
- Periodically check that the mount is secure and all fasteners are tight.
Product Overview
The MOUNTUP MU0008 is a tilting TV wall mount designed for flat screen and curved TVs ranging from 37 to 82 inches. It offers a low-profile design, sitting just 1.5 inches from the wall, while providing a 0° to -10° downward tilt for glare reduction and optimal viewing angles.
Key Features
- Universal Compatibility: Supports most 37-82 inch flat or curved TVs up to 132 lbs (60 kg).
- VESA Compliance: Fits VESA mounting patterns from 100x100mm to 600x400mm.
- Space-Saving Design: Mounts TV just 1.5 inches from the wall for a sleek appearance.
- Adjustable Tilt: Allows downward tilt of 0° to -10° to reduce glare and improve viewing.
- Robust Construction: Made from solid steel for strong and stable support.
- Easy Installation: Features a two-piece frame assembly and a locking system for quick setup.
- Wide Stud Spacing: Designed for wood studs up to 24 inches apart.
Specifications
| Model Number | MU0008 |
| Screen Size Compatibility | 37 - 82 inches |
| Weight Capacity | 132 lbs (60 kg) |
| VESA Compatibility | 100x100mm, 200x200mm, 200x300mm, 300x200mm, 300x300mm, 400x300mm, 400x200mm, 400x400mm, 600x400mm |
| Mounting Type | Wall Mount |
| Movement Type | Tilt (0° to -10° downward) |
| Profile from Wall | 1.5 inches |
| Material | Metal |
| Color | Black |
| Wall Type Compatibility | Wood studs (up to 24"), Solid concrete, Brick (anchors required for concrete/brick). Not for drywall alone. |
Package Contents
Please verify that all components are present and undamaged before installation. If any parts are missing or damaged, please contact MOUNTUP customer service.
- Wall Plate Assembly
- TV Brackets (2x)
- Hardware Kit (various screws, spacers, washers, concrete anchors)
- Instruction Manual
Note: M8x45mm TV screws are not included in the standard package but can be provided upon request if needed for your TV model.
Installation Instructions
Follow these steps carefully for a safe and secure installation.
Pre-Installation Checks
- Check TV VESA Pattern: Ensure your TV's VESA pattern (mounting holes on the back) falls within 100x100mm to 600x400mm.
- Check TV Weight: Confirm your TV weighs no more than 132 lbs (60 kg).
- Identify Wall Type: Determine if your wall is wood stud, solid concrete, or brick. This mount is not for drywall alone.
Step-by-Step Installation
1. Attach TV Brackets to TV
Carefully place your TV face down on a soft, clean surface. Attach the two vertical TV brackets to the back of your TV using the appropriate screws, washers, and spacers from the hardware kit. Ensure the brackets are centered and securely fastened. The hooks on the brackets should face upwards.

Image: TV with vertical mounting brackets attached.
2. Assemble and Position Wall Plate
The wall plate comes in two pieces for easier handling and wider stud compatibility. Assemble the two pieces using the provided screws. Determine the desired height and horizontal position for your TV. Use a stud finder to locate wood studs if applicable. Mark the drilling locations on the wall.

Image: Two-piece frame assembly for the wall plate.

Image: Wall plate dimensions and stud compatibility for easy TV centering.
3. Attach Wall Plate to Wall
Drill pilot holes at the marked locations. For wood stud installation, use the lag bolts directly. For concrete or brick walls, insert the concrete anchors into the pilot holes before securing the lag bolts. Ensure the wall plate is level before tightening all bolts securely.
Video: Official MOUNTUP MU0008 TV Wall Mount Installation Video. This video demonstrates the step-by-step process of attaching the wall plate to the wall, including considerations for different wall types.
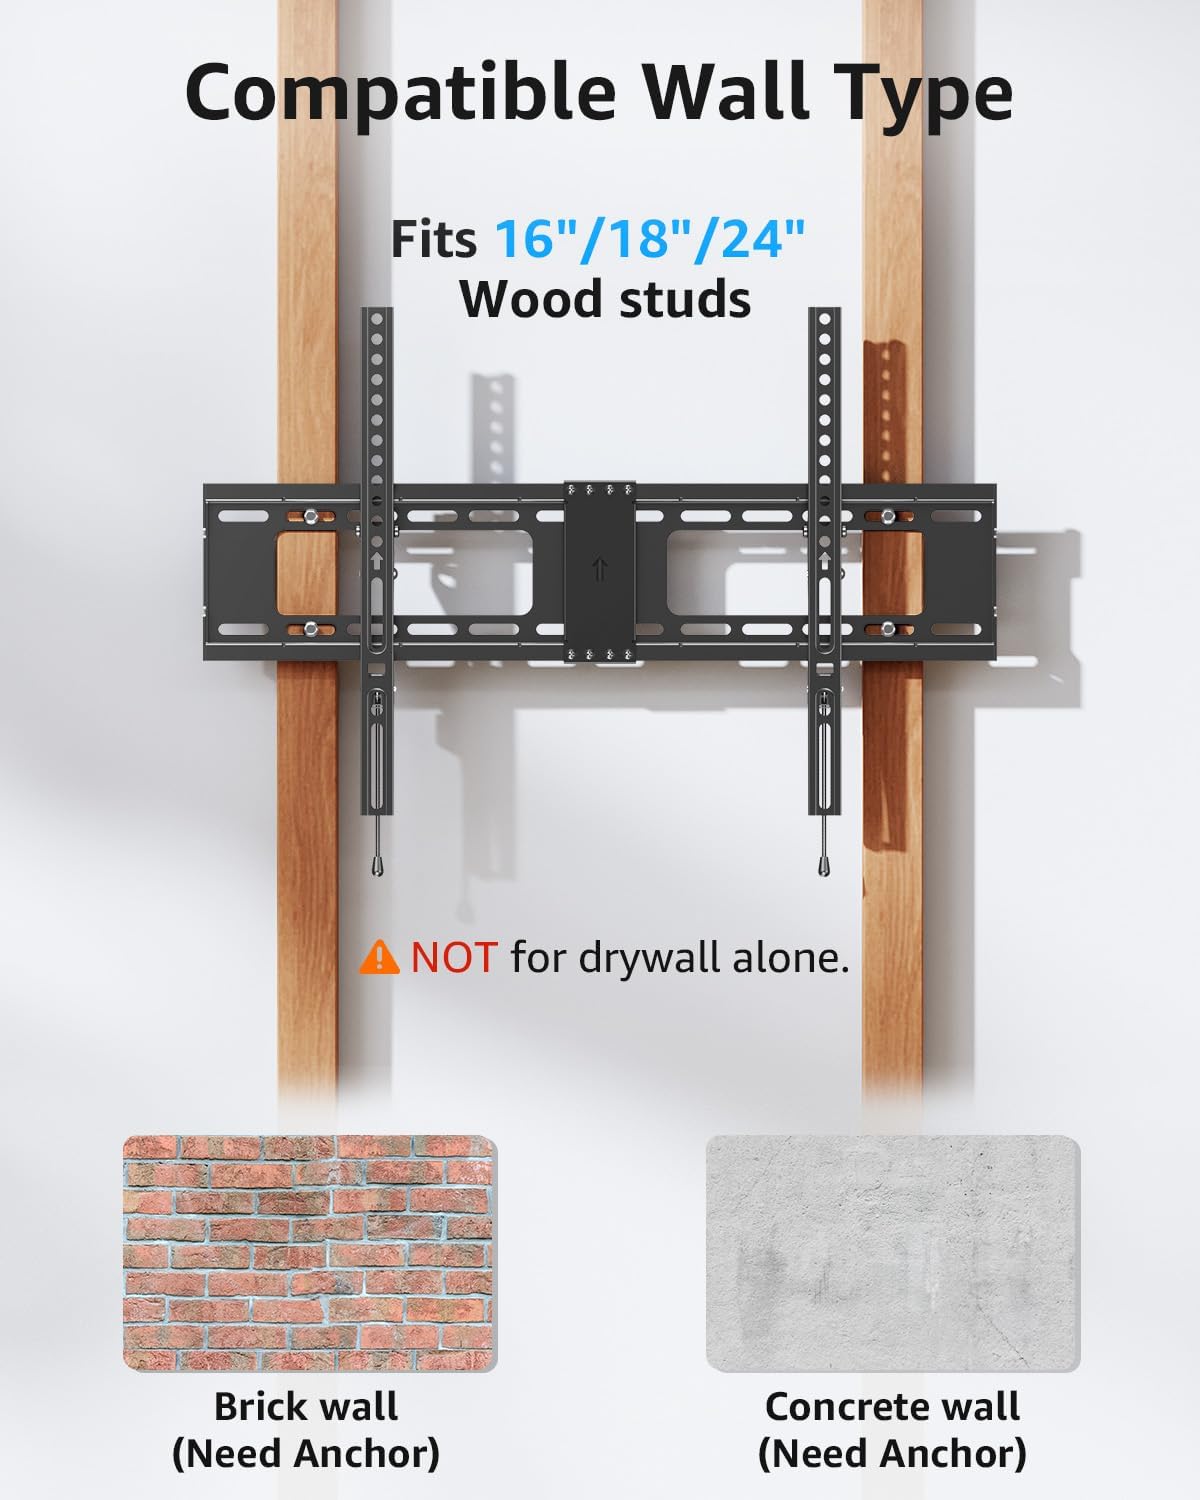
Image: Compatible wall types for installation, highlighting the need for anchors in brick and concrete.
4. Hang TV on Wall Plate
With assistance, carefully lift the TV and hook the TV brackets onto the top edge of the wall plate. Gently lower the TV until the brackets are fully seated on the wall plate. Ensure the TV is centered and stable.

Image: Easy installation process, showing the TV being mounted onto the wall plate.
5. Secure TV to Wall Plate
Locate the safety locking pull straps at the bottom of the TV brackets. Pull these straps downwards to engage the locking mechanism, securing the TV to the wall plate. This prevents accidental dislodgement.

Image: Handy locking system for easy and secure attachment.

Image: Anti-drop edges design to prevent the TV from sliding off.
Operation
Adjusting Tilt Angle
The MOUNTUP MU0008 allows for a downward tilt adjustment of 0° to -10°. To adjust the tilt, loosen the tilt adjustment knobs located on the side of the TV brackets. Tilt the TV to your desired angle, then tighten the knobs to secure the position. This feature helps reduce glare from windows or lights.

Image: Anti-glare design with 0° to -10° tilt capability.
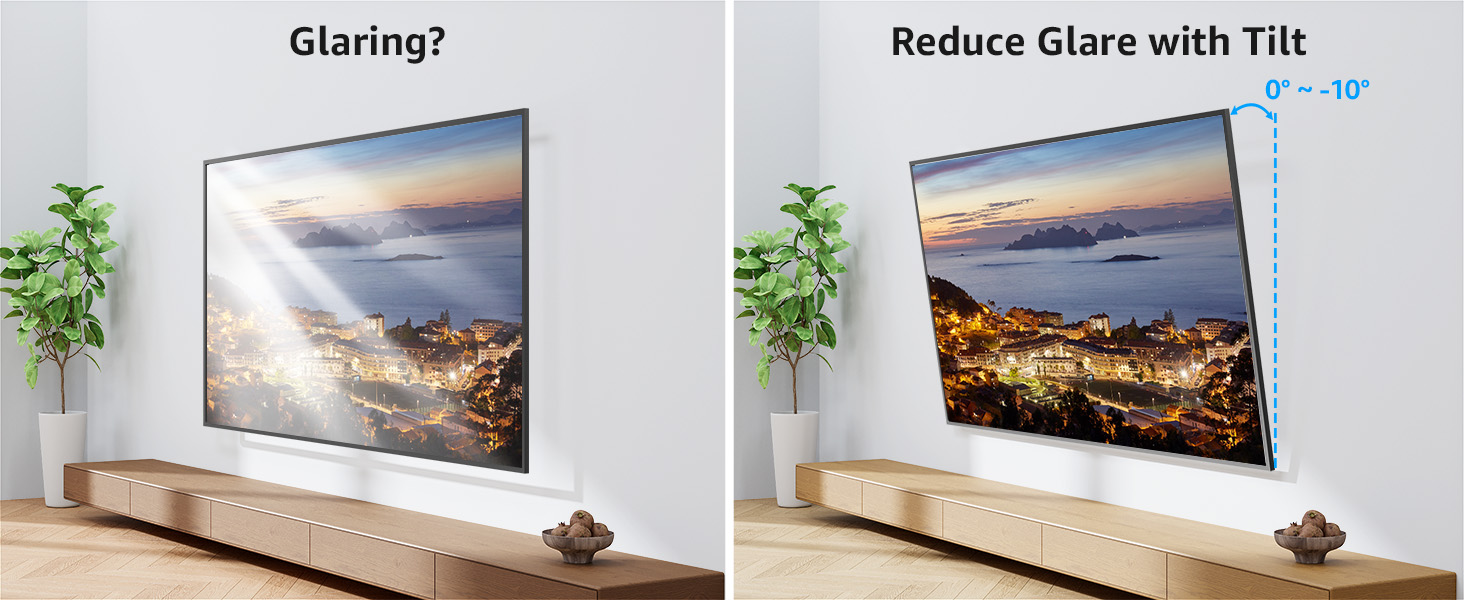
Image: Demonstrating how tilting the TV reduces glare.


