Introduction
Welcome to your new EZICLEAN Map Robot Vacuum. This manual provides essential information for the setup, operation, and maintenance of your device to ensure optimal performance and longevity. Please read this manual thoroughly before using the robot vacuum.
Important Safety Information
To reduce the risk of injury or damage, always observe basic safety precautions when installing, using, and maintaining your robot vacuum.
- Read all instructions before operating the appliance.
- Do not allow children to play with the robot vacuum.
- Use only as described in this manual.
- Do not use the robot vacuum in wet environments or on wet surfaces.
- Keep hair, loose clothing, fingers, and all parts of the body away from openings and moving parts.
- Do not pick up anything that is burning or smoking, such as cigarettes, matches, or hot ashes.
- Do not use without dust bin and/or filters in place.
- Ensure the charging base is placed on a level surface against a wall, with clear space around it.
Package Contents
Verify that all items are present in the package:
- EZICLEAN Map Robot Vacuum
- Charging Base
- Power Adapter
- Side Brushes (2 pairs)
- High-Efficiency Filter (pre-installed)
- Cleaning Tool
- User Manual
Product Overview
Familiarize yourself with the main components of your EZICLEAN Map Robot Vacuum.
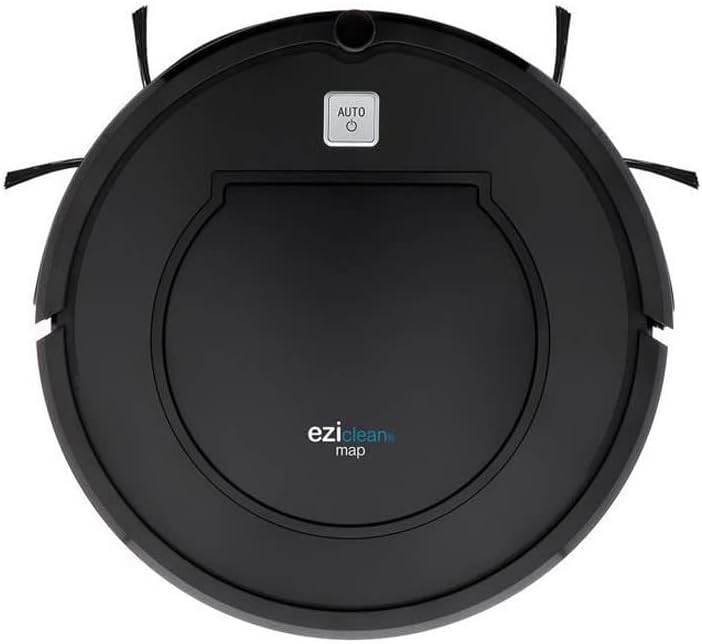
Figure 1: Top view of the EZICLEAN Map Robot Vacuum. This image displays the circular robot vacuum from above, highlighting the central dustbin access panel and the 'AUTO' power button. The two side brushes are visible extending from the front sides of the unit.
The robot features a compact, circular design with integrated sensors for navigation and obstacle avoidance. The main power button is located on the top surface, providing easy access for starting and stopping cleaning cycles.
Setup
1. Charging Base Placement
Place the charging base against a wall in an open, uncluttered area. Ensure there is at least 1 meter (3 feet) of clear space to the front and 0.5 meters (1.5 feet) to each side of the charging base. Plug the power adapter into the charging base and then into a wall outlet.
2. Initial Charging
Place the robot vacuum on the charging base, ensuring the charging contacts align. The indicator light on the robot will illuminate to show it is charging. For first-time use, charge the robot for at least 5-6 hours until fully charged.
Operating Your Robot Vacuum
Starting and Stopping
- To Start: Press the 'AUTO' button on the top of the robot. The robot will begin cleaning in automatic mode.
- To Pause: Press the 'AUTO' button again during cleaning.
- To Stop: Press and hold the 'AUTO' button for a few seconds, or place the robot back on its charging base.
Cleaning Modes
The EZICLEAN Map Robot Vacuum is designed to clean various floor types efficiently.
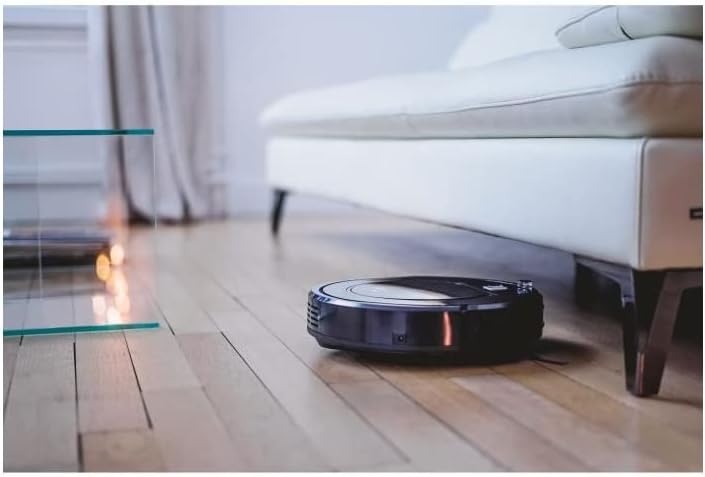
Figure 2: The robot vacuum cleaning under a sofa. This image shows the low-profile design of the robot, allowing it to easily access and clean dust and debris in hard-to-reach areas beneath furniture.

Figure 3: The robot vacuum operating in a bedroom. The robot is shown on a light-colored wooden floor, demonstrating its ability to navigate and clean open spaces effectively.
Navigation
The robot uses intelligent navigation to cover up to 120m² efficiently. It is equipped with sensors to detect obstacles and prevent falls.

Figure 4: The robot vacuum performing edge cleaning. This image illustrates the robot's capability to clean close to walls and baseboards, ensuring thorough coverage of the room.

Figure 5: The robot vacuum cleaning near a sleeping cat. This image highlights the quiet operation of the robot, allowing it to clean without disturbing pets or household activities.
Maintenance
Regular maintenance is crucial for the optimal performance and longevity of your robot vacuum.
1. Emptying the Dustbin
Empty the dustbin after each cleaning cycle or when the 'Dustbin Full' indicator (if available) illuminates. Open the top cover, remove the dustbin, and dispose of the collected debris.
2. Cleaning Brushes
Periodically check and clean the main brush and side brushes. Remove any tangled hair or debris using the provided cleaning tool. Replace worn-out side brushes as needed.
3. Cleaning Filters
Tap the high-efficiency filter to remove dust. Do not wash the high-efficiency filter with water. The foam filter can be rinsed with water; ensure it is completely dry before reinserting.
4. Cleaning Sensors
Wipe the cliff sensors, wall sensors, and charging contacts with a clean, dry cloth to ensure proper functionality.
Troubleshooting
If your robot vacuum encounters an issue, refer to the table below for common problems and their solutions.
| Problem | Possible Cause | Solution |
|---|---|---|
| Robot does not start | Low battery; Power button not pressed; Obstruction | Charge the robot; Press the 'AUTO' button; Clear any obstructions. |
| Robot cannot find charging base | Charging base obstructed; Robot too far from base | Ensure clear space around base; Manually place robot closer to base. |
| Poor cleaning performance | Full dustbin; Clogged filter; Tangled brushes | Empty dustbin; Clean/replace filter; Clean brushes. |
| Robot gets stuck frequently | Loose cables/rugs; Narrow spaces | Clear obstacles; Block off problematic areas. |
Technical Specifications
| Specification | Value |
|---|---|
| Brand | EZICLEAN |
| Model Number | EZI3760190144980 |
| Color | Black |
| Product Dimensions (L x W x H) | 32 x 32 x 8.5 cm |
| Item Weight | 2.8 Kilograms |
| Material | Plastic |
| Noise Level | 60 dB |
| Battery Life | 90 minutes |
| Special Feature | Cordless |
| Filter Type | Cartridge |
| Power Source | Battery Powered |
| Included Components | Filter, Battery |
Warranty and Customer Support
Your EZICLEAN Map Robot Vacuum comes with a standard manufacturer's warranty. For detailed warranty information, please refer to the warranty card included in your product packaging or visit the official EZICLEAN website. If you encounter any issues not covered in the troubleshooting section or require further assistance, please contact EZICLEAN customer support through their official channels. Keep your purchase receipt as proof of purchase for warranty claims.


