
1. Introduction
Thank you for purchasing the Jensen Portable CD-120 Personal CD Player. This device is designed to provide portable audio playback from compact discs and features an integrated FM radio. It includes 120-second anti-skip protection for uninterrupted listening, a bass boost function for enhanced audio, and a digital LCD display for easy navigation. Please read this manual thoroughly to ensure proper use and care of your new CD player.
2. Package Contents
- Jensen Portable CD-120 Personal CD Player
- Sport Stereo Earbuds
- Owner's Manual (this document)
3. Product Overview
Familiarize yourself with the components and controls of your CD player.

Figure 3.1: Front view of the Jensen Portable CD-120 Personal CD Player, showing the main unit and connected earbuds. The display and control buttons are visible on the front panel.

Figure 3.2: Side view of the CD-120, illustrating the volume control dial, 3.5mm headphone jack, DC power input (4.5V), and the FM/CD mode switch.
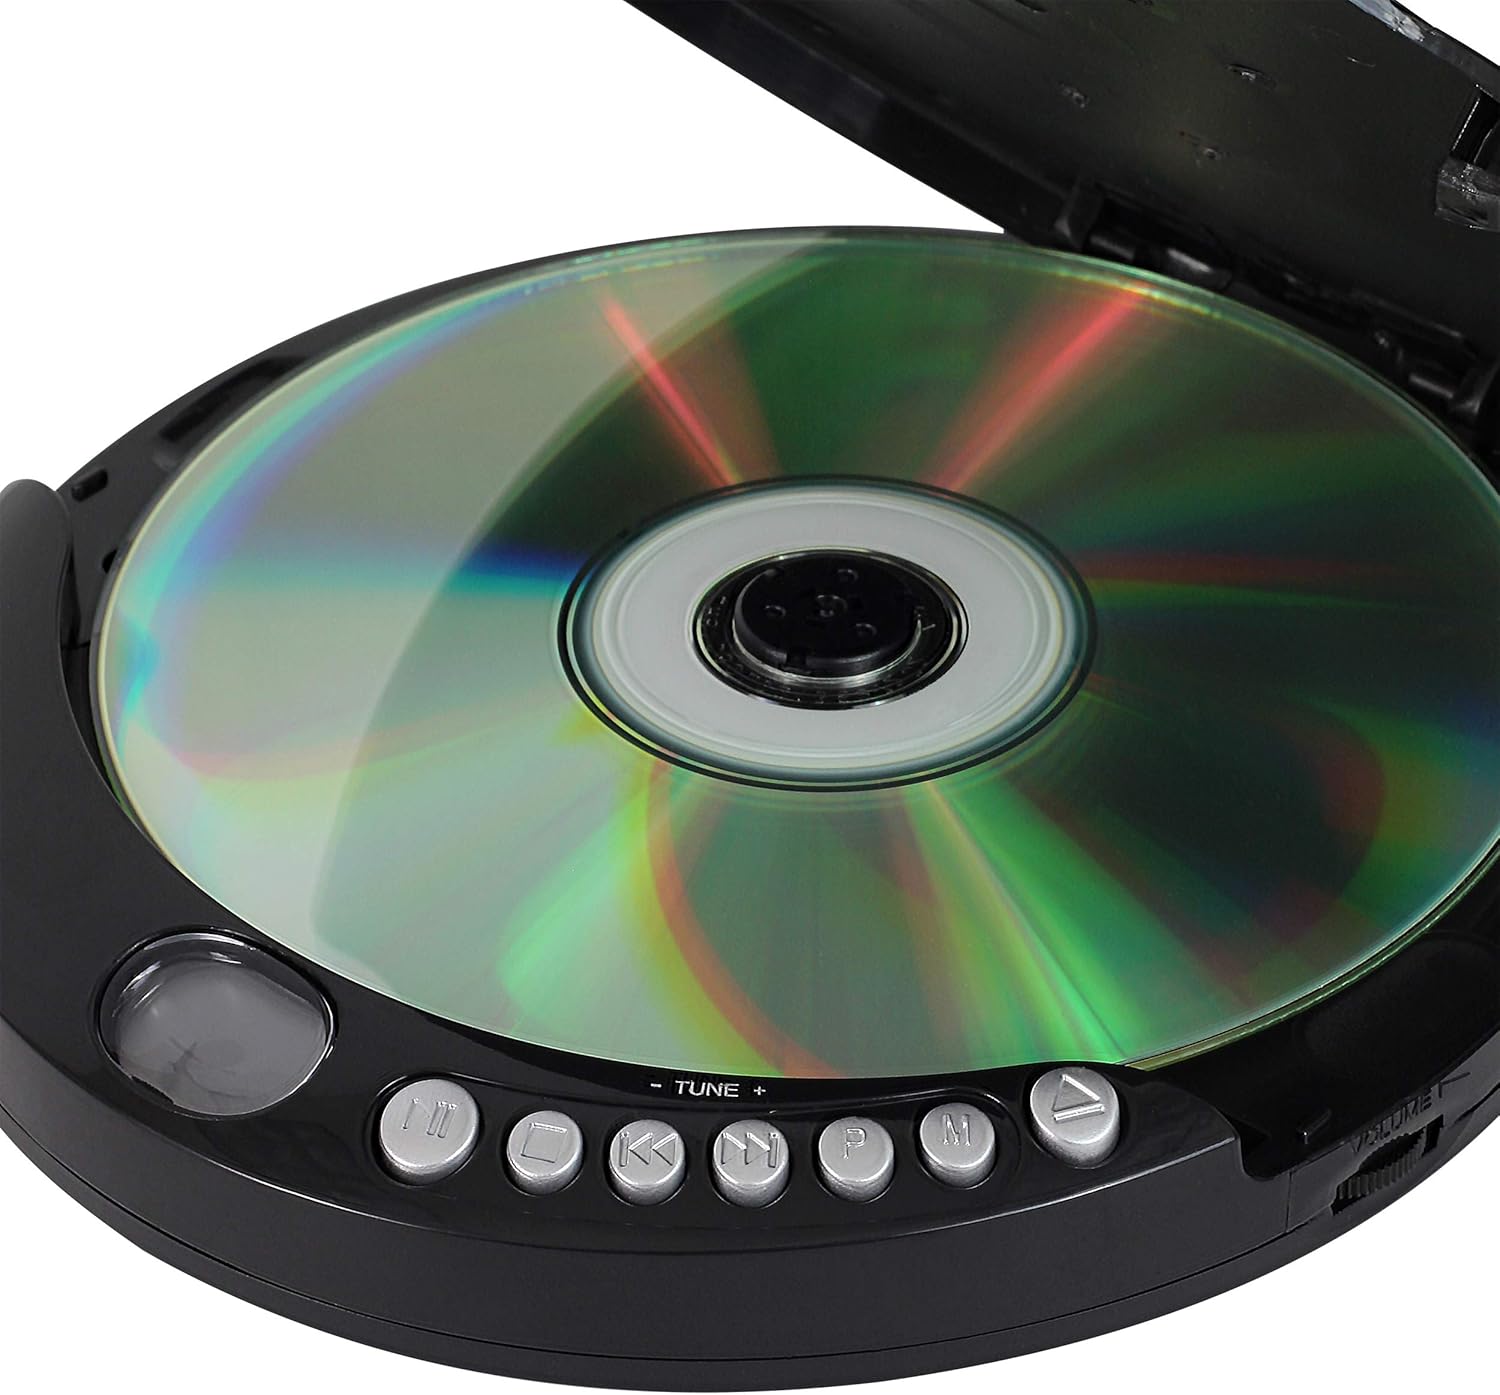
Figure 3.3: The CD-120 with its lid open, revealing the CD spindle and laser assembly. This is where a compact disc is placed for playback.

Figure 3.4: A diagram highlighting key features of the Jensen Portable CD-120, including 120-second anti-skip protection, CD-R/RW compatibility, skip/search functions, repeat modes, multi-function LCD display, FM scan receiver, stereo headphone jack, auto power off, bass boost, and programmable memory.
Controls and Indicators:
- LCD Display: Shows track number, time, FM frequency, and various mode indicators.
- Play/Pause Button (►/−): Starts or pauses CD playback.
- Stop Button (■): Stops CD playback.
- Skip/Search Buttons (◀◀/▶▶): Skips to the previous/next track or searches within a track.
- Repeat Button: Cycles through repeat modes (repeat one, repeat all).
- Program Button: Used for programming CD playback order.
- Mode Button: Selects Intro or Random play modes.
- Bass Boost Switch: Activates or deactivates bass enhancement.
- Volume Control Dial: Adjusts the audio output level.
- Headphone Jack (3.5mm): Connects headphones or external audio devices.
- DC In Jack (4.5V): Connects an optional AC power adapter (not included).
- FM/CD Switch: Selects between CD playback and FM radio mode.
4. Setup
4.1 Powering the Unit
The CD-120 can be powered by batteries or an optional AC adapter.
- Battery Installation: Open the battery compartment on the bottom of the unit. Insert two (2) AA batteries (not included), ensuring correct polarity (+/-). Close the compartment securely.
- AC Adapter (Optional): If using an AC adapter (not included), plug it into the DC In 4.5V jack on the side of the unit and then into a standard wall outlet.
Note:
- Remove batteries if the unit will not be used for an extended period.
- The unit features an automatic power-off function to conserve battery life.
4.2 Connecting Earbuds
Plug the included Sport Stereo Earbuds into the 3.5mm Headphone Jack on the side of the unit. Ensure the plug is fully inserted for proper audio output.
5. Operating Instructions
5.1 Playing a CD
- Slide the FM/CD switch to the CD position.
- Open the CD compartment lid by gently pressing the OPEN button/latch.
- Place a CD onto the center spindle with the label side facing up. Gently press the CD until it clicks into place.
- Close the CD compartment lid firmly.
- Press the Play/Pause (►/−) button to begin playback. The LCD display will show the track number and elapsed time.
- To pause playback, press the Play/Pause (►/−) button. Press it again to resume.
- To stop playback, press the Stop (■) button.
- To skip to the next track, press the Skip/Search (▶▶) button.
- To go back to the beginning of the current track, press the Skip/Search (◀◀) button once. Press it twice to go to the previous track.
- To search rapidly forward or backward within a track, press and hold the Skip/Search (▶▶) or (◀◀) button during playback.
- Adjust the Volume Control Dial to your desired listening level.
5.2 Anti-Skip Protection
The CD-120 features 120-second anti-skip protection. This function buffers audio data, allowing for continuous playback even during minor shocks or vibrations. If a significant shock occurs, the unit may briefly pause to re-buffer data before resuming playback.
5.3 Repeat Modes
During CD playback, press the Repeat button to cycle through the following modes:
- Repeat 1: Repeats the current track.
- Repeat All: Repeats all tracks on the CD.
5.4 Intro and Random Play
During CD playback, press the Mode button to select:
- Intro: Plays the first few seconds of each track.
- Random: Plays tracks in a random order.
5.5 Programmable Memory
You can program up to 20 tracks to play in a specific order:
- In stop mode, press the Program button. The program indicator will flash.
- Use the Skip/Search (◀◀/▶▶) buttons to select the desired track.
- Press the Program button again to confirm the selection.
- Repeat steps 2 and 3 to add more tracks to the program list.
- Press the Play/Pause (►/−) button to start programmed playback.
5.6 FM Radio Operation
- Slide the FM/CD switch to the FM position.
- Press the Play/Pause (►/−) button to initiate an automatic scan for FM stations. The radio will scan and stop at the next available station.
- Use the Skip/Search (◀◀/▶▶) buttons to manually tune to a specific frequency or to jump to the next/previous strong station.
- Adjust the Volume Control Dial to your desired listening level.
5.7 Bass Boost
Slide the Bass Boost switch to the ON position to enhance the low-frequency audio output. Slide it to OFF to disable this feature.
6. Maintenance
- Cleaning the Unit: Wipe the exterior of the unit with a soft, damp cloth. Do not use abrasive cleaners or solvents.
- Cleaning the CD Lens: If CD playback becomes erratic, the laser lens may be dirty. Use a specialized CD lens cleaning kit (not included) to clean the lens. Do not touch the lens with your fingers.
- CD Care: Handle CDs by their edges. Keep them in their cases when not in use to prevent scratches and dust accumulation.
- Battery Care: Remove batteries if the unit is not used for extended periods to prevent leakage.
7. Troubleshooting
| Problem | Possible Cause | Solution |
|---|---|---|
| Unit does not power on. | Batteries are dead or incorrectly inserted. AC adapter not connected or faulty. | Replace batteries, check polarity. Ensure AC adapter is securely connected and functional. |
| No sound from headphones. | Headphones not properly plugged in. Volume too low. Headphones faulty. | Ensure headphones are fully inserted. Increase volume. Test with another pair of headphones. |
| CD skips or does not play. | CD is dirty or scratched. CD not properly seated. Laser lens is dirty. Anti-skip buffer overwhelmed. | Clean or replace CD. Re-seat CD. Clean laser lens with a cleaning kit. Avoid excessive movement during playback. |
| FM radio reception is poor. | Weak signal. Interference. | Relocate the unit to improve reception. Avoid sources of electronic interference. |
| Buttons are unresponsive. | Unit may be frozen. | Remove batteries or disconnect AC adapter for a few minutes, then reconnect. |
8. Specifications
- Model: CD-120
- Brand: Jensen
- Product Dimensions: 1 x 1 x 1 inches
- Item Weight: 9.1 ounces
- Power Source: 2 x AA batteries (not included) or 4.5V DC AC adapter (not included)
- Connectivity Technology: CD 120 second Anti Skip Protection
- Special Feature: Portable
- Color: Black
- Manufacturer: Jensen
- Date First Available: October 21, 2019
9. Warranty and Support
For warranty information or technical support, please refer to the warranty card included with your product or visit the official Jensen website. You may also contact Jensen customer service directly for assistance.
Jensen Customer Service: Please refer to the contact information provided on the product packaging or the official Jensen website.