1. Product Overview
This manual provides essential information for the safe and efficient use of your maXpeedingrods ZY1020 500W 24V DC Brush Electric Motor. This motor is designed for various DIY electric projects, including scooters, e-bikes, go-karts, and mowers. Please read this manual thoroughly before installation and operation.

Figure 1.1: maXpeedingrods ZY1020 500W 24V DC Brush Electric Motor. This image shows the complete motor assembly with its integrated mounting bracket and electrical wiring.

Figure 1.2: Wide range of applications for the ZY1020 motor. This image illustrates the motor being used in a lawnmower, a scooter, and a go-kart, highlighting its versatility for DIY projects.
2. Safety Information
Always observe the following safety precautions to prevent injury or damage to the motor and equipment.
- Electrical Safety: Ensure all wiring is correctly connected and insulated. Disconnect power before performing any installation, maintenance, or troubleshooting.
- Voltage and Current: Only operate the motor with a 24V DC power supply. Exceeding the rated voltage or current can cause damage to the motor.
- Mounting: Securely mount the motor using the provided bracket. Loose mounting can lead to vibration, noise, and potential failure.
- Moving Parts: Keep hands, clothing, and tools clear of moving parts (e.g., sprocket, chain) during operation.
- Ventilation: Ensure adequate ventilation around the motor to prevent overheating.
- Environmental Conditions: Avoid exposing the motor to excessive moisture, dust, or extreme temperatures.
3. Product Features
- Application: Widely used in Electric Bike, Scooter, Go-kart, Mower, and Tricycle applications requiring a 500W motor.
- Motor Type: ZY1020 brushed DC motor.
- Power Output: 500W.
- Voltage: 24V DC.
- Rated Speed: 2500 RPM.
- Rated Current: 26.7 Amp.
- Dimensions: Diameter 107.5mm (4.23 inches), Length 133mm (5.24 inches).
- Replacement: Designed as a direct replacement for damaged or rusty DC geared motors.

Figure 3.1: Close-up of the motor's high-hardness sprocket. This image highlights the robust construction of the output shaft and sprocket, designed for reliable power transmission.
4. Specifications
Detailed technical specifications for the ZY1020 motor:
| Specification | Value |
|---|---|
| Model | ZY1020 |
| Motor Type | DC Brush Motor |
| Rated Voltage | 24V DC |
| Rated Power | 500W |
| Rated Speed | 2500 RPM |
| Rated Current | 26.7 Amp |
| Diameter | 107.5mm (4.23 inches) |
| Length | 133mm (5.24 inches) |
| Item Weight | 4200 Grams |
| Sprocket Type | 11 Teeth Sprocket, #25 Chain Compatible |
| Material | Lead (internal components) |
| Part Number | NJ47 |

Figure 4.1: Detailed dimensions of the ZY1020 electric motor. This diagram provides precise measurements for diameter, length, and mounting bracket hole spacing, crucial for proper installation.
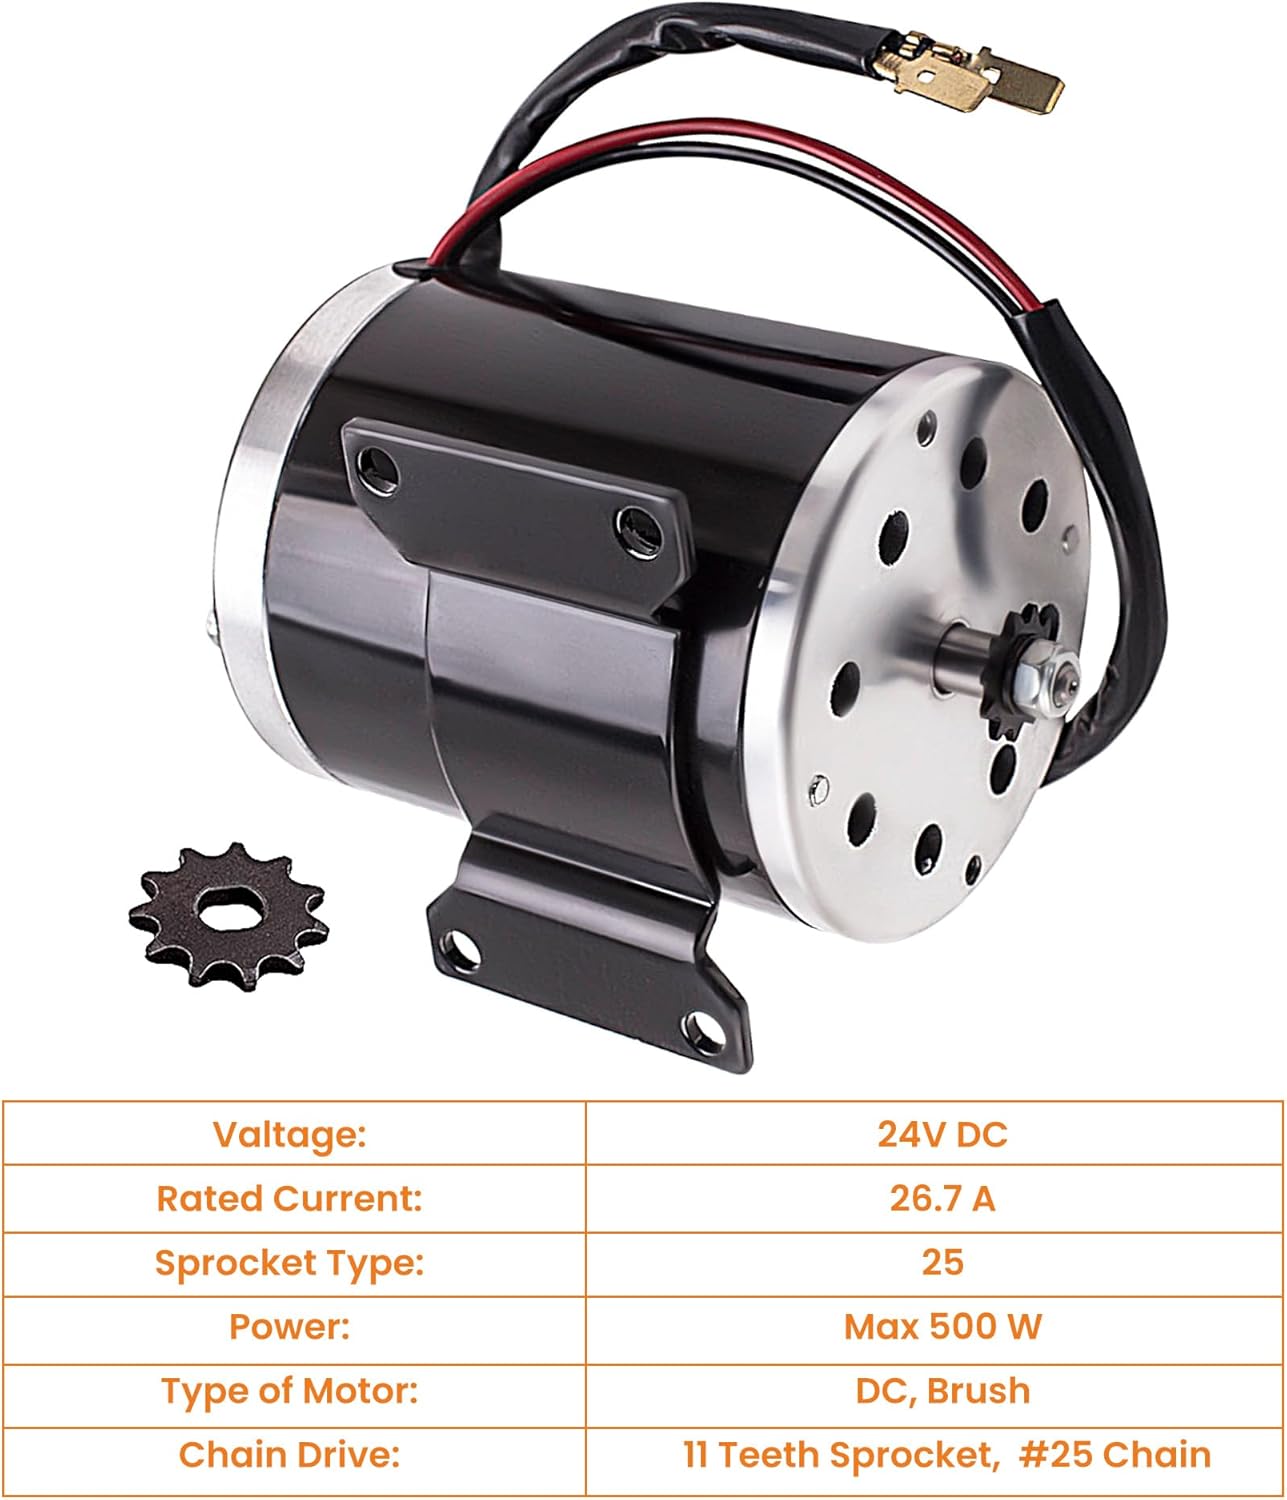
Figure 4.2: ZY1020 motor with key specifications highlighted. This image visually reinforces the voltage, rated current, power, and sprocket type of the motor.
5. Installation
5.1 Pre-Installation Check
- Verify Compatibility: Before purchasing or installing, confirm that the motor's dimensions, voltage, and power specifications match your application's requirements.
- Inspect Components: Check the motor for any visible damage from shipping. Ensure the sprocket is securely attached and the wiring is intact.
5.2 Mounting the Motor
- Identify a stable and secure mounting location on your scooter, e-bike, go-kart, or other application.
- Align the motor's integrated bracket with the mounting surface.
- Use appropriate bolts, washers, and nuts (not included) to firmly secure the motor to the frame. Ensure all fasteners are tightened to prevent movement or vibration during operation.

Figure 5.1: Close-up view of the motor's robust mounting bracket. This image shows the welded bracket with pre-drilled holes for secure attachment to a frame.
5.3 Electrical Wiring
- Ensure the power source is disconnected before making any electrical connections.
- Connect the motor's positive (+) wire (typically red) to the positive output of your 24V DC power supply or motor controller.
- Connect the motor's negative (-) wire (typically black) to the negative output of your 24V DC power supply or motor controller.
- If using a motor controller, refer to the controller's specific wiring diagram for proper connection.
- Double-check all connections for tightness and proper insulation to prevent short circuits.

Figure 5.2: Various close-up views of the motor components. This composite image shows the sprocket, the motor's top plate with ventilation holes, the mounting bracket, and the electrical connections, providing visual aid for installation.
6. Operation
Once the motor is securely mounted and wired, you can proceed with operation.
- Ensure all safety checks have been performed and there are no obstructions around the motor or connected drivetrain.
- Apply 24V DC power to the motor. If using a controller, gradually increase the throttle or power input.
- The motor will begin to rotate, reaching its rated speed of 2500 RPM under optimal conditions.
- Monitor the motor for any unusual noises, excessive heat, or vibrations during initial operation. If any issues are detected, immediately disconnect power and refer to the troubleshooting section.
7. Maintenance
Regular maintenance helps ensure the longevity and optimal performance of your motor.
- Cleaning: Periodically clean the exterior of the motor to remove dust, dirt, and debris. Ensure ventilation holes are clear.
- Brush Inspection: As a brushed motor, the carbon brushes will wear over time. Inspect them periodically (e.g., every 100-200 hours of operation, depending on usage) and replace them if they are significantly worn. Refer to a qualified technician for brush replacement if unsure.
- Connection Check: Regularly inspect all electrical connections for tightness and corrosion.
- Mounting Check: Verify that the motor remains securely mounted and all fasteners are tight.
- Lubrication: The motor is generally maintenance-free regarding internal lubrication. Do not attempt to lubricate internal components unless specifically instructed by a qualified technician.
8. Troubleshooting
This section addresses common issues you might encounter with your motor.
| Problem | Possible Cause | Solution |
|---|---|---|
| Motor does not start | No power supply; Incorrect wiring; Blown fuse/circuit breaker; Faulty controller; Worn brushes. | Check power source and connections; Verify wiring polarity; Check fuses/breakers; Test controller; Inspect and replace brushes if necessary. |
| Motor runs slowly or with low power | Low voltage; High load; Worn brushes; Damaged windings. | Check battery/power supply voltage; Reduce load; Inspect and replace brushes; Consult a technician for winding inspection. |
| Motor overheats | Excessive load; Insufficient ventilation; Prolonged operation; Internal friction. | Reduce load; Ensure clear airflow around motor; Allow motor to cool down; Check for mechanical binding. |
| Unusual noise or vibration | Loose mounting; Damaged bearings; Obstruction in drivetrain; Worn brushes/commutator. | Tighten mounting bolts; Inspect bearings; Clear any obstructions; Inspect brushes and commutator. |
If you are unable to resolve an issue using this troubleshooting guide, please contact customer support.
9. Warranty and Support
maXpeedingrods warrants its products against manufacturing defects in materials and workmanship for 1 year from the date of purchase. This warranty covers defects that arise under normal use and conditions.
The warranty does not cover damage caused by improper installation, misuse, neglect, unauthorized modifications, or normal wear and tear of consumable parts like carbon brushes.
For technical support, warranty claims, or any questions regarding your maXpeedingrods ZY1020 motor, please contact maXpeedingrods customer service. They provide unlimited technical support and customer service.
Contact Information: Please refer to the contact details provided with your purchase or visit the official maXpeedingrods website for the most current support information.


