1. Introduction
Thank you for choosing the Kalawen QXZ-3390 Wireless Weather Station. This device provides accurate indoor and outdoor temperature and humidity readings, weather forecasts, an atomic clock, and alarm functions. This manual will guide you through the setup, operation, and maintenance of your new weather station to ensure optimal performance.
2. Package Contents
Please check the package contents carefully. If any items are missing or damaged, contact customer support.
- Kalawen QXZ-3390 Main Weather Station Unit
- Wireless Remote Sensor
- Power Adapter
- Instruction Manual (this document)
3. Product Overview
The Kalawen QXZ-3390 Weather Station features a large color LCD screen for clear display of various weather parameters and time. It includes a main unit for indoor monitoring and a wireless remote sensor for outdoor data collection.
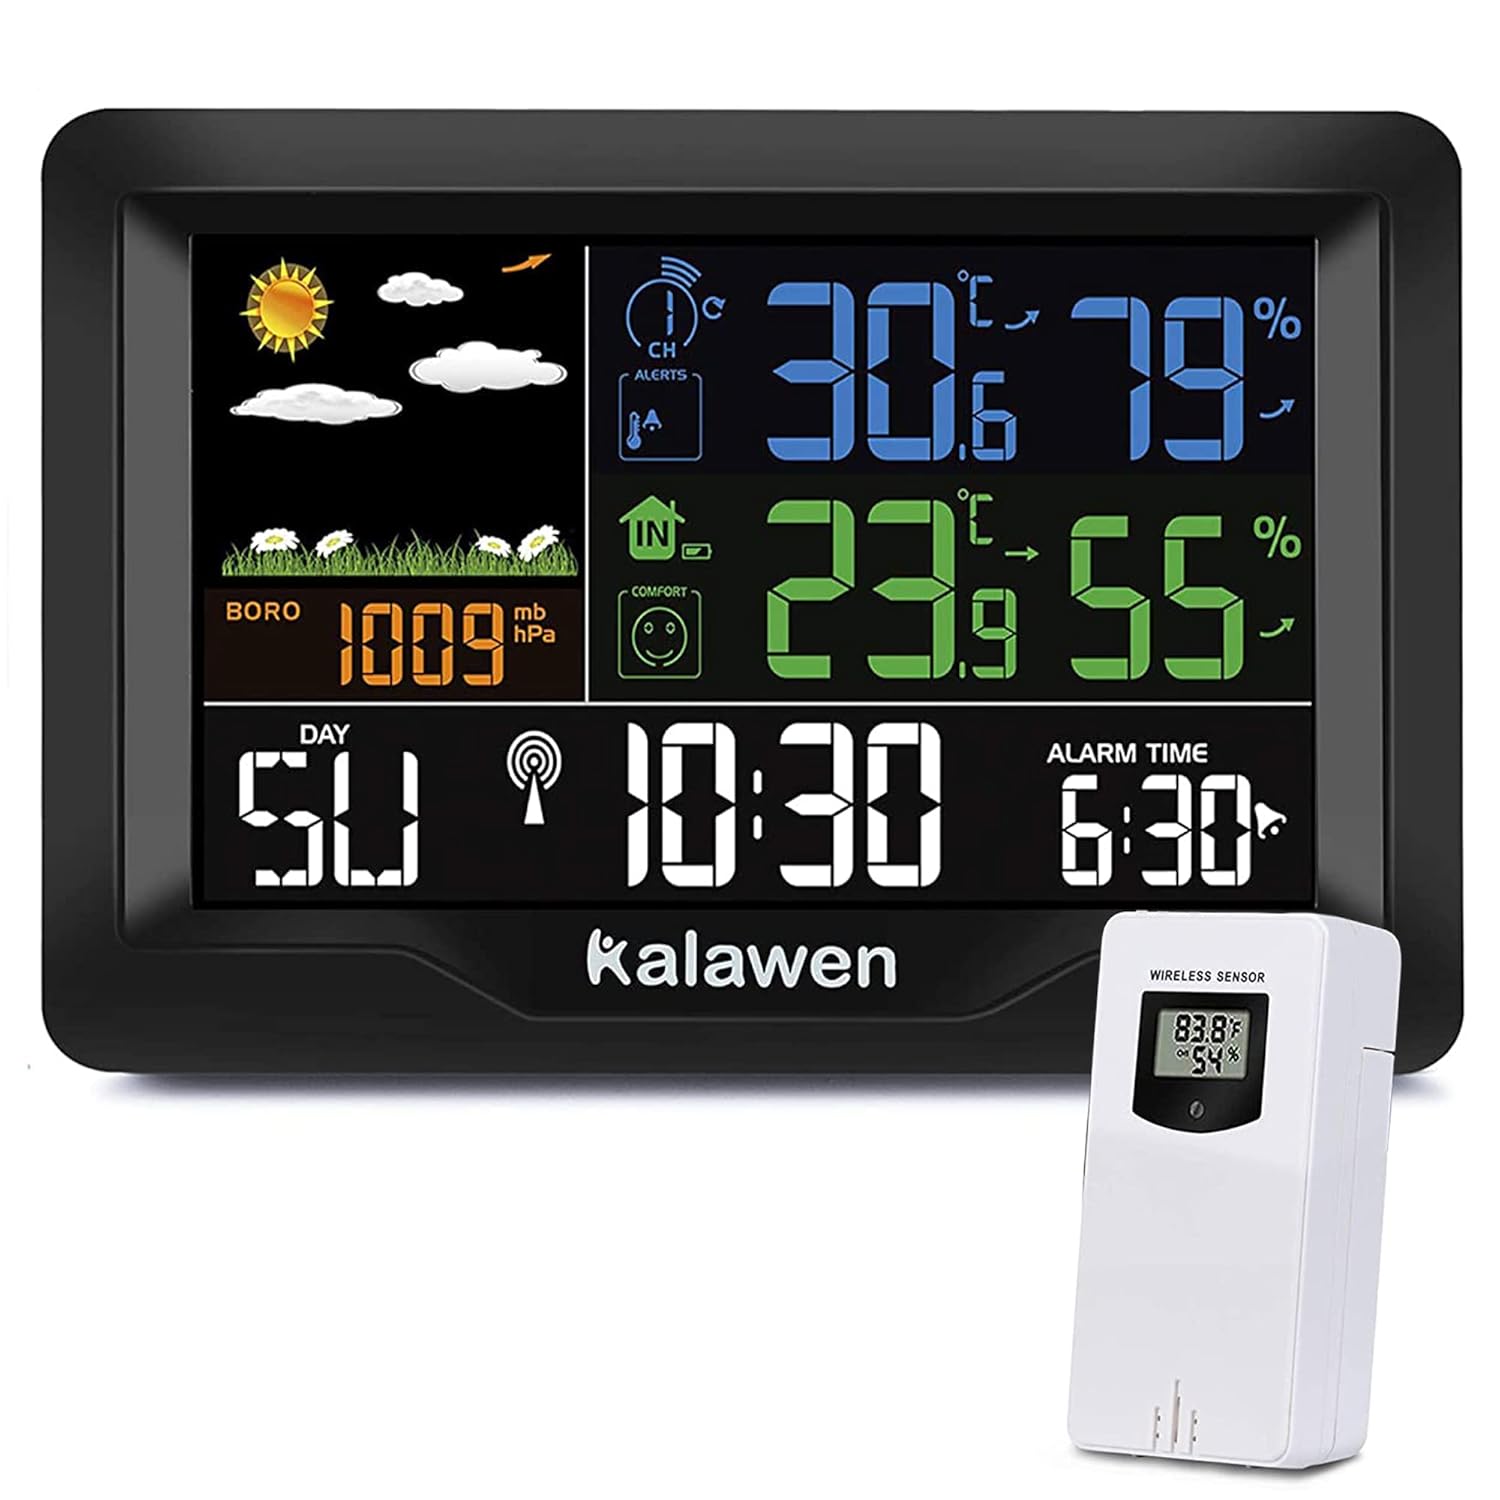
Figure 3.1: Main Weather Station Unit and Wireless Remote Sensor. The main unit displays indoor and outdoor conditions, while the remote sensor transmits outdoor data wirelessly.
Key features include:
- Indoor and Outdoor Temperature & Humidity Display
- Weather Forecast with animated icons
- Atomic Clock with automatic time calibration
- Dual Alarm with Snooze function
- Barometric Pressure display
- MAX/MIN Temperature and Humidity Records
- Temperature Alerts
- USB Charging Port for external devices

Figure 3.2: Visual representation of the weather station's key functions, including weather forecast, humidity, barometric pressure, alarm, temperature, calendar, auto-time calibration, and MAX/MIN temperature alerts.
4. Setup
4.1 Battery Installation
Main Unit: Insert 2 AA batteries (not included) into the battery compartment on the back of the main unit. These batteries serve as a backup power source in case of a power outage, preserving time and settings. The main unit primarily operates via the included power adapter.
Wireless Remote Sensor: Insert 2 AA batteries (not included) into the battery compartment of the remote sensor. For optimal performance and longevity, especially in cold climates, lithium batteries are recommended for the outdoor sensor.
4.2 Powering On and Initial Setup
- Connect the power adapter to the main unit and plug it into a power outlet. The display will light up.
- Ensure the remote sensor is placed within range (up to 60 meters / 200 feet in open areas) of the main unit. The main unit will automatically search for and connect to the remote sensor. This process may take a few minutes.
- Once connected, the outdoor temperature and humidity will appear on the main unit's display.
- The weather station will attempt to synchronize with the atomic clock signal. This usually occurs between 1:00 AM and 5:00 AM for optimal signal reception.

Figure 4.1: The main unit and wireless sensor demonstrating the effective range of up to 60 meters (200 feet) in open areas for reliable data transmission.
5. Basic Operation
5.1 Time and Date Setting
The weather station automatically sets the time via the atomic clock signal. If manual adjustment is needed, refer to the specific buttons on your device (usually labeled "SET" or "MODE") and follow the on-screen prompts to adjust time, date, and time zone.
5.2 Alarm Function
The device features a dual alarm function, allowing you to set two separate wake-up times. Use the "ALARM" button to access and adjust alarm settings. A snooze function is typically activated by pressing a specific button (often labeled "SNOOZE" or "LIGHT") when the alarm sounds.

Figure 5.1: The weather station screen showing the current time and a set alarm time, illustrating the dual alarm capability for managing wake-up schedules.
5.3 Temperature and Humidity Display
The main unit displays indoor temperature and humidity, while the outdoor sensor transmits its readings to the main unit. You can typically switch between Celsius (°C) and Fahrenheit (°F) using a dedicated button (often labeled "°C/°F").
5.4 Weather Forecast
The weather station predicts the weather for the next 12 hours based on changes in barometric pressure. The forecast is displayed using intuitive icons such as sunny, partly cloudy, cloudy, rainy, and snowy.

Figure 5.2: The weather station's display showing a range of weather icons, indicating its 12-hour forecast capabilities from sunny to snowy conditions.
5.5 Barometric Pressure
The barometric pressure is displayed in millibars (mb) or hectopascals (hPa). This reading is used by the station to generate weather forecasts. Note that the barometer may require calibration to match local weather station readings for precise accuracy.
5.6 MAX/MIN Records and Temperature Alerts
The weather station records the maximum and minimum temperature and humidity values over a period. You can also set customizable temperature alerts to be notified when temperatures exceed or fall below a specified range.
6. Advanced Features
6.1 USB Charging Port
The main unit is equipped with a USB charging port (Output: 5V, 1A) on its side. This allows you to conveniently charge small electronic devices, such as smartphones, directly from the weather station.

Figure 6.1: Side view of the weather station highlighting the USB output port, capable of providing 5V/1A for charging compatible devices.
7. Maintenance
- Cleaning: Wipe the main unit and remote sensor with a soft, damp cloth. Do not use abrasive cleaners or solvents.
- Battery Replacement: Replace batteries in the remote sensor annually or when the low battery indicator appears. Replace main unit backup batteries as needed.
- Placement: Ensure the remote sensor is placed in a shaded, dry location outdoors, away from direct sunlight and precipitation, for accurate readings.
8. Troubleshooting
| Problem | Possible Cause | Solution |
|---|---|---|
| No outdoor temperature/humidity reading | Remote sensor out of range, low batteries, interference. | Relocate sensor closer to main unit, replace sensor batteries, avoid placing near large metal objects or electronics. Re-pair if necessary (refer to setup section). |
| Incorrect time display | Atomic clock signal not received, manual setting error. | Ensure main unit is in an area with good signal reception (e.g., near a window). Allow time for automatic synchronization (typically overnight). Manually set time if atomic signal is consistently unavailable. |
| Inaccurate barometric pressure | Requires local calibration. | Compare the station's reading with a local weather service. Adjust the barometer setting on the device to match local conditions if a calibration option is available. |
| Display is dim or blank | Power adapter disconnected, backup batteries low/dead. | Check power adapter connection. Replace backup batteries. |
| Temperature alerts are annoying/hard to cut off | Alert settings are active. | Access the temperature alert settings in the menu and disable or adjust the thresholds as desired. |
9. Specifications
| Model Number | QXZ-3390 |
| Brand | Kalawen |
| Display Type | Color LCD Screen |
| Screen Size | Approximately 7.4 inches (diagonal) |
| Wireless Range | Up to 60 meters (200 feet) in open area |
| Power Source (Main Unit) | Power Adapter (included), 2 x AA batteries (backup, not included) |
| Power Source (Remote Sensor) | 2 x AA batteries (not included, lithium recommended) |
| USB Output | 5V, 1A |
| Special Features | Alarm, Clock, Lightweight, Wireless, Atomic Clock, Weather Forecast, USB Charging |
| Material | Metal (housing components) |
| Dimensions (Main Unit) | Approx. 20.3 cm (8 inches) width, 12.7 cm (5 inches) height (based on image) |
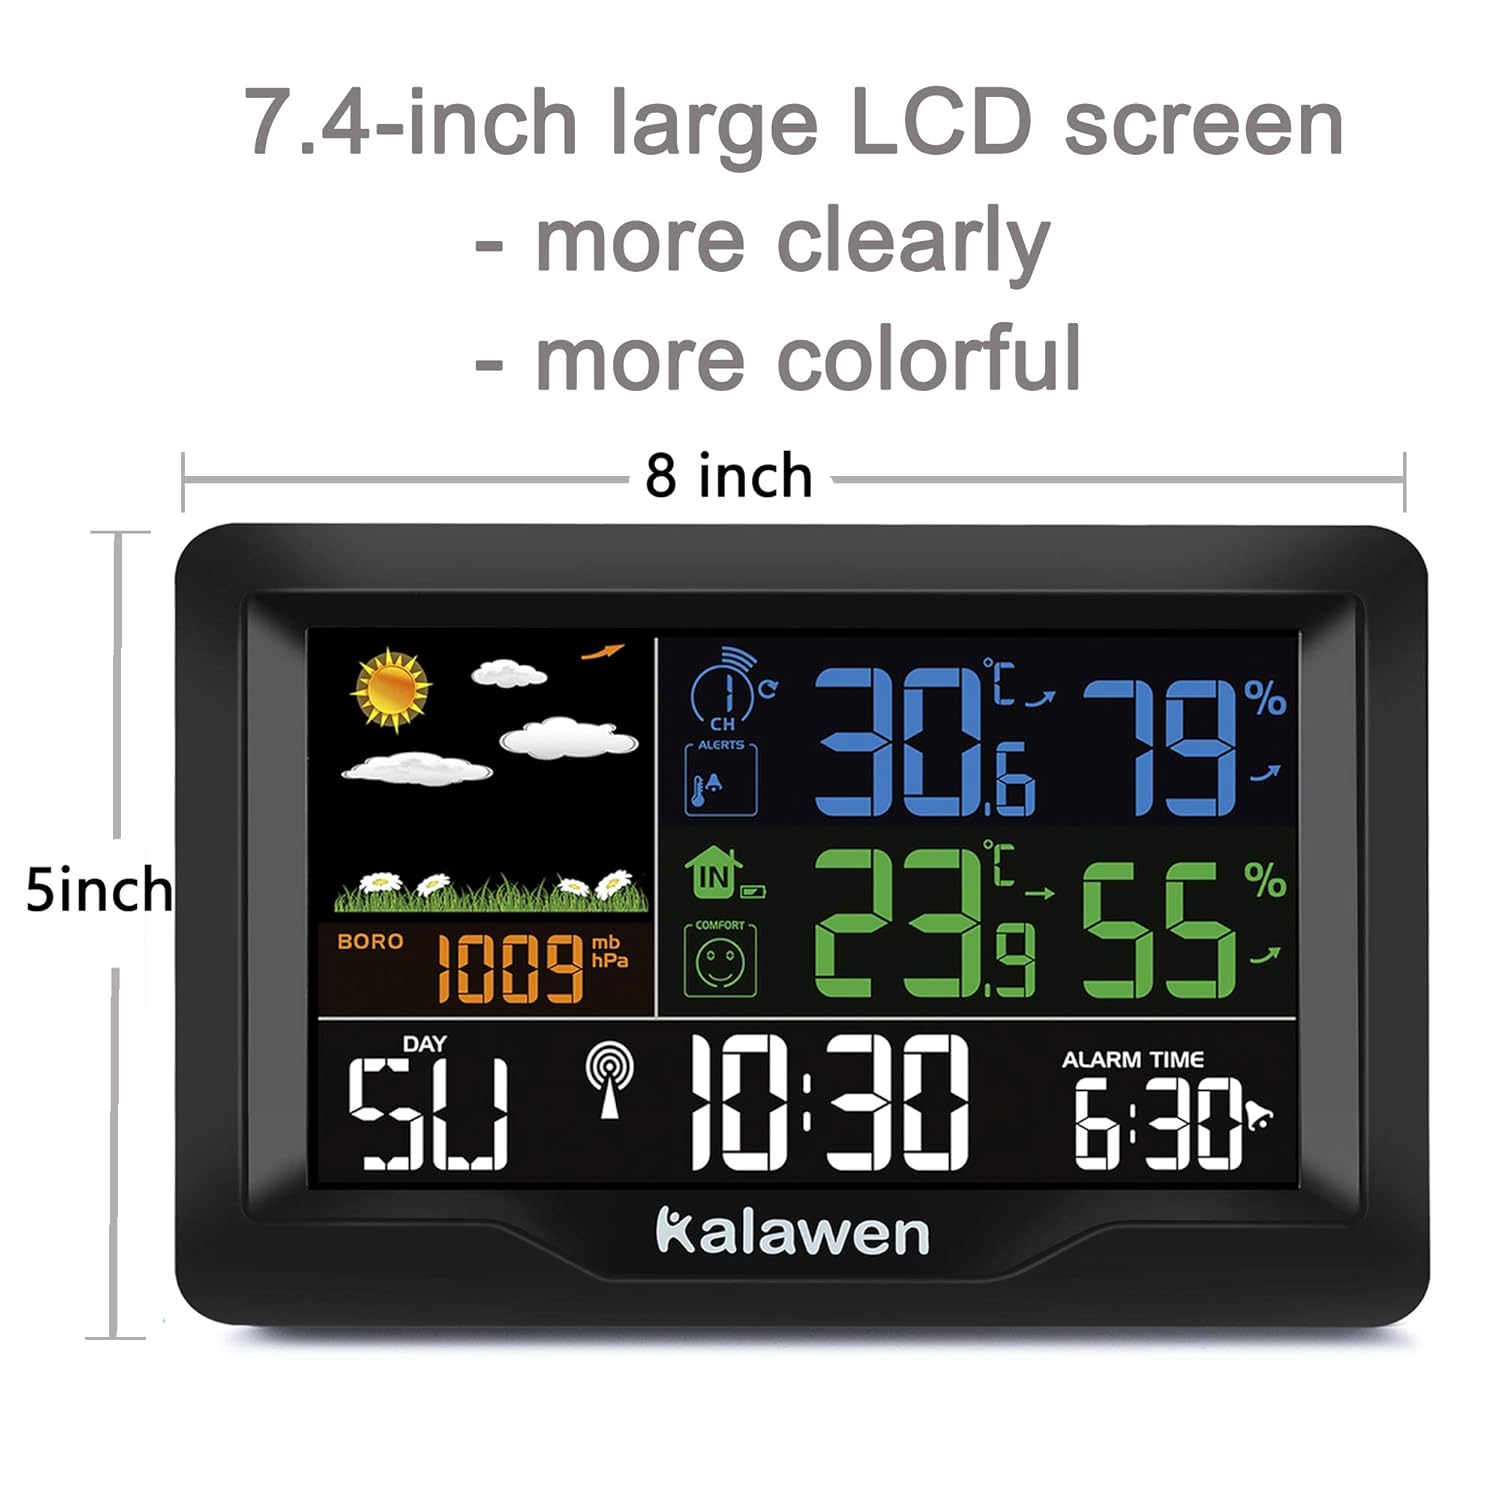
Figure 9.1: The weather station's display dimensions, indicating a 7.4-inch screen within an 8-inch wide and 5-inch high unit for clear visibility.
10. Warranty and Support
Kalawen products are designed for reliability and performance. For warranty information, technical support, or customer service inquiries, please refer to the contact information provided on the product packaging or visit the official Kalawen website. Please retain your proof of purchase for warranty claims.


