
GJ JGA ELECTRONICS 12 INCH
GJ JGA ELECTRONICS 12-Inch PA Speaker System User Manual
Model: 12 INCH
Introduction
Thank you for choosing the GJ JGA ELECTRONICS 12-Inch PA Speaker System. This manual provides essential information for the safe and efficient operation of your new audio equipment. Please read it thoroughly before use and retain it for future reference.
Important Safety Information
WARNING: To prevent fire or shock hazard, do not expose this appliance to rain or moisture.
- Read these instructions.
- Keep these instructions.
- Heed all warnings.
- Follow all instructions.
- Do not use this apparatus near water.
- Clean only with dry cloth.
- Do not block any ventilation openings. Install in accordance with the manufacturer's instructions.
- Do not install near any heat sources such as radiators, heat registers, stoves, or other apparatus (including amplifiers) that produce heat.
- Protect the power cord from being walked on or pinched, particularly at plugs, convenience receptacles, and the point where they exit from the apparatus.
- Only use attachments/accessories specified by the manufacturer.
- Unplug this apparatus during lightning storms or when unused for long periods of time.
- Refer all servicing to qualified service personnel. Servicing is required when the apparatus has been damaged in any way, such as power-supply cord or plug is damaged, liquid has been spilled or objects have fallen into the apparatus, the apparatus has been exposed to rain or moisture, does not operate normally, or has been dropped.
Package Contents
Verify that all items listed below are included in your package:
- 1 x Active PA Speaker
- 1 x Passive PA Speaker
- 2 x Speaker Stands
- 1 x Wired Microphone
- 1 x Remote Control
- 2 x Dust Bags
- Speaker Connection Cables
- Power Cable
- USB Cable

Image: All components included in the GJ JGA ELECTRONICS PA Speaker System package.
Product Overview
The GJ JGA ELECTRONICS PA Speaker System features a 12-inch full-range woofer and a 25mm voice coil titanium horn driver for high-quality sound. The active speaker includes a multifunctional amplifier panel for various connections and controls.

Image: Overview of the PA Speaker System, showing both speakers and stands.
Active Speaker Rear Panel Controls and Connections

Image: Detailed view of the multifunctional amplifier panel on the active speaker.
- MP3 Player Display: Shows current mode and track information.
- USB In: For connecting USB drives.
- SD Card: For inserting SD memory cards.
- Mode Button: Switches between input modes (Bluetooth, USB, SD, AUX).
- Level Controls: Adjust input levels for Microphone, Line In, and MP3/Bluetooth.
- Mic In (6.35mm/XLR): Connect wired microphones.
- Line In (RCA/XLR): Connect external audio sources like mixers or instruments.
- Line Out (XLR): Connect to other speakers or audio equipment.
- Treble Control: Adjusts high-frequency sound.
- Bass Control: Adjusts low-frequency sound.
- Master Volume: Controls the overall output volume.
- Power Switch: Turns the speaker on/off.
- Speaker Out (8 Ohm): Connects to the passive speaker.
Portability Features
The speakers are designed with humanized handles for easy transport and can be mounted on retractable speaker stands.

Image: Ergonomic handle for convenient portability.
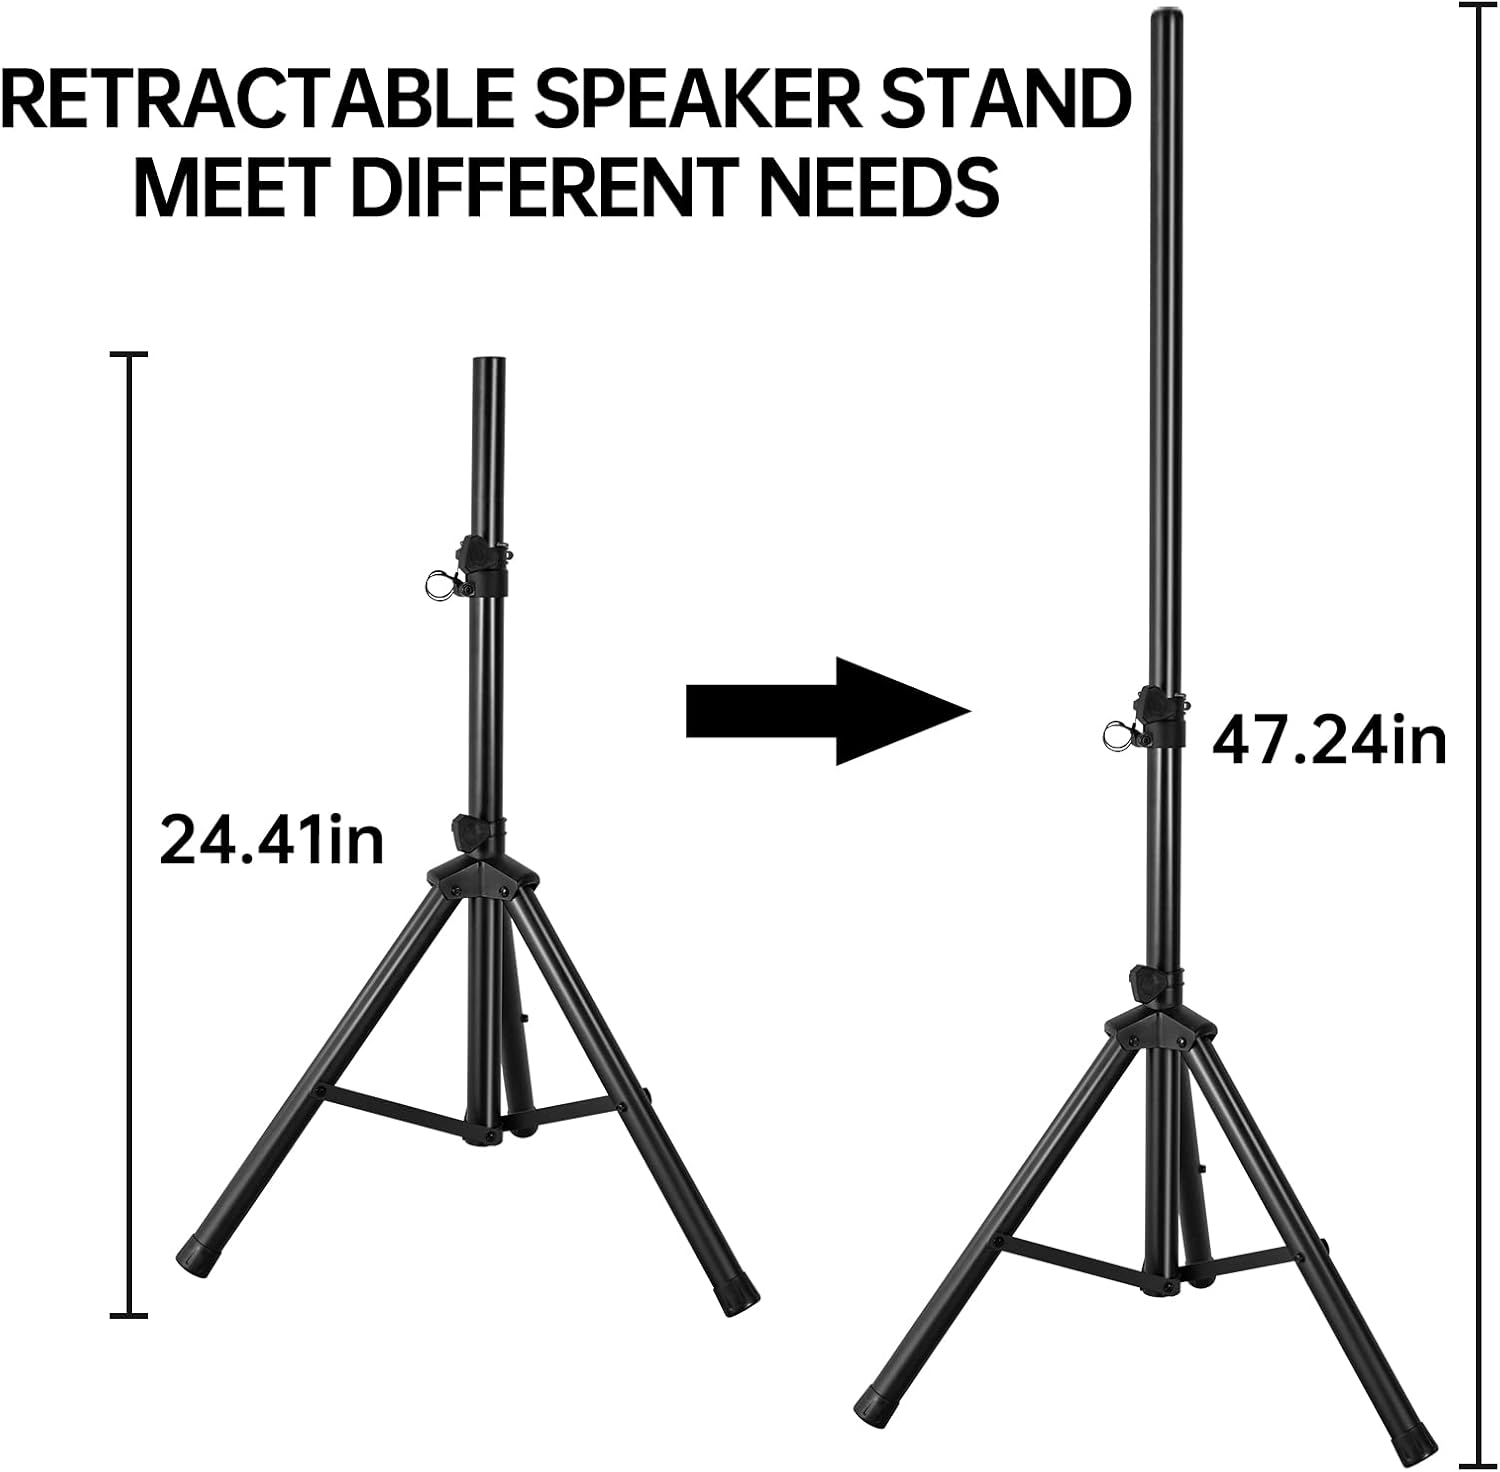
Image: Retractable speaker stand with adjustable height for various needs.
Setup
- Unpacking: Carefully remove all components from the packaging. Retain packaging for future transport or storage.
- Speaker Stand Assembly:
- Extend the legs of the speaker stands to form a stable base.
- Adjust the height of the stands using the locking pin and knob to your desired level (up to 47.24 inches). Ensure the stand is securely locked before placing a speaker on it.
- Speaker Placement:
- Place the active speaker (with the control panel) and the passive speaker on the assembled stands or a stable, flat surface.
- Ensure speakers are positioned to provide optimal sound coverage for your intended area.
- Connecting Speakers:
- Connect the passive speaker to the "SPEAKER OUT 8 OHM" port on the active speaker using the provided speaker cable. Ensure a secure connection.
- Power Connection:
- Ensure the power switch on the active speaker is in the "OFF" position.
- Connect the power cable to the active speaker's power input and then to a suitable power outlet (AC115V-60Hz or AC230V-50Hz).
Operating Instructions
Power On/Off
- To turn on, flip the "POWER" switch on the rear panel of the active speaker to the "ON" position. The MP3 Player Display will illuminate.
- To turn off, flip the "POWER" switch to the "OFF" position.
Bluetooth Connection
- Ensure the speaker is powered on.
- Press the "MODE" button on the active speaker's control panel until "Bluetooth" is displayed.
- On your mobile device (smartphone, tablet, computer), enable Bluetooth and search for available devices.
- Select "GJ JGA ELECTRONICS" (or similar name) from the list to pair.
- Once paired, you can play audio from your device through the speakers. Adjust the "MP3 Bluetooth" level knob and "Master" volume as needed.
USB/SD Card Playback
- Insert a USB drive into the "USB In" port or an SD card into the "SD CARD" slot.
- The speaker should automatically switch to USB or SD mode. If not, press the "MODE" button until the correct mode is displayed.
- Use the playback controls (Play/Pause, Next, Previous) on the panel or remote control to manage your audio.
- Adjust the "MP3 Bluetooth" level knob and "Master" volume.
AUX Input (Line In)
- Connect your external audio source (e.g., mixer, instrument, CD player) to the "LINE IN" (RCA or XLR) ports on the active speaker.
- Press the "MODE" button until the display indicates AUX or Line In mode.
- Adjust the "LEVEL" knob for "LINE IN" and the "Master" volume to achieve desired sound.
Microphone Usage
- Connect the wired microphone to the "MIC IN" (6.35mm or XLR) port on the active speaker.
- Adjust the "LEVEL" knob for "MIC IN" to control the microphone volume.
- Use the "Treble" and "Bass" controls to fine-tune the microphone's sound.
Sound Adjustment (Treble, Bass, Master Volume)
- Treble: Rotate the "TREBLE" knob to increase or decrease high frequencies for brighter or softer sound.
- Bass: Rotate the "BASS" knob to increase or decrease low frequencies for deeper or lighter bass.
- Master Volume: Use the "MASTER" knob to control the overall output volume of the entire system. Start with a low volume and gradually increase to avoid sudden loud sounds.

Image: The PA speaker system in a typical usage scenario, suitable for various events.
Maintenance
- Cleaning: Use a soft, dry cloth to clean the speaker cabinets. Do not use abrasive cleaners, waxes, or solvents.
- Storage: When not in use for extended periods, store the speakers in a cool, dry place, preferably in their dust bags to protect them from dust and moisture.
- Ventilation: Ensure the ventilation grilles on the rear of the active speaker are clear of obstructions to prevent overheating.
- Cables: Regularly check all cables for damage. Replace any frayed or damaged cables immediately.
Troubleshooting
| Problem | Possible Cause | Solution |
|---|---|---|
| No power | Power cable not connected; Power switch off; Power outlet faulty. | Ensure power cable is securely connected. Turn power switch ON. Test power outlet with another device. |
| No sound from speakers | Master volume too low; Input level too low; Incorrect input mode selected; Passive speaker not connected. | Increase Master volume. Increase input level for selected source. Press MODE button to select correct input. Ensure passive speaker is connected to active speaker's SPEAKER OUT. |
| Bluetooth pairing failed | Speaker not in Bluetooth mode; Device too far; Interference. | Press MODE button to select Bluetooth. Move device closer to speaker. Avoid strong electromagnetic interference. |
| Distorted sound | Volume too high (clipping); Input signal too strong; Damaged cable. | Reduce Master volume or input level. Check input source for excessive signal. Replace audio cables if damaged. |
| Microphone not working | Microphone not connected; Mic level too low; Microphone faulty. | Ensure microphone is securely plugged into MIC IN. Increase MIC IN level. Test with another microphone if available. |
Specifications
| Feature | Detail |
|---|---|
| Brand | GJ JGA ELECTRONICS |
| Model Number | 12 INCH |
| Speaker Type | PA Speaker System (Active & Passive) |
| Woofer Diameter | 12 Inches |
| Horn Driver | 25mm Voice Coil Titanium Horn Driver 4 Oz, 4 Ohm |
| Speaker Maximum Output Power | 80 Watts |
| Frequency Response | 60Hz-18KHz |
| Connectivity Technology | Auxiliary, Bluetooth, USB, SD Card |
| Inputs | MP3/USB/SD, Bluetooth, 3.5mm/6.35mm Mic In, RCA/XLR Line In |
| Control Method | Remote, On-board controls |
| Power Source | Corded Electric (AC115V-60Hz / AC230V-50Hz) |
| Product Dimensions (each speaker) | 14.6"D x 22.8"W x 12.4"H |
| Item Weight (total) | 85 pounds |
| UPC | 722765421394 |

Image: Internal components of the speaker, illustrating the woofer and horn driver.
Warranty and Support
GJ JGA ELECTRONICS products are designed for reliability and performance. For warranty information, please refer to the warranty card included with your product or contact our customer support.
If you encounter any issues or have questions regarding your PA Speaker System, please contact GJ JGA ELECTRONICS Customer Support:
- Online Support: Visit the GJ JGA ELECTRONICS Store on Amazon for FAQs and contact options.
- Email: Refer to your product packaging or included documentation for direct email support.
Please have your model number (12 INCH) and purchase details ready when contacting support.
Ask a question about this manual
Ask about setup, troubleshooting, compatibility, parts, safety, or missing instructions. Manuals+ will review the question and use this page’s manual context to help answer it.