1. Introduction
This manual provides detailed instructions for the installation, operation, and maintenance of your Sondiko LED Grow Light Strip, Model A51542. This grow light is designed to support the growth of indoor plants by providing an optimal light spectrum, dimmable levels, and an automatic on/off timer function.
2. Safety Instructions
- Read all instructions before using the product.
- Do not expose the grow light to water or high humidity. This product is intended for indoor use only.
- Ensure the power source matches the voltage requirements (5 Volts).
- Do not attempt to disassemble or modify the product. This may void the warranty and pose a safety risk.
- Keep out of reach of children and pets.
- Unplug the device from the power source before cleaning or when not in use for extended periods.
- Avoid direct eye exposure to the LED light.
3. Package Contents
Verify that all components are present in the package:
- 1 x Sondiko LED Grow Light Strip (Model A51542)
- Instruction Manual
- Mounting Screws
- Double-sided Adhesive Tape
- Zip Ties
4. Product Overview
The Sondiko LED Grow Light Strip features 48 high-quality LED bulbs designed to provide a full spectrum of light (420-800nm) essential for plant growth. It includes an integrated controller for managing power, brightness, and timing functions.
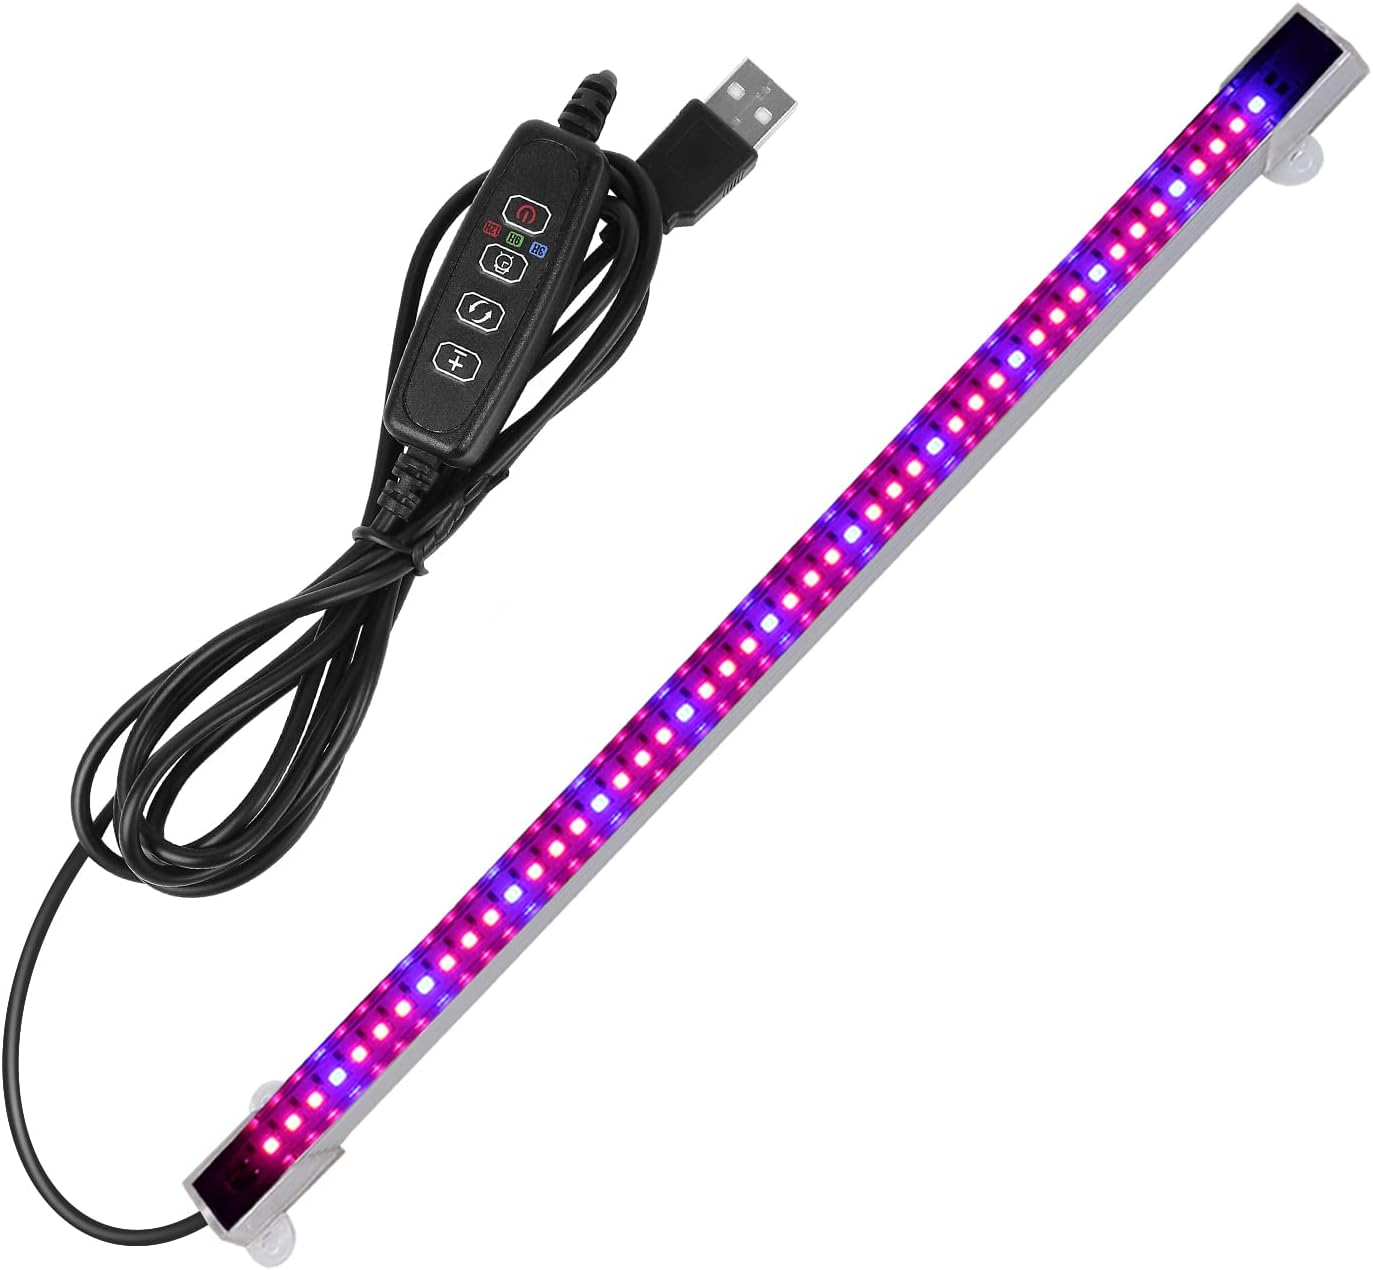
Image 1: The Sondiko LED Grow Light Strip with its attached controller and USB cable.
Controller Functions
The upgraded controller provides precise control over the light's functions. It features three buttons and two indicator lights for easy operation.

Image 2: Detailed view of the upgraded controller, highlighting its buttons and indicator lights.
- Brightness Adjustment Button (+/-): Adjusts the light intensity.
- Light Mode Button: Cycles through different light color modes (if applicable, based on model variation).
- Timing Button: Sets the automatic on/off timer.
- Power Button: Turns the light on or off.
5. Installation
The grow light bar offers multiple installation options for convenience:
- Surface Mounting with Screws: Use the provided screws to securely attach the light bar to a cabinet, shelf, or wall.
- Adhesive Mounting: Apply the double-sided adhesive tape to the back of the light bar and press firmly onto a clean, dry surface.
- Cable Tie Mounting: Utilize the included zip ties to fasten the light bar to various structures, such as wire shelving.
Ensure the chosen location provides adequate space for the light strip (length: 13.2 inches) and allows for proper light distribution to your plants.

Image 3: Example installation of the grow light strip above indoor potted plants.
6. Operation
Power On/Off
- Connect the USB plug to a compatible 5V power adapter (not included) or USB port.
- Press the Power Button on the controller to turn the light on or off.
Timing Function (Auto ON/Off)
The grow light features an automatic timer to ensure your plants receive consistent light cycles. Once set, the light will turn on and off automatically every day at the programmed interval.
- With the light on, press the Timing Button.
- Cycle through the available timer settings: 3H (3 hours), 9H (9 hours), or 12H (12 hours). The corresponding indicator light will illuminate.
- Once a timer is set, the light will operate for the selected duration and then turn off. It will automatically turn back on after 21 hours (for 3H setting), 15 hours (for 9H setting), or 12 hours (for 12H setting) from the time it turned off, maintaining a daily cycle.
- To deactivate the timer, press the Timing Button until all timer indicator lights are off.
Dimmable Levels
Adjust the light intensity to suit the specific needs of your plants at different growth stages.
- Press the Brightness Adjustment Buttons (+ or -) on the controller.
- Cycle through the four available dimmable levels: 25%, 50%, 75%, and 100% brightness.
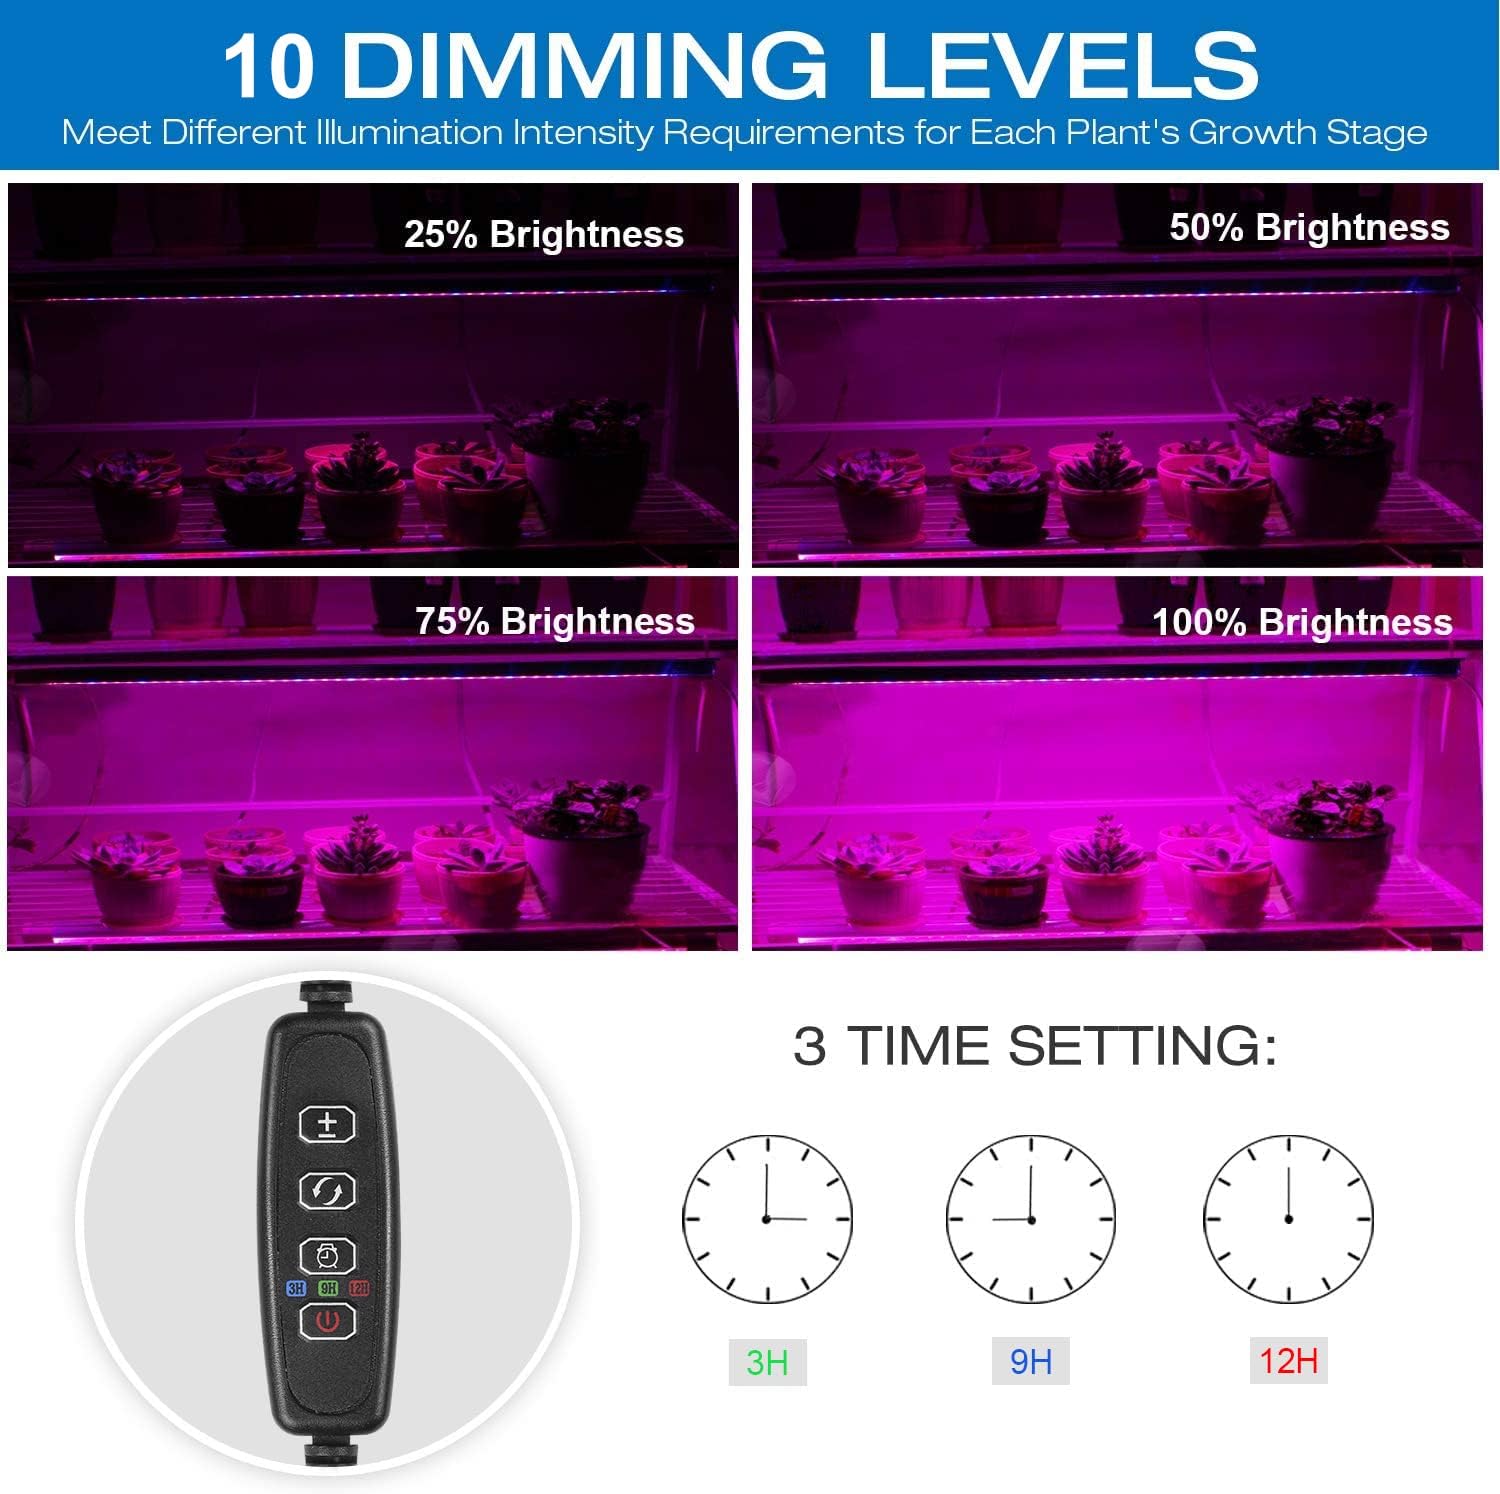
Image 4: Visual representation of the four dimmable brightness levels.
7. Maintenance
- Cleaning: Ensure the light is unplugged before cleaning. Wipe the light strip and controller with a soft, dry cloth. Do not use abrasive cleaners or immerse in water.
- Storage: When not in use, store the grow light in a cool, dry place away from direct sunlight and moisture.
8. Troubleshooting
- Light does not turn on:
- Ensure the USB cable is securely connected to a functional 5V power source.
- Verify that the power adapter is working correctly. Try a different adapter if available.
- Press the Power Button on the controller.
- Timer function is not working as expected:
- Ensure a timer setting (3H, 9H, or 12H) is actively selected and its indicator light is on.
- The timer operates on a daily cycle from the moment it is set. If the cycle is interrupted (e.g., power outage, manual turn off), you may need to reset the timer.
- Adhesive tape not holding:
- Ensure the mounting surface is clean, dry, and smooth before applying the adhesive.
- For more secure mounting, consider using the provided screws or zip ties.
9. Specifications
| Feature | Specification |
|---|---|
| Model Number | A51542 |
| Light Source Type | LED |
| Number of LEDs | 48 |
| Wavelength Selection | 420-800nm |
| Dimmable Levels | 4 (25%, 50%, 75%, 100%) |
| Timing Function | 3H, 9H, 12H (Auto On/Off) |
| Power Source | Corded Electric (USB, 5V) |
| Wattage | 10 watts |
| Brightness | 145 Lumen |
| Product Dimensions | 5.7"L x 0.73"W x 0.73"H |
| Item Weight | 6.4 ounces |
| Material | Metal, Plastic |
| Mounting Type | Wall Mount (Screws, Adhesive, Zip Ties) |
10. Warranty and Support
Sondiko is committed to providing quality products and customer satisfaction. If you encounter any issues or have questions regarding your LED Grow Light Strip, please contact our customer service department. We are dedicated to providing the best service and support for our products.
