Introduction
Thank you for choosing the HOMVILLA Digital LED Alarm Clock, Model HU-XI-74. This manual provides detailed instructions for setting up, operating, and maintaining your new alarm clock. Please read this manual thoroughly before use to ensure optimal performance and to understand all features.
Product Overview
The HOMVILLA Digital LED Alarm Clock features a large mirror LED display, dual alarms, temperature display, voice activation, and adjustable settings for brightness and volume. It is designed for ease of use and reliability.
Components and Controls
Familiarize yourself with the clock's layout and control buttons:

Image: Front and back view of the alarm clock, highlighting the display, snooze/brightness button, alarm 1/2 switches, time set, up, down, alarm set, volume adjustment, power, reset, and 5V/1A USB port.
- Front Display: Shows time, AM/PM indicator, temperature, and alarm icons.
- Top Button: Snooze / Brightness Adjustment.
- Rear Controls:
- ALARM1 ON/OFF Switch: Activates or deactivates Alarm 1.
- ALARM2 ON/OFF Switch: Activates or deactivates Alarm 2.
- TIME SET Button: Enters time setting mode.
- UP Button (+): Adjusts values upwards, switches between 12/24-hour format.
- DOWN Button (-): Adjusts values downwards, adjusts volume.
- ALARM SET Button: Enters alarm setting mode.
- VOLUME Adjustment Button: Adjusts alarm volume.
- POWER Button: Turns the clock on/off.
- RESET Button: Resets the clock to factory settings.
- 5V/1A USB Port: Power input for charging and continuous operation.
Setup
Initial Power-Up
- Connect the included USB cable to the 5V/1A USB port on the back of the clock.
- Plug the other end of the USB cable into a compatible 5V/1A or 5V/2A USB adapter (not included) or a USB port.
- The LED display will light up. If using battery power, ensure the clock is fully charged for optimal performance.
- For accurate temperature display, allow the clock to remain stationary for at least 30 minutes after unpacking.
Memory Function
The clock features a memory function. When sufficiently charged, it retains time and alarm settings even if the power key is turned off or the USB cable is disconnected for a short period.

Image: The clock displaying time and temperature, then showing it powered off, and finally powered on an hour later with the time advanced, demonstrating the memory function.
Operating Instructions
Time Setting
- Press the TIME SET button on the back of the clock. The hour digits will flash.
- Use the UP (+) or DOWN (-) buttons to adjust the hour.
- Press TIME SET again. The minute digits will flash.
- Use the UP (+) or DOWN (-) buttons to adjust the minutes.
- Press TIME SET a third time to confirm and exit time setting mode.

Image: A close-up of the clock display during time setting, showing the hour digits flashing.
12/24 Hour Format
While in normal time display mode, press the UP (+) button to switch between 12-hour and 24-hour formats.
Alarm Setting (Alarm 1 & Alarm 2)
The clock supports two independent alarms.
- Slide the ALARM1 ON/OFF or ALARM2 ON/OFF switch to the ON position. The corresponding alarm icon will appear on the display.
- Press the ALARM SET button. The hour digits for the selected alarm will flash.
- Use the UP (+) or DOWN (-) buttons to adjust the alarm hour.
- Press ALARM SET again. The minute digits will flash.
- Use the UP (+) or DOWN (-) buttons to adjust the alarm minutes.
- Press ALARM SET a third time to confirm and exit alarm setting mode.

Image: A close-up of the clock display during alarm setting, showing the alarm icon and flashing hour digits.

Image: Illustration of setting two alarms for different daily routines, such as 7:00 AM for waking up and 6:00 PM for exercise.
Ringtone Selection
The alarm clock offers 10 different alarm melodies. To select a ringtone:
- While in alarm setting mode (after setting minutes), press the ALARM SET button again. The current ringtone number will flash.
- Use the UP (+) or DOWN (-) buttons to cycle through the 10 available ringtones.
- Press ALARM SET to confirm your selection.
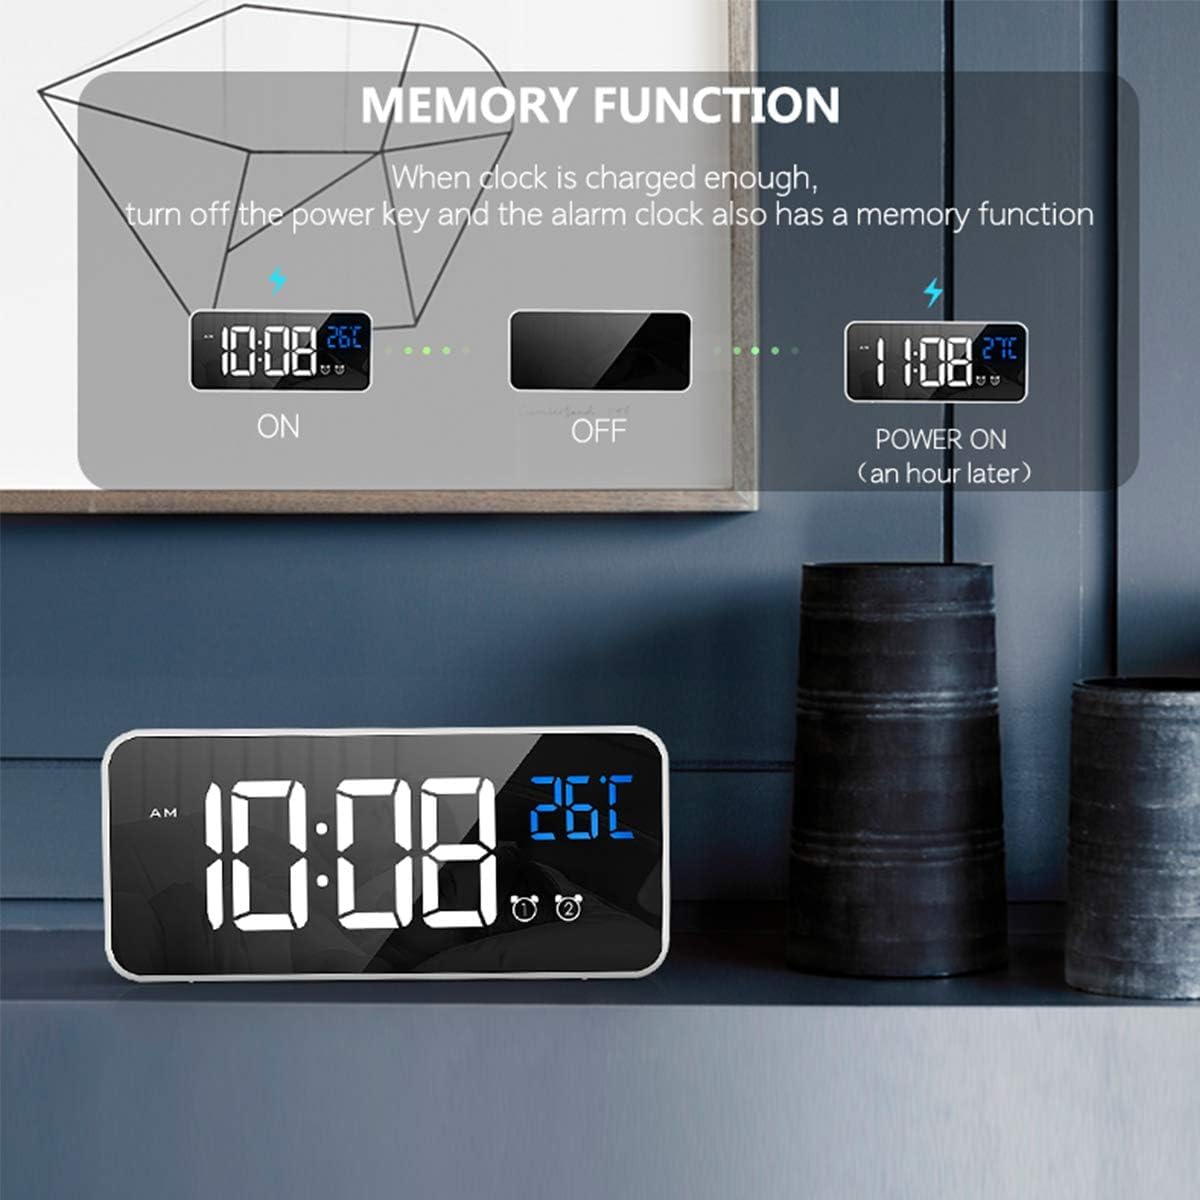
Image: A list of 10 available ringtones, including 'Di Di Di', 'Traditional Ringtone', 'Lullaby', 'The Chirps of Crickets', 'The Sound of the Waves', 'The Birds Chirping Running Water', 'The Sound of Running Water', 'White Noise', 'The Drip of Water', and 'The Sound of Thunderstorm'.
Snooze Function
When the alarm sounds, gently press the Snooze/Brightness Adjustment button on the top of the clock. The alarm will pause for 5 minutes, and the alarm icon will flicker. To turn off the alarm completely, press any other button on the back of the clock.
Image: A person's hand pressing the top button of the alarm clock to activate the snooze function, with the display showing the time and a snooze icon.
Brightness Adjustment
The clock offers 4 levels of brightness. You can adjust it manually or allow automatic adjustment when powered via USB.
- Manual Adjustment: In normal time display mode, press the Snooze/Brightness Adjustment button on the top of the clock to cycle through the 4 brightness levels.
- Automatic Adjustment (USB Power Mode): When connected via USB, the clock will automatically adjust its brightness at different times of the day. You can still manually override this setting.

Image: Four examples of the clock display at different brightness levels (1 to 4), demonstrating the adjustable illumination.

Image: A close-up of the clock display with a brightness icon, indicating the brightness adjustment feature.
Volume Adjustment
The alarm volume can be adjusted to three levels.
- In normal time display mode, press the VOLUME Adjustment button (often combined with the DOWN button) on the back of the clock.
- Press the button repeatedly to cycle through the three volume levels.

Image: A close-up of the clock display with a volume icon, indicating the volume adjustment feature.
Voice Activation Function
When operating on battery power, the display can be activated by sound (e.g., a clap or tap on the table). The display will turn off automatically after 6 seconds to conserve power.
- To activate the display, make a sound above 90 decibels or gently knock the surface where the clock is placed.
- Note: The voice control function is disabled when the clock is continuously powered via USB. In this mode, the display remains on.

Image: A person making a sound near the alarm clock, causing its display to light up, illustrating the voice activation feature.

Image: A close-up of the clock display with a voice activation icon, indicating the feature is active.
Temperature Display
The clock displays the ambient temperature. The temperature unit can be switched between Celsius (°C) and Fahrenheit (°F).
- In normal time display mode, press and hold the UP (+) button to switch between °C and °F.

Image: A person sleeping, with the alarm clock displaying time and temperature, and arrows indicating the ability to switch between Celsius and Fahrenheit.
Power Supply
The HOMVILLA Digital LED Alarm Clock can be powered in two ways:
- USB Cable (Continuous Power): Connect the clock to a 5V/1A or 5V/2A USB adapter for continuous display and power. The LED light will remain on.
- Built-in Lithium Battery (Portable Power): The clock has a built-in rechargeable lithium battery. When running on battery, the LED display will automatically turn off after 6 seconds of inactivity to conserve power. The voice activation function is available in this mode. Ensure the battery is fully charged for extended use.
Important: Only use a 5V/1A or 5V/2A adapter for charging the clock. Using an incompatible adapter may damage the device.
Maintenance
- Clean the clock with a soft, dry cloth. Do not use abrasive cleaners or solvents.
- Avoid exposing the clock to extreme temperatures, direct sunlight, or high humidity.
- Do not disassemble the clock. This will void any potential warranty and may cause damage.
Troubleshooting
| Problem | Possible Cause | Solution |
|---|---|---|
| Display is off or dim. | Battery low; USB cable disconnected; brightness set too low; voice activation mode (battery power). | Connect to USB power; charge battery; adjust brightness manually; make a sound to activate display if on battery. |
| Alarm does not sound. | Alarm is not activated; volume set too low; incorrect alarm time. | Ensure ALARM ON/OFF switch is on; adjust volume; verify alarm time setting. |
| Temperature reading seems inaccurate. | Clock recently moved or unpacked. | Allow the clock to stabilize for at least 30 minutes in its location for accurate readings. |
| Voice activation not working. | Clock is connected to USB power; ambient noise is too low. | Disconnect USB cable to enable battery mode; ensure sound is above 90dB or tap the surface. |
| Cannot change time/alarm settings. | Not in setting mode. | Press the appropriate TIME SET or ALARM SET button to enter setting mode. |
Specifications
- Brand: HOMVILLA
- Model Number: HU-XI-74 (also 8808)
- Color: White
- Material: Plastic
- Display Type: Digital LED Mirror Screen
- Product Dimensions: 14.5 x 3.81 x 3 cm (5.7 x 1.5 x 1.2 inches)
- Item Weight: 220 grams
- Power Source: USB Cable (5V/1A or 5V/2A adapter required) / Built-in Lithium Battery
- Special Features: Dual Alarms, Temperature Display (°C/°F), Voice Activation, 10 Ringtones, 4 Brightness Levels, 3 Volume Levels, Snooze Function, Memory Function.
- Battery: 1 C-type battery (included)
Warranty and Support
Information regarding warranty coverage and customer support for the HOMVILLA Digital LED Alarm Clock (Model HU-XI-74) is not available in this document. Please refer to the product packaging or the retailer's website for specific warranty terms and contact information for support.


