
Crenova FN335
Contents
Crenova FN335 A3 Laminator Machine User Manual
Model: FN335 | Brand: Crenova
Product Overview
The Crenova FN335 A3 Laminator Machine is designed for efficient and versatile lamination, suitable for home, office, and school environments. It supports both hot and cold lamination modes and can handle documents up to A3 size (13 inches wide).
- A3 Laminator Machine: This set includes the A3 laminator, a paper trimmer, a corner rounder, a hole puncher, and 10 laminating pouches (4*A5 / 3*A4 / 3*A3).
- Cold & Thermal Lamination: Offers two lamination modes. The HOT mode is for standard documents, while the COLD mode is for heat-sensitive materials, ensuring bubble-free results.
- Fast Preheating & Laminating: Features approximately 2-minute rapid warm-up time and a laminating speed of 350mm/min, significantly improving work efficiency.
- ABS Anti-Jam Function: Equipped with an ABS button to easily release jammed paper, ensuring smooth operation.
- Wide Applicability: The 330mm/13-inch inlet accommodates papers up to A3 wide, making it suitable for laminating labels, cards, photos, certificates, letters, drawings, menus, and more.
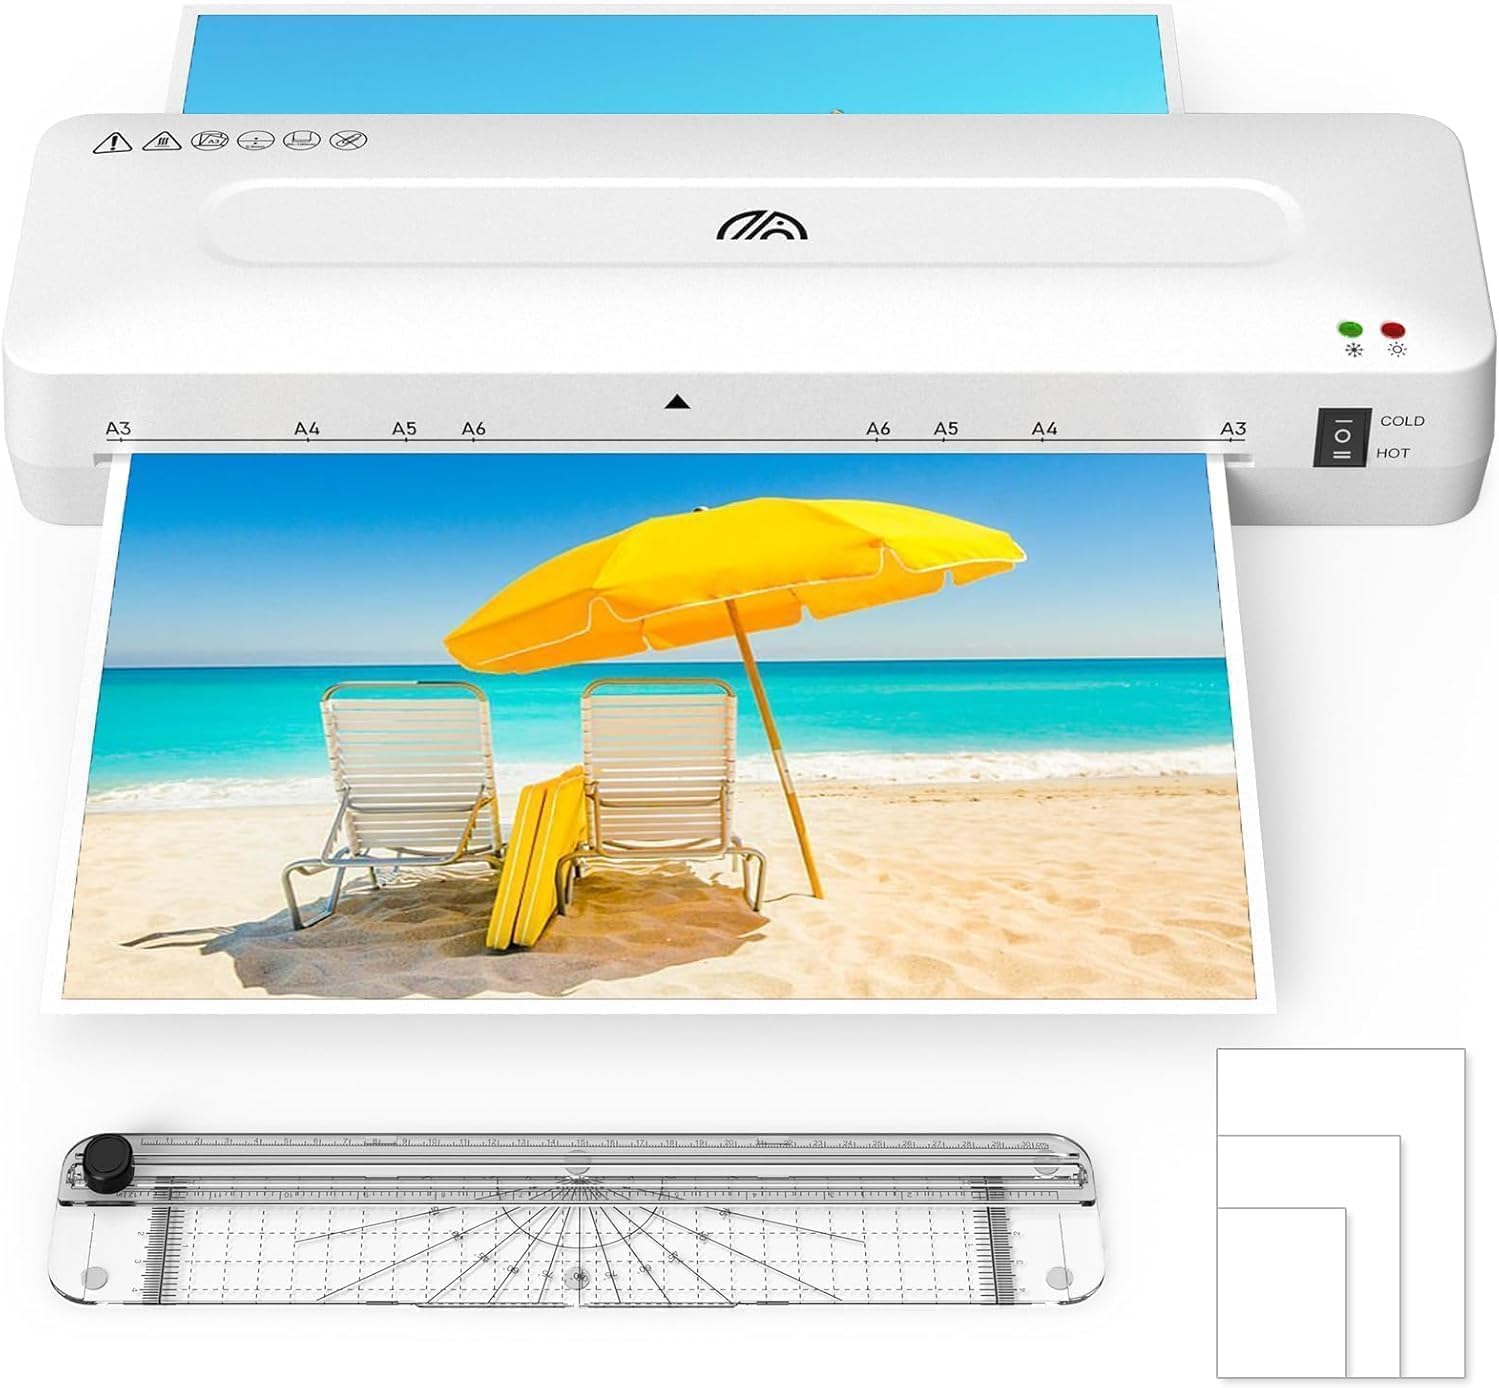
Setup Instructions
Unpacking:
Carefully remove the laminator and all accessories from the packaging. Retain the packaging for future storage or transport.
Placement:
Place the laminator on a stable, flat, and heat-resistant surface. Ensure there is enough space behind the machine for laminated items to exit freely.
Power Connection:
Plug the power cord into a standard electrical outlet. Ensure the power switch on the laminator is in the "OFF" position before plugging it in.
Initial Check:
Before first use, ensure there are no foreign objects in the laminator's feed slot.

Operating Instructions
1. Powering On and Mode Selection
Switch the power button to your desired mode: HOT for thermal lamination or COLD for pressure-sensitive lamination.

Image: Detail of the laminator's power switch, showing the HOT and COLD mode options. Wait for the "Ready" indicator light to turn green. This typically takes about 2 minutes for HOT mode.

Image: The green indicator light, signaling the laminator is ready for use.
2. Preparing Your Document
- Place your document inside a laminating pouch, ensuring it is centered and there is an even border around the edges.
- For best results, use laminating pouches appropriate for your chosen mode (thermal pouches for HOT, self-adhesive pouches for COLD).

3. Laminating the Document
Carefully insert the sealed edge of the laminating pouch into the laminator's feed slot. Ensure it is straight and centered to prevent misalignment.

Image: Proper insertion of a laminating pouch into the machine's feed slot. - The laminator will automatically feed the pouch through. Do not pull or push the pouch during the lamination process.
- Once the pouch exits the rear of the machine, place it on a flat surface to cool and flatten.
4. Using the ABS Anti-Jam Button
In case of a paper jam, immediately press and hold the ABS button located on the back of the machine. While holding the button, gently pull the laminating pouch out of the feed slot. This releases the rollers, allowing for easy removal of the jammed item.

5. Using Included Accessories
- Paper Trimmer: Use the included paper trimmer for precise and straight cuts on paper or laminated documents. Place the item under the cutting guide and slide the blade along the track.
- Corner Rounder: Use the corner rounder to create smooth, rounded corners on your laminated documents or photos for a professional finish.
- Hole Puncher: The hole puncher can be used to create clean holes in documents before or after lamination, depending on the material thickness.
Maintenance
Cleaning:
Ensure the laminator is unplugged and completely cool before cleaning. Wipe the exterior with a soft, dry cloth. Do not use abrasive cleaners or solvents. For internal cleaning, occasionally run a folded piece of paper through the machine to clear any adhesive residue.
Storage:
Store the laminator in a cool, dry place away from direct sunlight and extreme temperatures. If storing for an extended period, it is recommended to place it back in its original packaging.
Troubleshooting
| Problem | Possible Cause | Solution |
|---|---|---|
| Laminator does not turn on. | No power, loose connection. | Check power cord connection to the laminator and wall outlet. Ensure the outlet is functional. |
| Paper jam. | Pouch inserted incorrectly, too thick, or foreign object. | Press and hold the ABS button, then gently pull the pouch out. Ensure pouches are inserted sealed-edge first and are not too thick for the machine. |
| Bubbles or cloudy lamination. | Insufficient heat (HOT mode), incorrect pouch type (COLD mode), or moisture. | Ensure the laminator is fully preheated (green light). Use appropriate pouches for HOT or COLD mode. Ensure documents are dry. |
| Laminated document is wrinkled or creased. | Pouch inserted crookedly, or uneven feeding. | Always insert the sealed edge of the pouch straight and centered into the feed slot. Do not force or pull the pouch. |
| Laminator is slow to warm up or laminate. | Normal operation, or environmental factors. | Allow the full 2 minutes for warm-up. Ensure the machine is in a room temperature environment. |
| Edges of laminated document are not sealed properly. | Pouch too large for document, or document too close to edge. | Ensure there is a small, even border of laminating pouch around the entire document for proper sealing. |
Specifications
| Feature | Detail |
|---|---|
| Brand | Crenova |
| Model Number | FN335 |
| Lamination Width | 13 inches (330mm), supports up to A3 size |
| Lamination Modes | Hot & Cold |
| Warm-up Time | Approx. 2 minutes |
| Laminating Speed | 350mm/min |
| Anti-Jam Feature | ABS Release Button |
| Item Weight | 3.87 pounds (1.76 Kilograms) |
| Product Dimensions | 17.64 x 5.91 x 4.84 inches |
| Included Accessories | Paper Trimmer, Corner Rounder, Hole Puncher, 10 Laminating Pouches (4*A5 / 3*A4 / 3*A3) |
Warranty and Support
For warranty information and customer support, please refer to the official Crenova website or contact their customer service directly. Keep your purchase receipt as proof of purchase for any warranty claims.
You can also find additional support and resources by visiting the Crenova Store on Amazon.
Documents and downloads
Ask a question about this manual
Ask about setup, troubleshooting, compatibility, parts, safety, or missing instructions. Manuals+ will review the question and use this page’s manual context to help answer it.