
Introduction
This instruction manual provides essential information for the proper use and maintenance of your joystar 5-piece replacement parts kit. This kit is designed to be compatible with specific 1200W Ninja Auto-IQ Smooth Boost Blender models. Please read this manual thoroughly before installation and use to ensure optimal performance and safety.
Package Contents
Your joystar replacement parts kit includes the following items:
- 1 x Extractor Blade Assembly
- 1 x 18oz Blender Cup
- 1 x 24oz Blender Cup
- 2 x Spout Lids
Compatibility Check
This replacement kit is specifically designed for 1200W Ninja Auto-IQ Smooth Boost Blender models: BL490 30, BL491 30, BL492 30, BL492W 30, BL493Z 30, and BL494 30.
Important: Ensure your blender's motor base has a 7-fin gear for proper fit and function. This blade is not compatible with 6-fin gear bases.

Image: Comparison showing a 7-fin rubber bottom gear (MATCH) and a 6-fin rubber bottom gear (X), indicating compatibility.

Image: Diagram illustrating the extractor gear (blade) and the motor gear (blender base) with numbered fins for identification.

Image: A ruler measuring the diameter of the extractor blade, showing it is approximately 4 inches (10 cm).
Setup and Installation
Inspect the Extractor Blade
Before first use, carefully inspect the rubber gasket located in the bottom blade assembly. Ensure it is snugly and securely seated within the blade unit. A loose gasket can lead to leaks during operation.
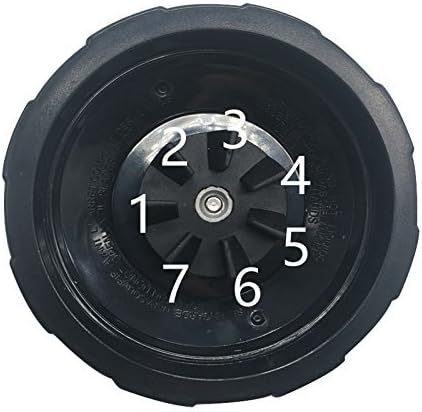
Image: Close-up view of the bottom of the extractor blade, highlighting the numbered fins and the area where the rubber gasket is located.
Attach the Blade to the Cup
Place your ingredients into either the 18oz or 24oz blender cup. Screw the extractor blade assembly onto the open end of the cup, turning clockwise until it is tightly sealed. Do not overtighten.

Image: A clear 18oz blender cup with measurement markings.
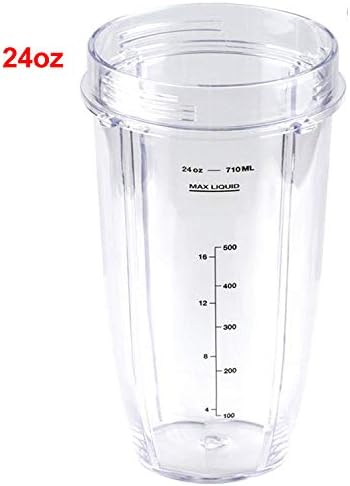
Image: A clear 24oz blender cup with measurement markings.

Image: The complete extractor blade assembly with stainless steel blades.
Place on Blender Base
Invert the assembled cup and blade, and place it onto your Ninja blender's motor base. Align the tabs on the cup with the slots on the base, then twist clockwise until it locks into place. The blender will not operate unless the cup is securely locked.
Operating Instructions
Once the cup and blade are securely attached to the blender base, you can begin blending. Refer to your original Ninja blender manual for specific blending programs and safety guidelines.
- Do not overfill the cups. Ensure ingredients do not exceed the "MAX LIQUID" line.
- Avoid continuous operation for extended periods. If blending for more than 1 minute, allow the motor to rest for a few minutes to prevent overheating.
- Never operate the blender with an empty cup or without the blade assembly securely attached.
Using the Spout Lids
After blending, remove the blade assembly and replace it with a spout lid for easy drinking or pouring. Press the flip-top spout firmly to ensure a secure seal.

Image: A black spout lid with a flip-top opening, designed for the blender cups.
Maintenance and Cleaning
Proper cleaning and maintenance will extend the life of your replacement parts.
- Dishwasher Safe: All components (extractor blade, cups, and lids) are dishwasher safe for convenient cleaning. Place them on the top rack.
- Hand Washing: For hand washing, use warm, soapy water and a non-abrasive sponge or brush. Rinse thoroughly and allow to air dry completely before storing.
- Blade Care: Exercise caution when cleaning the extractor blade due to its sharp edges.
- Gasket Check: Periodically check the rubber gasket in the blade assembly for wear or damage. Ensure it remains securely seated.
Troubleshooting
| Problem | Possible Cause | Solution |
|---|---|---|
| Blender leaks during operation. |
|
|
| Blender does not start. |
|
|
| Unusual noise or vibration. |
|
|
Specifications
| Feature | Detail |
|---|---|
| Brand | joystar |
| Compatible Blender Wattage | 1200W |
| Compatible Blender Models | Ninja Auto-IQ Smooth Boost Blender: BL490, BL491, BL492, BL492W, BL493Z, BL494 |
| Blade Type | 6-fin cutting blade with 7-fin drive gear (4" / 10cm diameter) |
| Cup Capacities | 18oz (530ml), 24oz (710ml) |
| Material | Plastic (cups, lids), Stainless Steel (blades) |
| Dishwasher Safe | Yes |
| Item Weight | 1.1 Pounds (approximate for the kit) |
Warranty and Support
This product is covered by the standard return and refund policies of the retailer where it was purchased. For specific warranty details, please refer to the purchase documentation or contact the seller directly.
For any questions, concerns, or assistance with your joystar replacement parts, please contact joystar customer support through the retailer's platform or visit the official joystar store page.