
1. Introduction
This manual provides essential instructions for the safe and efficient operation of your Miroir HD PRO M289 Portable Full HD Projector. Please read this manual thoroughly before using the device and retain it for future reference.
The Miroir HD PRO M289 is a compact, battery-powered projector designed for portability and high-definition viewing. It features native 1080p resolution, DLP technology, and versatile connectivity options.
2. Package Contents
Verify that all items are present in the package:
- Miroir HD PRO M289 Projector
- Power Cord
- HDMI Cable
- User Manual (this document)
3. Product Overview
Familiarize yourself with the physical components and dimensions of your projector.
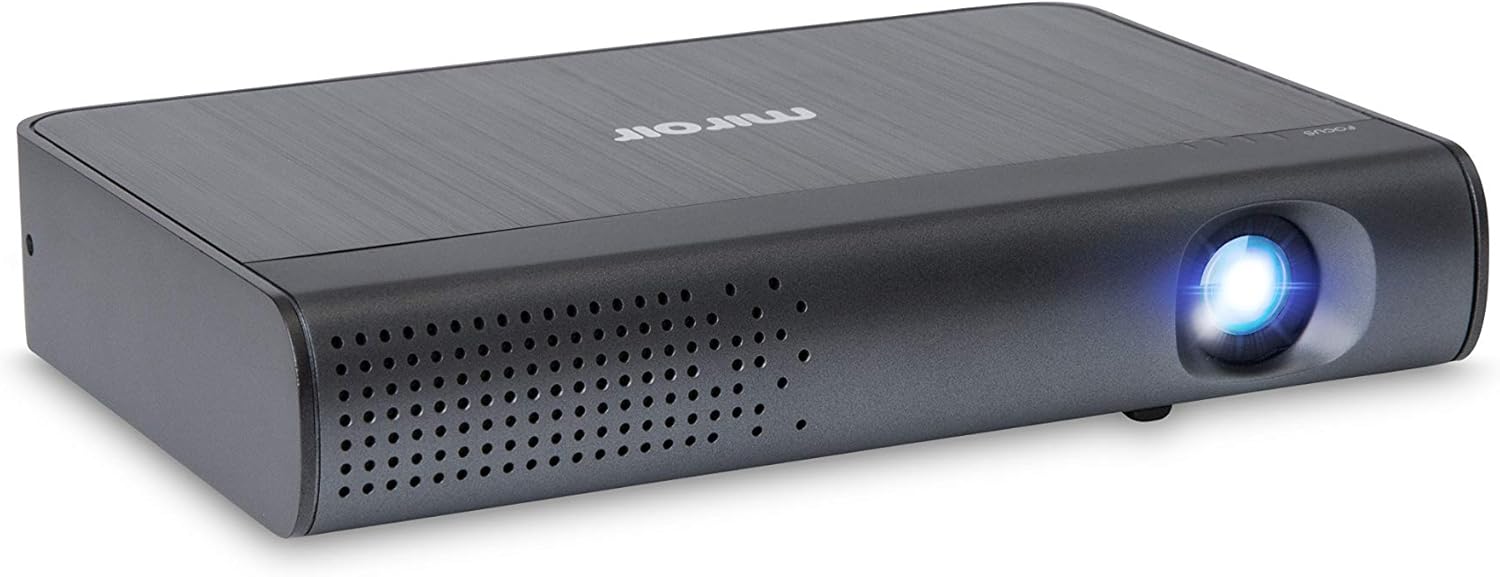
Figure 3.1: Front-right view of the Miroir HD PRO M289 Projector, showing the lens and ventilation.

Figure 3.2: Dimensions of the Miroir HD PRO M289 Projector: 6.9 inches (175 mm) long, 4.8 inches (122 mm) wide, and 1.4 inches (36 mm) thick.

Figure 3.3: Top view of the Miroir HD PRO M289 Projector, showing the focus wheel and indicator lights.

Figure 3.4: Side view of the Miroir HD PRO M289 Projector, highlighting the volume controls, power button, and focus wheel.
3.1. Ports and Controls
- Power Button: Turns the projector on or off.
- Volume Controls: Adjusts the audio output level.
- Focus Wheel: Manually adjusts the image clarity.
- HDMI Input: Connects to external video sources.
- USB-C Port: Used for charging and video input.
- Audio Output: Connects to external speakers or headphones.
4. Setup
4.1. Charging the Projector
Before initial use, fully charge the projector's internal battery. Connect the provided power cord to the projector and a power outlet. The charging indicator light will show the charging status. A full charge provides up to 2 hours of projection time.
4.2. Placement and Projection Size
Position the projector on a stable, flat surface. The distance from the projector to the projection surface (wall or screen) determines the image size. The projector does not feature zoom functionality, so physical placement is crucial for desired screen size.

Figure 4.1: Guide for projection distances: approximately 6 feet for a 70-inch screen, 7 feet for an 80-inch screen, and 9 feet for a 100-inch screen.
The projector supports a visible screen diagonal of up to 100 inches (254 cm).
5. Operating Instructions
5.1. Powering On/Off
- To power on, press and hold the Power Button until the indicator light illuminates.
- To power off, press and hold the Power Button until the indicator light turns off.
5.2. Connecting Video Sources
The Miroir HD PRO M289 supports HDMI and USB-C video input.
- HDMI Connection: Connect one end of the provided HDMI cable to the HDMI input port on the projector and the other end to the HDMI output port of your video source (e.g., laptop, gaming console, streaming device).
- USB-C Connection: Connect a compatible USB-C cable from your device (e.g., smartphone, tablet, laptop) to the USB-C port on the projector. Ensure your device supports video output over USB-C.
Note: Some Apple devices may require an Apple Digital AV Adapter (sold separately) for HDMI connectivity.

Figure 5.1: The Miroir HD PRO M289 Projector connected to a laptop, displaying a desktop interface on a wall.

Figure 5.2: The Miroir HD PRO M289 Projector displaying a video game on a large screen, demonstrating its use with gaming consoles.
5.3. Adjusting Focus
Rotate the Focus Wheel on the side of the projector until the projected image appears clear and sharp.
5.4. Audio Output
The projector has two built-in 2W speakers. To use external audio, connect headphones or external speakers to the audio output port.
- Adjust the volume using the Volume Controls on the projector or your connected source device.
6. Maintenance
- Cleaning the Lens: Use a soft, lint-free cloth specifically designed for optical lenses. Do not use abrasive cleaners or solvents.
- Cleaning the Exterior: Wipe the projector's exterior with a soft, dry cloth. Avoid using liquid cleaners directly on the device.
- Ventilation: Ensure the ventilation openings are clear of dust and obstructions to prevent overheating.
- Storage: When not in use, store the projector in a cool, dry place, away from direct sunlight and extreme temperatures.
7. Troubleshooting
| Problem | Possible Cause | Solution |
|---|---|---|
| No image projected | Projector not powered on; input source not connected; incorrect input selected (automatic detection); cable issue. | Ensure projector is on. Verify HDMI/USB-C cable connection. Check source device output. |
| Image is blurry | Focus not adjusted; projector too close/far from screen. | Adjust the Focus Wheel. Reposition the projector to achieve desired image size and clarity. |
| No sound | Volume too low; external speakers not connected/powered; source device audio settings. | Increase projector volume. Check external speaker connection and power. Verify audio output settings on your source device. |
| Projector not charging | Power cable not connected properly; faulty power adapter/cable; USB-C charging limitations. | Ensure power cable is securely connected. Use the original power adapter. Note that USB-C charging may have specific requirements and might not work with all power banks. |
| Projector overheats | Blocked ventilation; prolonged use in high ambient temperatures. | Ensure ventilation ports are clear. Operate in a well-ventilated area. Allow the projector to cool down if it becomes excessively warm. |
8. Specifications
| Feature | Detail |
|---|---|
| Model | M289 |
| Display Resolution | Native 1920 x 1080p (Full HD) |
| Projection Technology | DLP (Digital Light Processing) |
| Light Source | LED (20,000 hours lamp life) |
| Visible Screen Diagonal | Up to 100 inches (254 cm) |
| Connectivity | HDMI, USB-C (for video and charging) |
| Audio Output | Built-in 2W speakers, 3.5mm audio jack |
| Battery | Lithium Polymer (up to 2 hours viewing time) |
| Product Dimensions | 6.9 x 4.8 x 1.4 inches (175 x 122 x 36 mm) |
| Item Weight | 2.2 pounds (27.5 ounces) |
9. Warranty and Support
For warranty information and technical support, please refer to the official Miroir website or contact their customer service department. Details regarding specific warranty periods and terms are typically provided with your purchase documentation or on the manufacturer's website.
When contacting support, please have your product model (M289) and purchase date available.


