1. Introduction
This manual provides essential information for the safe and efficient operation of your RYOBI 18-Volt ONE+ Cordless High Volume Power Inflator, model P738. Please read and understand all instructions before use to ensure proper function and to prevent injury.

Figure 1: The RYOBI 18-Volt ONE+ Cordless High Volume Power Inflator P738. This tool is designed for high-volume, low-pressure inflation and deflation tasks.
2. Safety Information
Always follow basic safety precautions when using this product to reduce the risk of fire, electric shock, and personal injury.
- Read All Instructions: Familiarize yourself with the tool's operation and safety guidelines.
- Use in Well-Ventilated Areas: Ensure adequate airflow during operation.
- Keep Away from Children: This tool is not a toy.
- Proposition 65 Warning: This product can expose you to chemicals including lead, which is known to the State of California to cause cancer and birth defects or other reproductive harm. For more information go to www.P65Warnings.ca.gov.
- Battery Safety: Use only with compatible RYOBI ONE+ 18V batteries. Ensure the battery is securely attached before operation.
- Avoid Over-Inflation: Do not exceed the recommended pressure for items being inflated.
- Secure Attachments: Ensure nozzles are firmly attached before use.
3. Package Contents
Your RYOBI 18-Volt ONE+ Cordless High Volume Power Inflator (P738) package includes:
- RYOBI 18-Volt ONE+ Cordless High Volume Power Inflator (Tool Only)
- Various Nozzle Attachments (for inflation and deflation)
Note: This product is sold as a "Tool Only" unit. Battery and charger are sold separately and are required for operation.
4. Setup
4.1 Attaching the Battery
- Ensure the inflator is turned off.
- Align the ribs on the battery with the grooves in the tool's port.
- Slide the battery into the tool until it clicks securely into place.
- To remove, press the battery release latches and pull the battery out.
4.2 Attaching Nozzles
- Select the appropriate nozzle for your inflation or deflation task.
- For inflation, firmly push the desired nozzle onto the inflation port at the front of the tool.
- For deflation, firmly push the desired nozzle onto the deflation port at the top of the tool.
- Ensure the nozzle is securely attached before operating the tool.

Figure 2: Key features of the inflator, including convenient on-board storage for valve adapters.
5. Operating Instructions
5.1 Inflation
- Attach the appropriate nozzle to the inflation port.
- Insert the nozzle into the item to be inflated.
- Press the trigger to start inflation. The tool features a locking trigger for continuous operation, preventing user fatigue during extended use.
- Monitor the item being inflated to prevent over-inflation.
- Release the trigger or press it again if locked to stop inflation.

Figure 3: Inflating a standard twin air mattress. The inflator provides high volume airflow for quick inflation.
5.2 Deflation
- Attach the appropriate nozzle to the deflation port (located at the top of the tool).
- Insert the nozzle into the item to be deflated.
- Press the trigger to start deflation. The tool will draw air out of the item.
- Release the trigger to stop deflation.

Figure 4: Deflating a pool toy. The deflation feature helps to quickly pack away inflatable items.
5.3 Versatile Applications
Beyond inflating air mattresses and pool toys, this tool can also function as a portable benchtop blower for cleaning work surfaces or accelerating charcoal readiness on a grill.
6. Maintenance
- Cleaning: Keep the tool clean and free of debris. Use a dry cloth to wipe down the exterior. Do not use harsh chemicals or abrasive cleaners.
- Storage: Store the tool in a dry, secure location away from children. Remove the battery when storing for extended periods.
- Nozzle Care: Clean nozzles after each use to prevent blockages. Store them in the integrated storage on the tool's base.
7. Troubleshooting
| Problem | Possible Cause | Solution |
|---|---|---|
| Tool does not turn on. | Battery not attached or discharged. | Ensure battery is fully charged and properly seated. |
| Low airflow. | Nozzle blockage or incorrect nozzle. | Check and clear any blockages in the nozzle or ports. Ensure the correct nozzle is used for the task. |
| Item not inflating/deflating properly. | Improper nozzle seal or valve issue on item. | Ensure a tight seal between the nozzle and the item's valve. Check the item's valve for damage. |
8. Specifications
| Feature | Detail |
|---|---|
| Brand | RYOBI |
| Model Name | P738 |
| Voltage | 18 Volts |
| Power Source | Battery Powered |
| Recommended Uses | Blowing, Inflating, Deflating |
| Noise Level | 78 Decibels |
| Special Feature | Cordless, Portable |
| Item Weight | 1 Pounds |
| Air Flow Capacity | 200.91 Liters Per Minute |
| Maximum Operating Pressure | 0.5 Pound per Square Inch |
| Product Dimensions | 7.5"L x 4.25"W x 6"H |
| Material | ABS Plastic |
| Color | Black, Green |
| UPC | 682500982491 |
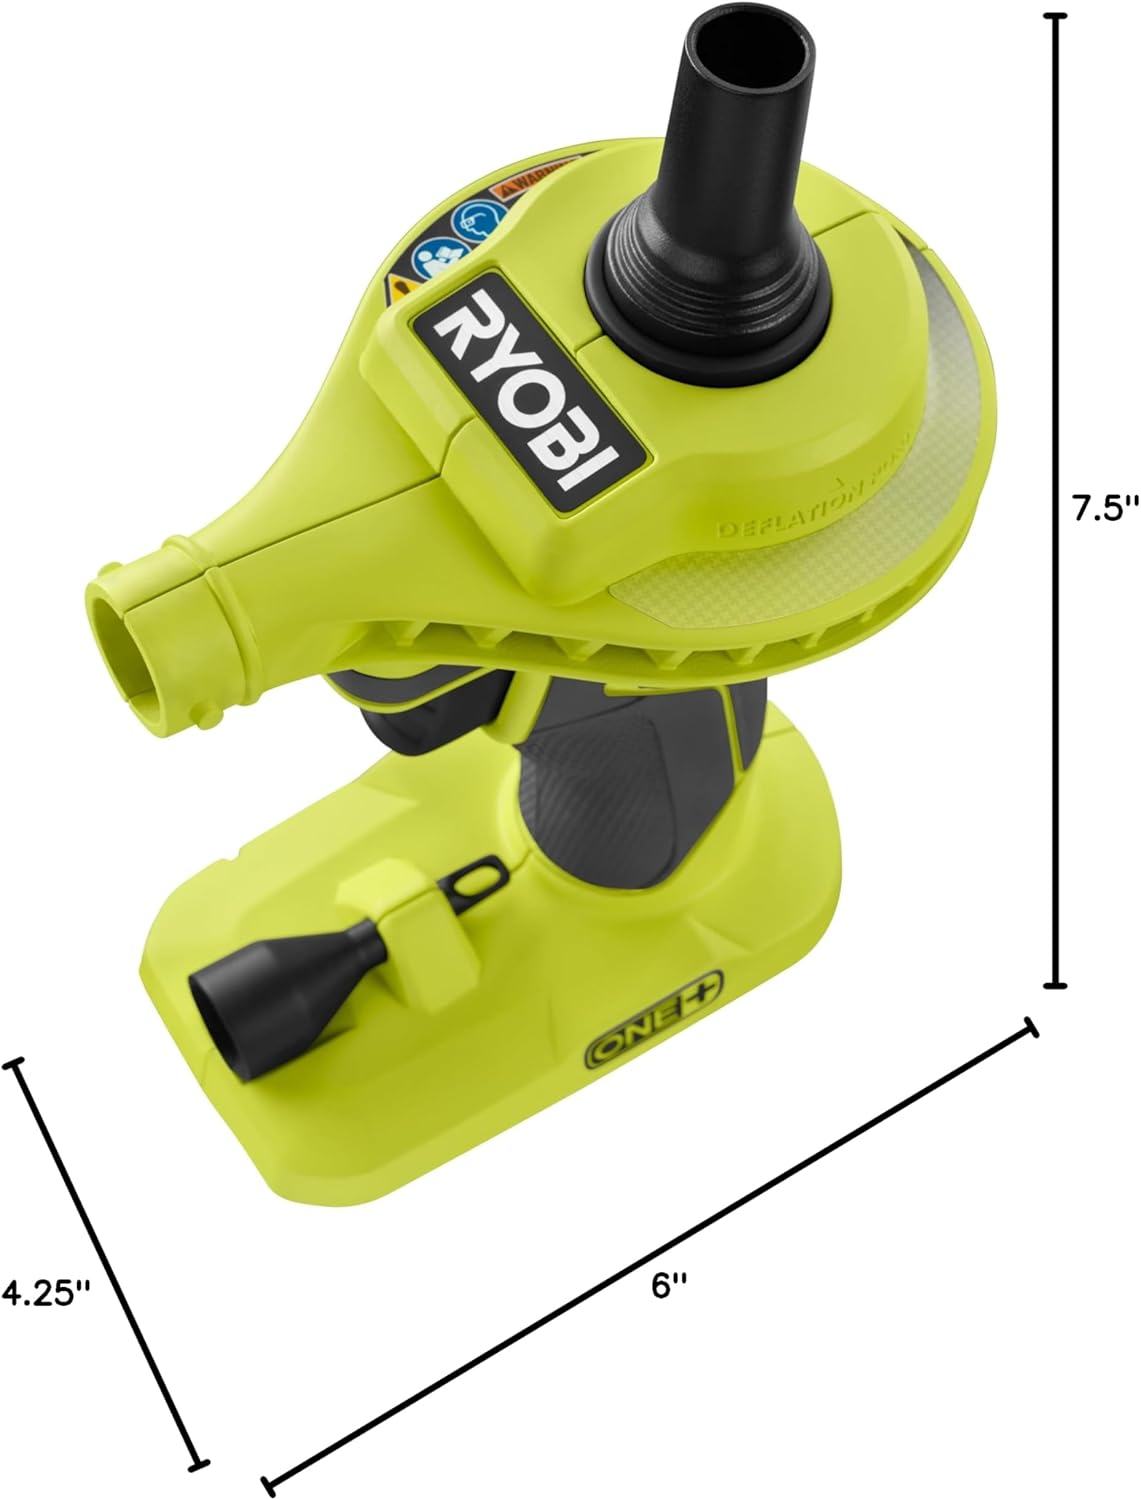
Figure 5: Physical dimensions of the inflator for reference.
9. Warranty and Support
For warranty information, technical support, or to purchase replacement parts, please refer to the official RYOBI website or contact their customer service directly. Keep your purchase receipt as proof of purchase for warranty claims.


