
Introduction
This manual provides essential information for the safe and efficient operation of your Kärcher SC 2 Deluxe EasyFix Steam Cleaner. Please read these instructions thoroughly before initial use and retain them for future reference. This steam cleaner is designed for hygienic cleaning of hard surfaces in your home without the need for chemical cleaning agents.
Safety Instructions
Observe the following safety guidelines to prevent accidents and damage to the appliance:
- Always ensure the appliance is unplugged from the power outlet before cleaning or maintenance.
- Do not open the boiler cap while the appliance is under pressure. Allow the appliance to cool down and depressurize completely before opening.
- Keep children away from the appliance during operation. The steam gun features a child safety lock to prevent accidental activation.
- Direct steam only at surfaces to be cleaned. Avoid directing steam at people, animals, or electrical components.
- Use only clean tap water. Do not add detergents, perfumes, or other chemicals to the water tank, as this can damage the appliance and void the warranty.
- Regularly check the power cord for damage. If damaged, do not operate the appliance.
Package Contents
Verify that all components are present upon unpacking:
- Kärcher SC 2 Deluxe EasyFix Steam Cleaner main unit
- Floor nozzle EasyFix with flexible joint
- Extension tubes (2x)
- Hand nozzle
- Round brush
- Power nozzle
- Microfibre floor cloth (2x)
- Microfibre cover for hand nozzle
- Accessory storage bag
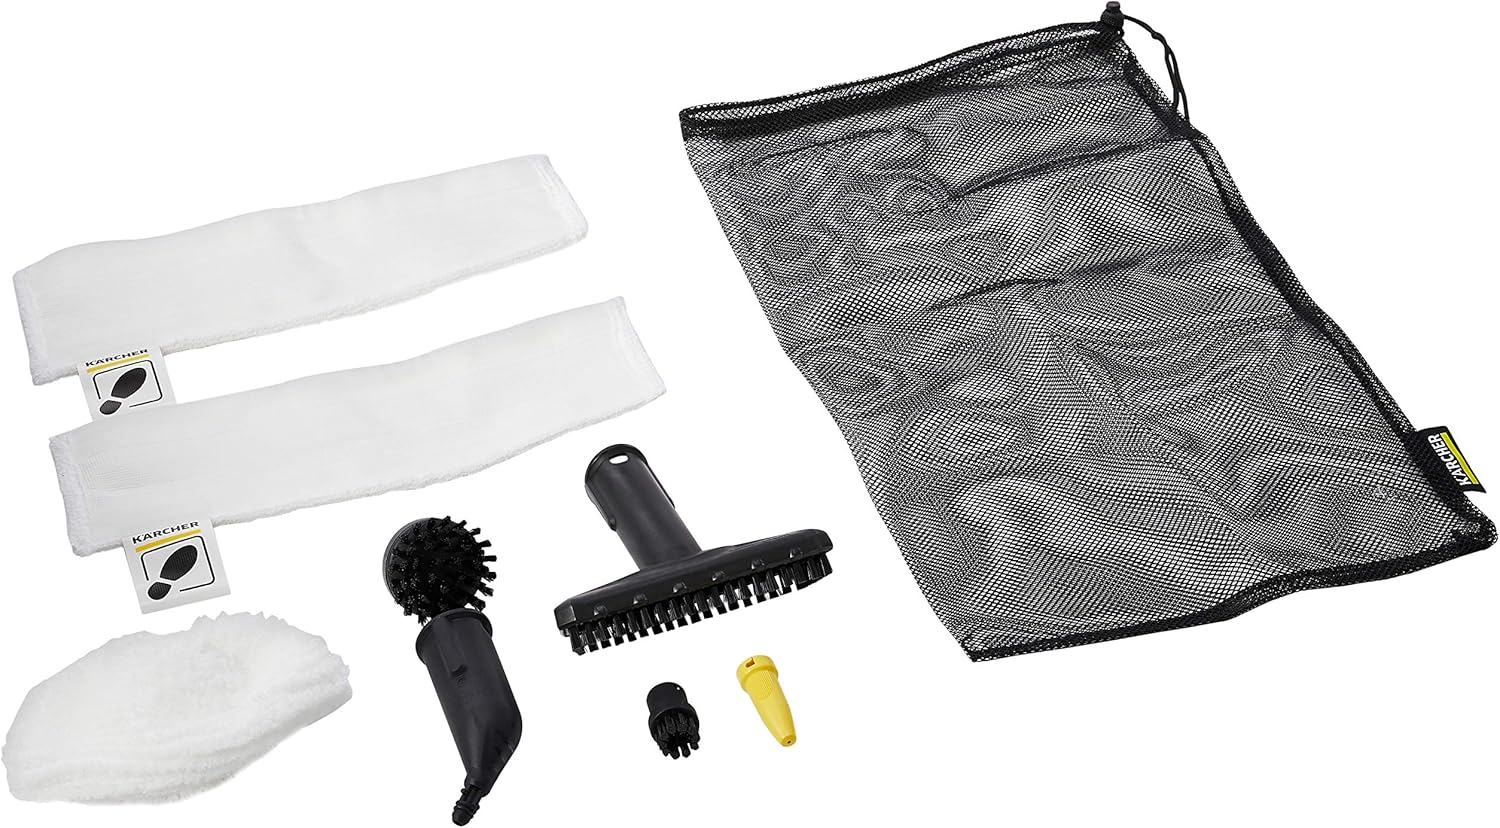
Image: Various accessories included with the Kärcher SC 2 Deluxe EasyFix Steam Cleaner, such as microfibre cloths, different brushes, and nozzles, neatly arranged.
Setup
- Assembly: Connect the extension tubes to the steam gun and then attach the EasyFix floor nozzle. For other cleaning tasks, attach the desired accessory (hand nozzle, round brush, power nozzle) directly to the steam gun or an extension tube.
- Filling the Water Tank: Unscrew the boiler cap. Fill the boiler with a maximum of 1 liter of tap water using a measuring cup or funnel. Do not overfill. Securely screw the boiler cap back on.
- Power Connection: Plug the power cord into a suitable grounded electrical outlet.

Image: The Kärcher SC 2 Deluxe EasyFix Steam Cleaner fully assembled with the floor nozzle and extension tubes, ready for use.
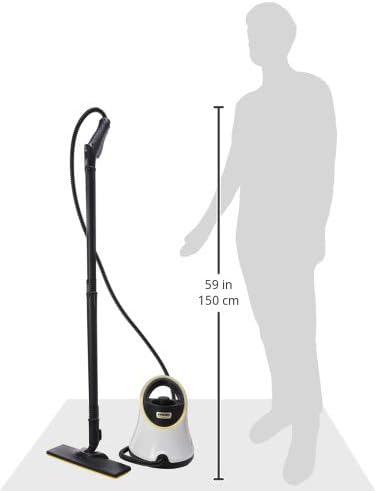
Image: The Kärcher SC 2 Deluxe EasyFix Steam Cleaner shown next to a human figure, providing a visual reference for its size and height.
Operating Instructions
- Power On and Heating: Switch on the appliance. The LED indicator ring on the device will illuminate red, indicating that the water is heating up. Once the LED turns green, the appliance is ready for use. This typically takes approximately 6.5 minutes.
- Steam Regulation: The steam flow can be adjusted in two stages using the control on the steam gun. Select the appropriate steam intensity for the surface and level of dirt.
- Child Safety Lock: Engage the child safety lock on the steam gun when the appliance is not in use or when children are present to prevent accidental steam release.
- Using the Floor Nozzle: Attach a microfibre floor cloth to the EasyFix floor nozzle using the hook-and-loop system. Move the nozzle evenly over the floor surface.
- Using Hand Nozzle and Brushes: For smaller areas, tiles, or stubborn dirt, attach the hand nozzle with a microfibre cover, or the round brush/power nozzle directly to the steam gun.
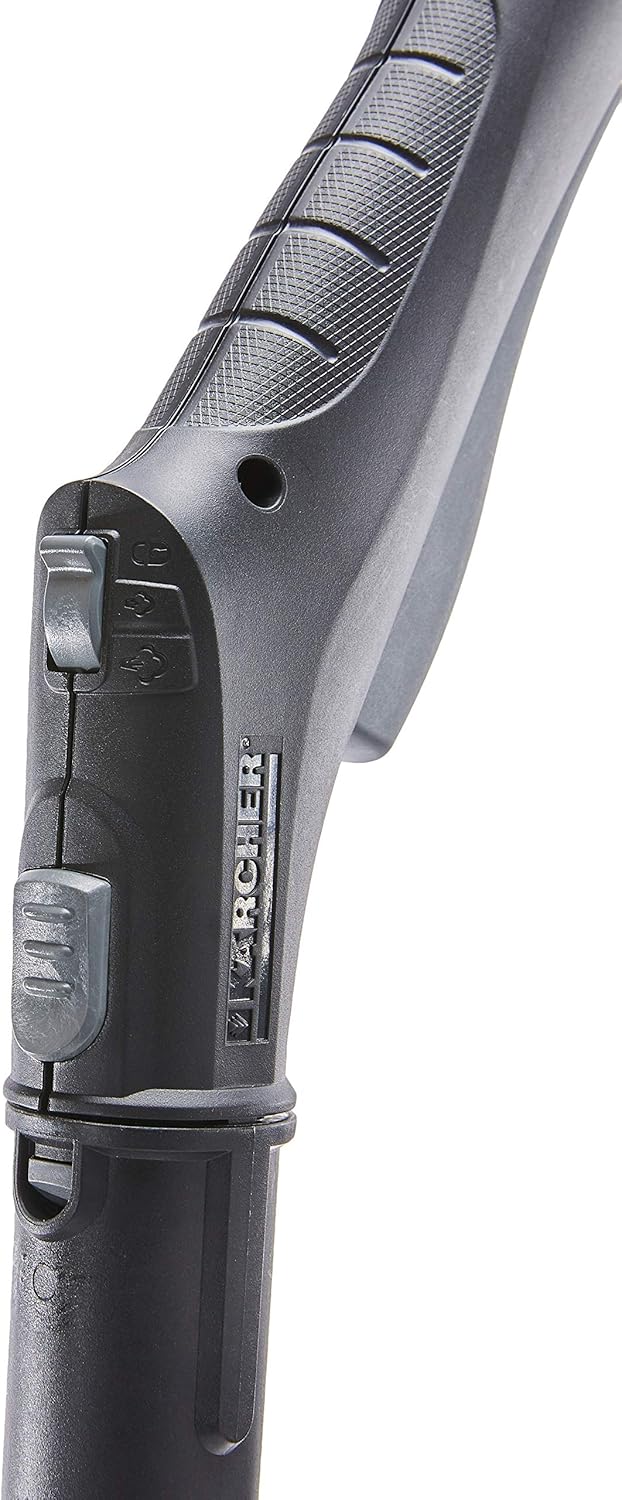
Image: A close-up view of the Kärcher SC 2 Deluxe EasyFix Steam Cleaner's handle, showing the steam trigger and the child safety lock mechanism.

Image: A detailed view of the flexible hose connecting the steam gun to the main unit of the Kärcher SC 2 Deluxe EasyFix Steam Cleaner, highlighting the robust connection point.
Maintenance
Regular maintenance ensures optimal performance and extends the lifespan of your steam cleaner.
- Emptying the Water Tank: After each use, allow the appliance to cool down completely and depressurize. Carefully unscrew the boiler cap and empty any remaining water.
- Cleaning Accessories: Wash microfibre cloths and covers after each use. Brushes and nozzles can be rinsed under running water.
- Descaling: Depending on water hardness, descaling may be necessary periodically. Refer to the Kärcher website or contact customer support for recommended descaling procedures and products.
- Storage: Store the appliance and its accessories in a dry, frost-free location. The accessory storage bag helps keep components organized.
Troubleshooting
| Problem | Possible Cause | Solution |
|---|---|---|
| No steam is produced. | Water tank is empty or appliance is not heated. | Refill water tank. Wait for the LED indicator to turn green. |
| LED indicator remains red. | Appliance is still heating up or a fault has occurred. | Allow sufficient time for heating (approx. 6.5 min). If it persists, unplug and contact support. |
| Steam pressure is low. | Low water level or scale buildup. | Check water level. Perform descaling if necessary. |
Specifications
- Model: SC 2 Deluxe EasyFix
- Heating output: 1500 W
- Max. steam pressure: 3.2 bar
- Heat-up time: 6.5 min
- Boiler/tank capacity: 1 L
- Cable length: 4 m
- Current type: 1 Ph / 220 - 240 V / 50 - 60 Hz
- Item weight: 2.7 kg
- Dimensions (L x W x H): (Not explicitly provided, but generally compact)
Warranty and Support
The Kärcher SC 2 Deluxe EasyFix Steam Cleaner comes with a limited warranty. For detailed warranty information, service, or technical support, please refer to the warranty card included with your product or visit the official Kärcher website. You may also contact Kärcher customer service directly for assistance with product operation or troubleshooting.


