
1. Introduction
This manual provides detailed instructions for the installation, operation, and maintenance of the Real HD DS-7608NI-Q2/8P Network Video Recorder (NVR). This NVR is designed to manage and record video streams from up to 8 IP cameras, supporting resolutions up to 8MP and utilizing H.265 video compression for efficient storage.
Please read this manual thoroughly before operating the device to ensure proper usage and to maximize its performance and longevity.
2. Key Features
- Supports up to 8 IP cameras with resolutions up to 8MP.
- Advanced H.265+/H.265/H.264+/H.264 video compression formats.
- Equipped with 8 independent Power over Ethernet (PoE) network interfaces for simplified camera connection.
- Incoming bandwidth of 80 Mbps and outgoing bandwidth of 80 Mbps.
- HDMI output supports resolutions up to 4K (3840x2160) at 60Hz.
- VGA output supports resolutions up to 1920x1080P at 60Hz.
- Supports 1 SATA interface for a hard disk drive (HDD) with up to 6TB capacity (HDD not included).
- Features 2 USB 2.0 interfaces for external devices.
- Includes Hik-Connect for easy network management and remote access.

Figure 1: Front view of the Real HD DS-7608NI-Q2/8P NVR, showing its sleek design and front USB port.
3. Setup Guide
3.1 Unpacking and Inspection
Carefully unpack the NVR and check for any signs of damage. Verify that all components listed in the packing list are present. If any items are missing or damaged, contact customer support immediately.
3.2 Hard Drive Installation (Optional)
The DS-7608NI-Q2/8P NVR does not include a pre-installed hard drive. A SATA hard drive (up to 6TB capacity) is required for video recording. Follow these steps to install a hard drive:
- Power off the NVR and disconnect all cables.
- Remove the top cover of the NVR by unscrewing the retaining screws.
- Connect the SATA data cable and power cable to the hard drive.
- Secure the hard drive to the NVR chassis using the provided screws.
- Replace the top cover and secure it with the screws.
Note: After installation, the hard drive may need to be initialized and formatted through the NVR's system settings before it can be used for recording.
3.3 Physical Connections
Refer to the diagram below for connecting power, network, display, and cameras to the NVR.

Figure 2: Rear panel connections of the NVR, including PoE ports, audio in/out, VGA, HDMI, LAN, and USB ports.
- Power: Connect the power adapter to the NVR's power input and then to a power outlet.
- Display: Connect a monitor to the NVR's HDMI or VGA output port.
- Network: Connect the NVR's LAN port to your router or network switch using an Ethernet cable.
- IP Cameras: Connect IP cameras to the NVR's PoE ports. The NVR will provide power and data connectivity to the cameras.
- Audio: If using external audio devices, connect them to the Audio In/Out RCA ports.
- USB: Connect a USB mouse (for local control) or a USB flash drive (for backup) to the USB ports.
3.4 Initial Configuration
Upon first boot, the NVR will guide you through an initial setup wizard. This typically includes setting up a password, network settings, date/time, and hard drive initialization.
- Follow the on-screen prompts to complete the wizard.
- Ensure the network settings are correctly configured to allow the NVR to access the internet for remote viewing and updates.
- Scan for connected IP cameras. The NVR's PoE ports should automatically detect and configure compatible cameras.
3.5 Remote Access Setup
The NVR supports remote access via the Hik-Connect application. This allows you to view live feeds and playback recordings from your smartphone, tablet, or PC.

Figure 3: Three-step process for setting up remote access: Connect NVR to internet, download Hik-Connect app, add device.
- Connect the NVR to the Internet: Ensure the NVR's LAN port is connected to a network with internet access.
- Download the Hik-Connect App: Download and install the Hik-Connect application from your device's app store (available for Android and iOS) or access the PC client.
- Add the Device: Open the Hik-Connect app, create an account, and add your NVR by scanning the QR code on the NVR or manually entering its serial number.
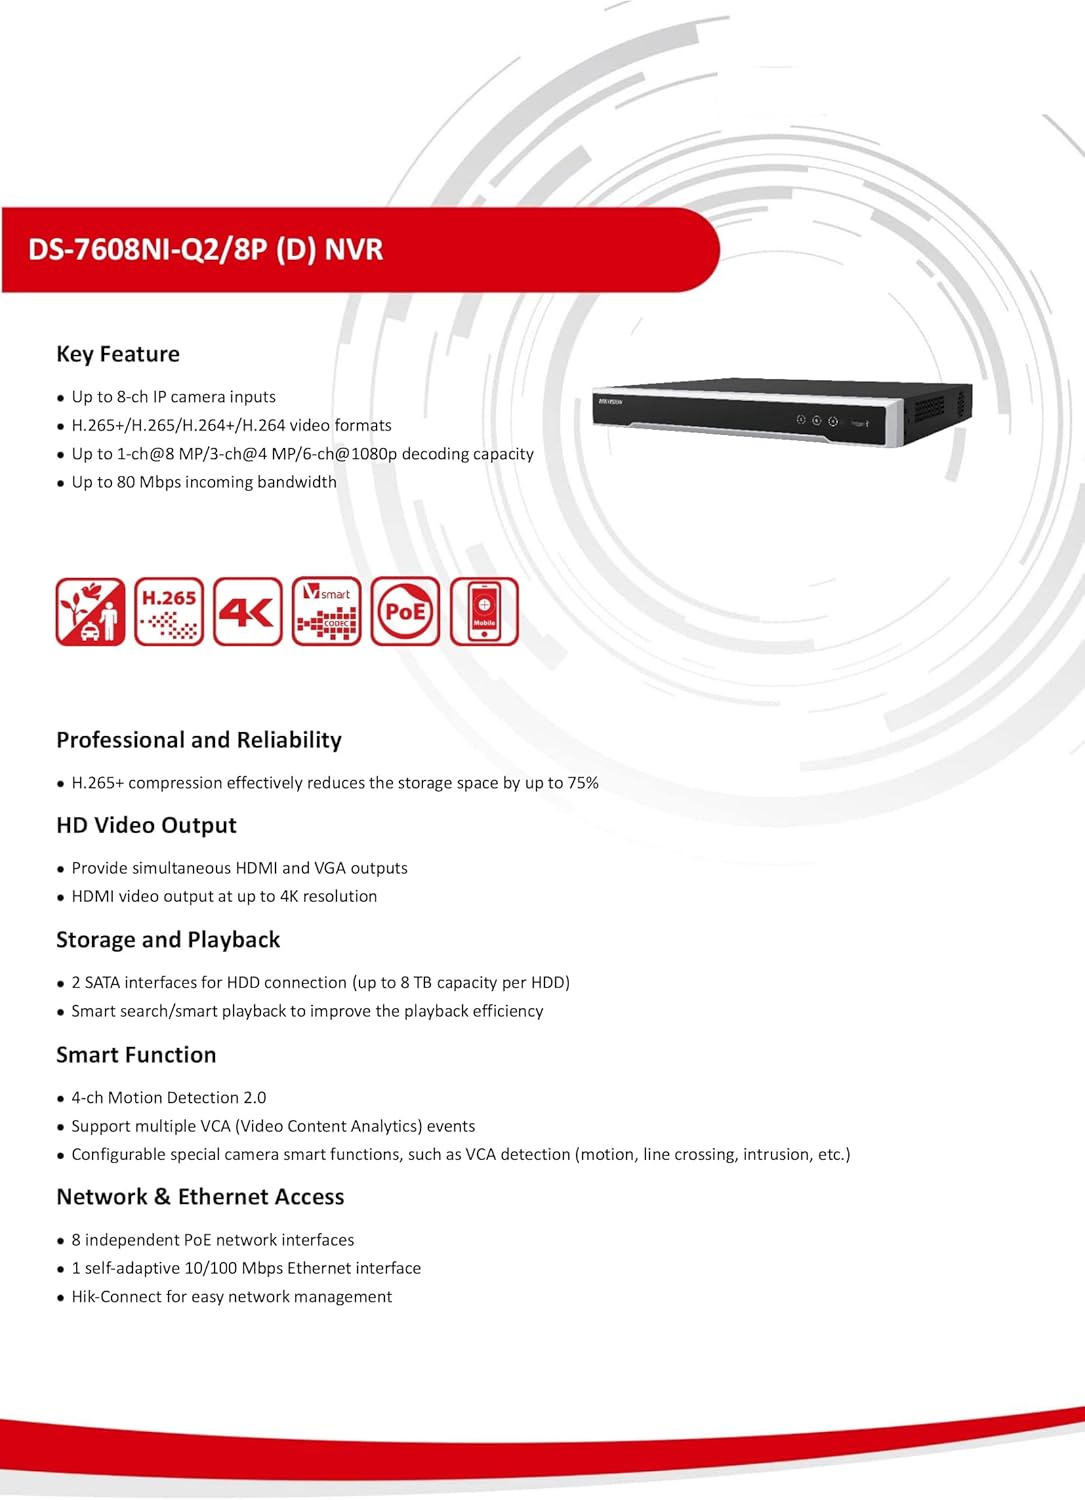
Figure 4: Example of live camera feed viewed on a smartphone using the Hik-Connect application.
4. Operating Instructions
4.1 Live View
The live view interface displays real-time video feeds from all connected cameras. You can switch between single-camera view, multi-camera grid view, and customize the display layout.

Figure 5: NVR's live view interface displaying multiple camera feeds simultaneously, with a channel selection panel on the left.
- Use the mouse to navigate the interface.
- Double-click a camera feed to view it in full screen.
- Right-click to access the main menu for system settings and other functions.
4.2 Video Playback
To review recorded footage, access the playback function from the main menu. You can search for recordings by date, time, and event type.

Figure 6: NVR's playback interface with a timeline for navigating recordings and a calendar for date selection.
- Select the desired camera and date using the calendar.
- Use the timeline to pinpoint specific times for playback. Different colors on the timeline may indicate different recording types (e.g., continuous, motion detection).
- Playback controls (play, pause, fast forward, rewind) are available at the bottom of the screen.
4.3 Recording Settings
Configure recording schedules, motion detection, and other event-triggered recording options through the NVR's system settings. This allows for optimized storage usage and targeted recording.
4.4 Network Configuration
Access network settings to configure IP addresses, port forwarding (if necessary for advanced remote access), and other network-related parameters. Ensure stable network connectivity for optimal performance.
5. Maintenance
- Regular Firmware Updates: Check the manufacturer's website or the NVR's system settings for available firmware updates. Keeping the firmware updated ensures optimal performance, security, and access to new features.
- Hard Drive Health Check: Periodically check the health status of the installed hard drive through the NVR's system menu. Replace the hard drive if any errors or warnings are reported to prevent data loss.
- System Backup: Regularly back up important video footage to an external USB drive or network storage.
- Environmental Conditions: Ensure the NVR is operated within its specified working temperature range of -10 °C to +55 °C (+14 °F to +131 °F) and working humidity of 10% to 90%. Avoid exposing the device to extreme temperatures, direct sunlight, or high humidity.
- Cleaning: Keep the NVR free from dust and debris. Use a soft, dry cloth for cleaning. Do not use liquid cleaners or solvents. Ensure ventilation openings are clear to prevent overheating.
6. Troubleshooting
- No Video Output:
- Check HDMI/VGA cable connections to the monitor and NVR.
- Ensure the monitor is set to the correct input source.
- Verify the NVR is powered on and its indicator lights are active.
- Cameras Not Displaying:
- Confirm cameras are properly connected to the NVR's PoE ports.
- Check camera power and network status.
- Ensure cameras are compatible with the NVR and have been added/activated in the NVR's camera management settings.
- Verify camera IP addresses are not conflicting.
- No Recording:
- Check if a hard drive is installed and properly connected.
- Verify the hard drive status in the NVR's system settings; initialize/format if necessary.
- Ensure recording schedules are configured correctly.
- Check for sufficient hard drive space.
- Remote Access Issues:
- Confirm the NVR has internet access.
- Verify Hik-Connect account login details and device binding.
- Check network firewall settings that might be blocking communication.
- System Freezing/Unresponsive:
- Restart the NVR.
- Ensure adequate ventilation to prevent overheating.
- Check for the latest firmware updates.
For further assistance, refer to the official Real HD support resources or contact their technical support team.
7. Specifications
Detailed technical specifications for the Real HD DS-7608NI-Q2/8P NVR are provided below:
| Category | Specification |
|---|---|
| Model | DS-7608NI-Q2/8P |
| IP Video Input | 8-channel |
| Two-way Audio Input | 1-channel, RCA (2.0 Vp-p, 1kΩ) |
| Incoming Bandwidth | 80 Mbps |
| Outgoing Bandwidth | 80 Mbps |
| HDMI Output | 1-channel, resolutions: 4K(3840*2160)/60Hz, 4K(3840*2160)/30Hz, 1920*1080P/60Hz, 1600*1200/60Hz, 1280*1024/60Hz, 1280*720/60Hz, 1024*768/60Hz |
| VGA Output | 1-channel, resolutions: 1920*1080P/60Hz, 1280*1024/60Hz, 1280*720/60Hz, 1024*768/60Hz |
| Recording Resolution | 8MP/6MP/5MP/4MP/3MP/1080p/UXGA/720p/VGA/4CIF/DCIF/2CIF/CIF/QCIF |
| Decoding Capability | 8-ch@1080P |
| SATA Interfaces | 1 SATA interface for 1 HDD |
| HDD Capacity | Up to 6TB capacity for each HDD |
| USB Interface | 2 x USB 2.0 |
| PoE Interfaces | 8 independent 10/100 Mbps PoE Ethernet interfaces |
| Power Supply | 100 to 200 VAC |
| Consumption (without HDD and PoE) | ≤ 15 W |
| Working Temperature | -10 °C ~ +55 °C (+14 °F ~ +131 °F) |
| Working Humidity | 10 % ~ 90 % |
| Dimensions (W × D × H) | 385 mm × 315 mm × 52 mm (15.2" × 12.4" × 2.0") |
| Weight (without HDD) | ≤ 3 kg (6.6 lb) |

Figure 7: A visual representation of the NVR's detailed technical specifications.
8. Warranty and Support
The Real HD DS-7608NI-Q2/8P NVR comes with a One Year Warranty. This warranty covers manufacturing defects and ensures the product functions as intended under normal use conditions.
Lifetime Technical Support is provided by the seller, Real HD Store. For any technical inquiries, setup assistance, or troubleshooting not covered in this manual, please contact the Real HD Store customer support. Their team is available to provide guidance and resolve issues related to your NVR.
Contact information for support can typically be found on the seller's Amazon store page or through the product packaging.