Introduction
The Diamond Audio MICRO84U is a high-performance 4-channel full-range digital amplifier designed for powersports applications. This amplifier delivers powerful audio output and is engineered for durability in harsh environments. Its compact design allows for flexible installation while maintaining robust sound quality.
Key Features:
- 4-Channel Full-Range Digital Amplifier: Provides versatile audio amplification for various setups.
- High Power Output: Offers up to 250W RMS bridged at 4Ω, 125W RMS at 2Ω, and 85W RMS at 4Ω for clear and dynamic sound.
- All-Weather Durability: Features a conformal-coated design for protection in harsh environments.
- Compact Design: Allows for easy integration into various powersports vehicles.
- Flexible Input and Turn-On Modes: Includes selectable 2CH / 4CH input modes and REM / VOX / DC turn-on modes.
- Adjustable Crossover Filter: A 40-400Hz crossover ensures optimal sound clarity across a wide range of audio applications.
What's in the Box:
- Diamond Audio MICRO84U Amplifier
- Owner's Manual
- Installation Hardware (e.g., wiring harnesses, mounting screws)
Important Safety Information
Read all instructions carefully before installing and operating your amplifier. Failure to follow these guidelines may result in damage to the amplifier, vehicle, or personal injury. Keep this manual for future reference.
- Professional Installation Recommended: For optimal performance and safety, professional installation is highly recommended.
- Power Source: Connect the amplifier only to a 12-volt DC negative ground electrical system.
- Fusing: Always install an appropriate fuse holder within 18 inches of the car battery's positive terminal. Refer to the wiring diagram for recommended fuse ratings.
- Wiring: Ensure all wiring is properly routed and secured to prevent pinching, cutting, or short circuits. Use appropriate gauge wire for power and ground connections.
- Ventilation: Mount the amplifier in a location that allows for adequate air circulation to prevent overheating.
- Water Exposure: While designed for all-weather use, avoid direct high-pressure water spray on the unit.
- Volume Levels: Prolonged exposure to high volume levels can cause hearing damage.
Setup and Installation
Proper installation is crucial for the performance and longevity of your amplifier. Follow these steps carefully.
1. Mounting Location:
Select a mounting location that is dry, well-ventilated, and protected from direct sunlight or excessive heat. The amplifier's dimensions are approximately 9 x 4 x 1.64 inches. Ensure there is sufficient space around the unit for air circulation.
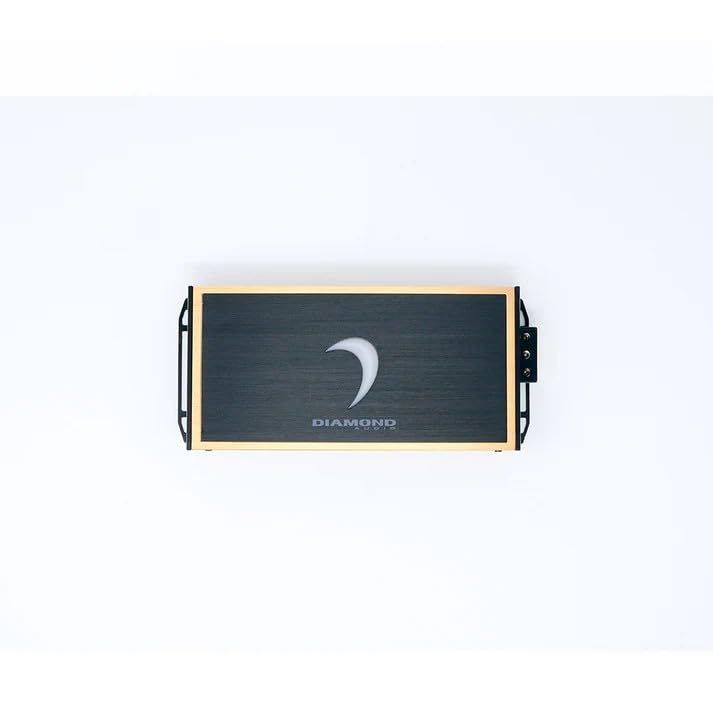
Image: Top view of the Diamond Audio MICRO84U amplifier, showcasing its compact design and Diamond Audio branding.
2. Power and Ground Wiring:
Connect the power and ground wires as follows:
- +12V (Power): Connect a suitable gauge power wire directly to the positive terminal of your vehicle's battery. Install an inline fuse holder with the recommended fuse rating (consult your vehicle's manual or a professional installer for specific fuse ratings) within 18 inches of the battery.
- GND (Ground): Connect a suitable gauge ground wire to a clean, unpainted metal surface of the vehicle chassis. Ensure a solid electrical connection.
- REM (Remote Turn-On): Connect this terminal to the remote output of your head unit or an ignition-switched 12V source.
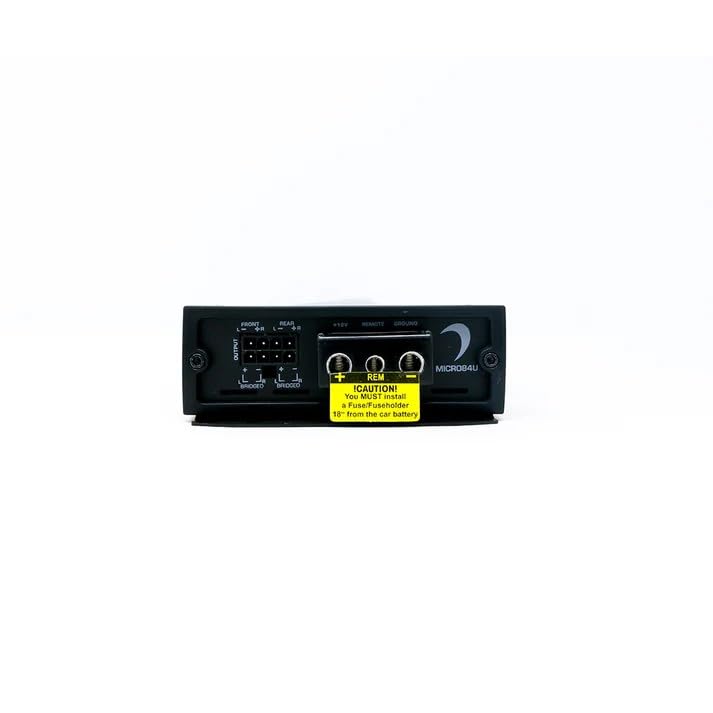
Image: Rear view of the MICRO84U amplifier, highlighting the power (+12V), remote (REM), and ground (GND) terminals, along with a caution sticker regarding fuse installation.
3. Input Connections:
Connect your audio source (head unit) to the amplifier's input terminals. The MICRO84U supports both 2-channel and 4-channel input configurations.
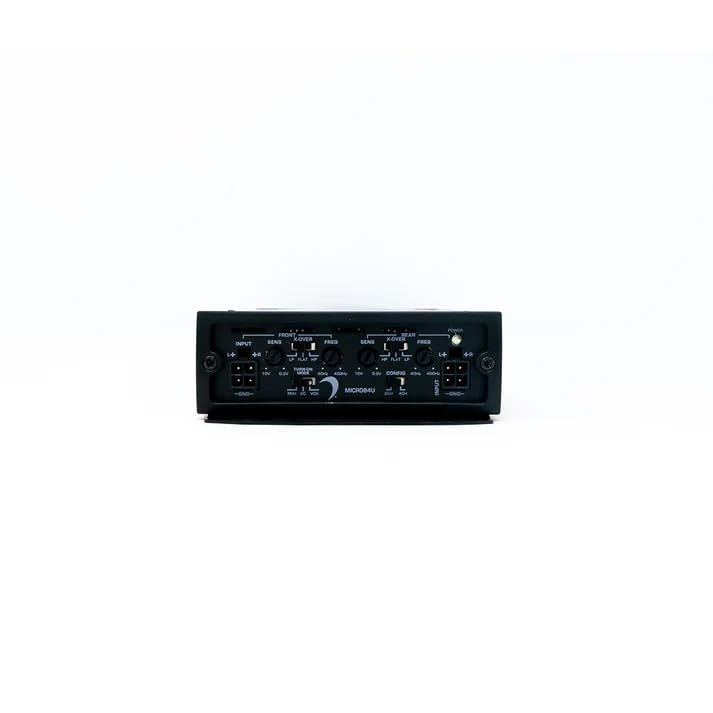
Image: Front view of the MICRO84U amplifier, displaying the input terminals, sensitivity controls, crossover frequency adjustments, and input mode selector.
4. Speaker Output Connections:
Connect your speakers to the amplifier's output terminals. Ensure correct polarity (+ to + and - to -) for each speaker. The amplifier can be configured for stereo or bridged operation.
- Stereo Mode: Connect one speaker per channel.
- Bridged Mode: For higher power output to a single speaker (e.g., a subwoofer), bridge two channels. Refer to the specific wiring diagram in the full owner's manual for correct bridging connections. The amplifier offers up to 250W RMS bridged at 4Ω.
Operating Instructions
Once installed, configure the amplifier settings for optimal audio performance.
1. Turn-On Modes (REM / VOX / DC):
The MICRO84U offers selectable turn-on modes:
- REM (Remote): Standard turn-on via a remote wire from the head unit.
- VOX (Voltage Offset): Detects a voltage change on the audio input to turn on the amplifier. Useful for factory head units without a remote output.
- DC (DC Offset): Detects a DC offset on the speaker-level inputs to turn on the amplifier. Also useful for factory head units.
Select the appropriate mode using the switch on the amplifier's control panel.
2. Input Mode (2CH / 4CH):
Select the input mode based on your audio source configuration:
- 2CH: Use if your head unit provides only a 2-channel input signal, and the amplifier will internally distribute it to all 4 channels.
- 4CH: Use if your head unit provides a full 4-channel input signal.
3. Gain (SENS) Adjustment:
Adjust the gain controls (SENS) for each channel to match the output voltage of your head unit. Start with the gain set to minimum and slowly increase it until you achieve a clear, undistorted sound at your desired maximum volume level from the head unit. Avoid setting the gain too high, as this can introduce distortion and potentially damage speakers.
4. Crossover Filter (X-OVER, FREQ):
The MICRO84U features adjustable crossover filters (40-400Hz) for precise sound tuning:
- LP (Low Pass): Allows only frequencies below the set frequency to pass through. Typically used for subwoofers.
- HP (High Pass): Allows only frequencies above the set frequency to pass through. Typically used for full-range or component speakers to protect them from low bass frequencies.
- FLAT: Bypasses the crossover, allowing all frequencies to pass through.
Adjust the FREQ (frequency) knob to set the desired crossover point for each channel group (Front and Rear).
Maintenance
The Diamond Audio MICRO84U amplifier is designed for durability and requires minimal maintenance. Following these simple guidelines will help ensure its long-term performance:
- Cleaning: Periodically wipe the amplifier's exterior with a soft, dry cloth. Avoid using harsh chemicals or abrasive cleaners.
- Connections: Occasionally check all power, ground, remote, input, and speaker connections to ensure they are secure and free from corrosion. Loose connections can lead to poor performance or damage.
- Ventilation: Ensure that the amplifier's cooling fins are free from dirt, dust, or debris to maintain proper heat dissipation.
- Environmental Protection: While the unit is conformal-coated for all-weather applications, avoid submerging it in water or exposing it to extreme temperatures beyond its operating range.
Troubleshooting
If you experience issues with your MICRO84U amplifier, consult the following troubleshooting guide before contacting support.
| Problem | Possible Cause | Solution |
|---|---|---|
| No Power / Amplifier Not Turning On |
|
|
| No Sound Output |
|
|
| Distorted Sound |
|
|
| Amplifier Overheating (Protection Mode) |
|
|
Specifications
| Feature | Detail |
|---|---|
| Model Number | MICRO84U |
| Amplifier Type | 4-Channel Full-Range Class D |
| RMS Power Output (4Ω) | 85W x 4 |
| RMS Power Output (2Ω) | 125W x 4 |
| RMS Power Output (4Ω Bridged) | 250W x 2 |
| Crossover Filter | 40-400Hz (Selectable LP/HP/FLAT) |
| Input Modes | 2CH / 4CH Selectable |
| Turn-On Modes | REM / VOX / DC Selectable |
| Voltage | 12 Volts (DC) |
| Maximum Supply Voltage | 12 Volts (DC) |
| Item Dimensions (L x W x H) | 9 x 4 x 1.64 inches |
| Item Weight | 10 pounds |
| Mounting Type | Surface Mount |
| Material | Plastic, Metal |
| Manufacturer | Diamond Audio |
| UPC | 847169044731 |
Warranty and Support
Diamond Audio Technology products are designed and manufactured to the highest quality standards. For specific warranty details, please refer to the warranty card included with your product or visit the official Diamond Audio Technology website. Keep your purchase receipt as proof of purchase.
For technical assistance, troubleshooting beyond this manual, or warranty claims, please contact Diamond Audio Technology customer support through their official website or authorized dealer.
Online Resources: www.diamondaudio.com