1. Introduction
Thank you for choosing the Antec NX800 Mid Tower Gaming Case. This manual provides detailed instructions for the proper installation, operation, and maintenance of your new PC case. The NX800 is designed to offer excellent compatibility, cooling performance, and aesthetic appeal for your gaming and high-performance computing needs.
Key features include USB 3.0 connectivity, extensive storage drive bays, and support for large expansion cards and liquid cooling solutions. It comes equipped with two 200mm ARGB fans in the front and one 120mm ARGB fan in the rear, along with a built-in LED controller for customizable lighting.
2. Product Features
- Motherboard Support: Accommodates motherboards up to E-ATX size.
- Included ARGB Fans: Features 2 x 200 mm ARGB fans in the front and 1 x 120 mm ARGB fan in the rear for optimal airflow and customizable lighting.
- Radiator Support: Ready for liquid cooling radiators up to 360 mm in the front, 280 mm on top, and 140 mm in the rear.
- ARGB Sync: Supports synchronization of up to 6 ARGB fans simultaneously for unified lighting effects.
- Flexible Storage Potential: Offers versatile storage options with support for up to 3 x 3.5" HDDs and 4 x 2.5" SSDs.
- Tempered Glass Side Panel: A clear tempered glass side panel showcases your internal components and ARGB lighting.

Figure 2.1: Antec NX800 Mid Tower Gaming Case with illuminated ARGB fans.

Figure 2.2: Illustration of the included 2x 200mm ARGB fans for the front and 1x 120mm ARGB fan for the rear.
3. Component Overview
Familiarize yourself with the various parts and connectors of the Antec NX800 case before beginning installation.
3.1 Front I/O Ports
- Power Button: To turn the system on/off.
- Reset Button: To restart the system.
- LED Control Button: To cycle through ARGB lighting modes or sync with motherboard.
- MIC/AUDIO Jacks: For microphone input and audio output.
- USB 2.0 Ports (x2): For connecting USB 2.0 devices.
- USB 3.0 Port (x1): For connecting high-speed USB 3.0 devices.

Figure 3.1: Detailed view of the front I/O ports on the Antec NX800 case.
3.2 Internal Layout
The NX800 provides a spacious interior for easy component installation and efficient cable management.

Figure 3.2: Internal layout highlighting component compatibility, including E-ATX motherboard, CPU cooler (max 180mm), GPU (max 350mm), 3.5" HDDs/2.5" SSDs, and PSU (max 200mm).
4. Installation Guide
Follow these steps for a smooth and successful build process.
4.1 Preparing the Case
- Carefully remove the tempered glass side panel by unscrewing the thumb screws and gently pulling it away.
- Remove the rear side panel to access the cable management area.
4.2 Motherboard Installation
- Install the I/O shield (if not pre-installed on your motherboard).
- Align your motherboard with the standoffs inside the case. Ensure the standoffs match your motherboard's form factor (ATX, Micro-ATX, E-ATX).
- Secure the motherboard with the provided screws.
4.3 Storage Drive Installation
- 3.5" HDDs: Locate the HDD cage at the bottom of the case. Slide the HDD into the drive tray and secure it with screws.
- 2.5" SSDs: Mount SSDs to the dedicated SSD trays located behind the motherboard tray or on the PSU shroud. Secure with screws.
4.4 Power Supply Installation
- Place your ATX power supply unit (PSU) into the PSU shroud at the bottom rear of the case.
- Secure the PSU to the case using screws from the rear.
4.5 Fan and Radiator Installation
The NX800 supports various fan and radiator configurations:
- Front: 3 x 120mm / 3 x 140mm fans or 1 x 360mm / 1 x 280mm radiator. (2 x 200mm ARGB fans pre-installed)
- Top: 2 x 120mm / 2 x 140mm fans or 1 x 280mm radiator.
- Rear: 1 x 120mm / 1 x 140mm fan or 1 x 140mm radiator. (1 x 120mm ARGB fan pre-installed)

Figure 4.1: Diagram illustrating fan and radiator mounting options in the Antec NX800 case.
4.6 Cable Management
Utilize the ample space behind the motherboard tray and the cable routing cutouts to manage your cables. This improves airflow and aesthetics.
5. ARGB Lighting Control
The Antec NX800 features a built-in ARGB LED controller that supports up to 6 ARGB fans. You can control the lighting effects via the dedicated LED control button on the front I/O panel or synchronize it with your motherboard's ARGB software.
- Using the LED Button: Press the LED button to cycle through various pre-set lighting modes.
- Motherboard Sync: Press and hold the LED button for 3 seconds to switch control to your motherboard's ARGB software. Ensure the controller's motherboard sync cable is connected to your motherboard's 3-pin 5V ARGB header.

Figure 5.1: Diagram showing the built-in LED controller with 6-pin ARGB fan connectors and motherboard sync connector.
6. Maintenance
Regular maintenance ensures optimal performance and longevity of your PC components.
- Dust Filters: The NX800 includes removable dust filters on the top and front. Periodically remove and clean these filters with compressed air or water (ensure they are completely dry before re-installing).
- General Cleaning: Use a soft, dry cloth to wipe down the exterior of the case. For the tempered glass panel, use a glass cleaner and a microfiber cloth.
- Internal Dust: Every few months, open the case and use compressed air to remove dust from internal components and fans.
7. Troubleshooting
If you encounter issues with your Antec NX800 case, refer to the following common problems and solutions:
| Problem | Possible Cause | Solution |
|---|---|---|
| Fans not spinning / LEDs not lighting up | Loose power connection to fans or controller; Controller not connected to PSU; Motherboard sync issue. | Check all fan and controller power connections. Ensure the controller is powered. If using motherboard sync, verify the 3-pin 5V ARGB cable is correctly connected and try cycling the LED button. |
| Front I/O ports not working | Front panel cables not connected to motherboard. | Ensure all front panel cables (USB, Audio, Power SW, Reset SW, HDD LED, Power LED) are securely connected to the correct headers on your motherboard. Refer to your motherboard manual for header locations. |
| Poor airflow / High temperatures | Dust buildup on filters or fans; Incorrect fan orientation; Poor cable management. | Clean dust filters and fans. Ensure fans are oriented correctly for optimal intake/exhaust. Improve cable management to reduce airflow obstruction. |
8. Technical Specifications
Detailed specifications for the Antec NX800 Mid Tower Gaming Case:
| Feature | Specification |
|---|---|
| Model Name | NX800 |
| Case Type | Mid Tower |
| Motherboard Compatibility | E-ATX, ATX, Micro-ATX, ITX |
| Dimensions (LxWxH) | 21.75 x 11.75 x 22 inches (approx. 552 x 298 x 559 mm) |
| Weight | 17.38 pounds (approx. 7.9 kg) |
| Material | Alloy Steel, Plastic, Tempered Glass |
| Expansion Slots | 7 Horizontal |
| 3.5" Drive Bays | 3 (convertible with 2.5" SSDs) |
| 2.5" Drive Bays | 4 |
| Front I/O Ports | Power, Reset, LED Control, MIC/AUDIO, 2x USB 2.0, 1x USB 3.0 |
| Pre-installed Fans | Front: 2 x 200mm ARGB; Rear: 1 x 120mm ARGB |
| Max CPU Cooler Height | 180 mm |
| Max GPU Length | 350 mm |
| Max PSU Length | 200 mm |
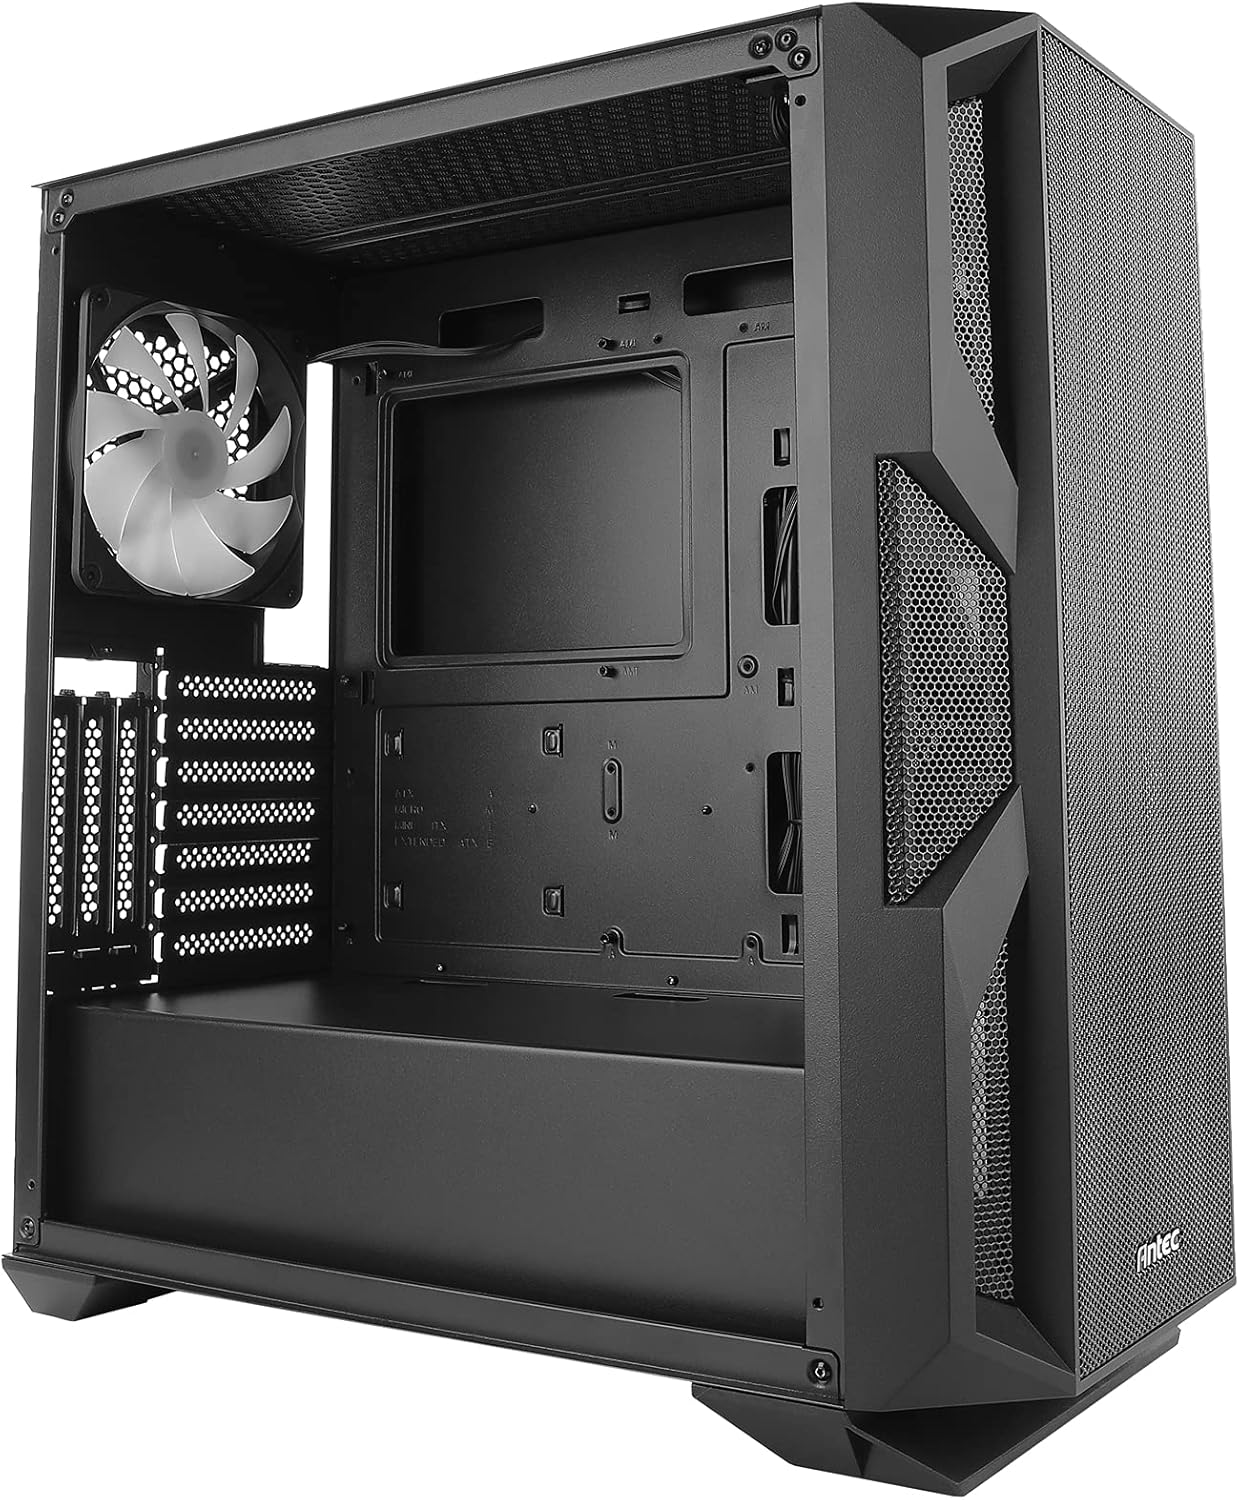
Figure 8.1: Antec NX800 case dimensions: 500mm (height), 230mm (width), 470mm (depth).
9. Warranty and Support
Antec products are designed and manufactured to the highest standards. For warranty information and technical support, please visit the official Antec website or contact their customer service department. Keep your proof of purchase for warranty claims.
Antec Official Website: www.antec.com