
1. Product Overview
The reiga 52-inch Smart WiFi Ceiling Fan is designed to provide efficient air circulation and integrated lighting for various indoor spaces. It features a quiet DC motor, reversible blade direction for year-round use, and versatile control options including a remote, mobile application, and voice commands.

Figure 1: Front view of the reiga 52-inch Smart WiFi Ceiling Fan.
2. Setup and Installation
Proper installation is crucial for the safe and efficient operation of your ceiling fan. It is recommended that installation be performed by a qualified electrician.
2.1. Unpacking and Inspection
Carefully remove all components from the packaging. Verify that all parts listed in the packing list are present and undamaged. If any parts are missing or damaged, do not proceed with installation and contact customer support.
2.2. Tools Required
- Phillips head screwdriver
- Flathead screwdriver
- Adjustable wrench
- Wire strippers
- Electrical tape
- Ladder
- Drill with appropriate drill bits
2.3. Pre-Installation Safety
WARNING: Before beginning installation, ensure the power to the ceiling fan location is turned OFF at the circuit breaker or fuse box to prevent electrical shock.
2.4. Assembly Steps
- Attach Blades to Motor: Securely fasten the three fan blades to the motor housing using the provided screws. Ensure all screws are tightened to prevent wobbling during operation.
- Install Light Kit: Connect the light kit wiring to the fan's internal wiring. Carefully align and secure the light kit to the bottom of the motor housing.
- Attach Downrod: Insert the downrod through the canopy and connect it to the fan motor assembly. Feed the electrical wires from the fan through the downrod. Secure the downrod with the provided pin and screws. Two downrod lengths (6 inches and 10 inches) are included to accommodate different ceiling heights.
2.5. Mounting the Fan
- Prepare Ceiling: Locate a suitable ceiling joist or a fan-rated electrical junction box. Drill pilot holes as necessary for the mounting bracket.
- Install Mounting Bracket: Secure the mounting bracket to the ceiling joist or junction box using the appropriate hardware. Ensure it is firmly attached and can support the fan's weight.
- Hang Fan: Carefully lift the fan assembly and hang it from the mounting bracket. This will allow you to make the electrical connections more easily.
2.6. Electrical Connections
Connect the fan's electrical wires to the household wiring according to local electrical codes. Typically, this involves connecting:
- Black wire (Live/Hot) from fan to Black wire from ceiling.
- White wire (Neutral) from fan to White wire from ceiling.
- Green/Yellow wire (Ground) from fan to Green/Bare Copper wire from ceiling.
Ensure all connections are secure using wire nuts and electrical tape.
2.7. Receiver Installation
The smart receiver allows for remote, app, and voice control. Connect the receiver's wires to the fan and household wiring as indicated in the wiring diagram. Carefully tuck the receiver into the mounting bracket or canopy.
2.8. Final Assembly
- Secure Canopy: Slide the canopy up the downrod and secure it to the mounting bracket with the provided screws. Ensure it covers all wiring connections.
- Attach Light Cover: Twist or snap the light cover onto the light kit assembly.
Video 1: Detailed installation guide for the reiga 7062 ceiling fan model. This video demonstrates the assembly of fan blades, light kit, downrod, and the electrical connections for mounting the fan to the ceiling.
3. Operating Instructions
Your reiga Smart WiFi Ceiling Fan offers multiple ways to control its functions.
3.1. Remote Control Operation
The included remote control provides convenient access to all fan and light features.
- Power Button: Turns the fan and light On/Off.
- Fan Speed Control: Adjusts fan speed through 6 settings.
- Light On/Off & Dimming: Toggles the light and adjusts brightness from 0% to 100%.
- Color Temperature Adjustment: Cycles through 3 color temperatures: 3000K (Warm Light), 4000K (Natural Light), and 5700K (Cool Light).
- Reversible Rotation: Changes the blade direction for summer (downward airflow for cooling) or winter (upward airflow for heat retention) modes.
- Timer Function: Sets the fan to turn off automatically after 1, 3, or 8 hours.

Figure 2: Overview of remote control functions including timer settings, wind speed, and breeze mode.
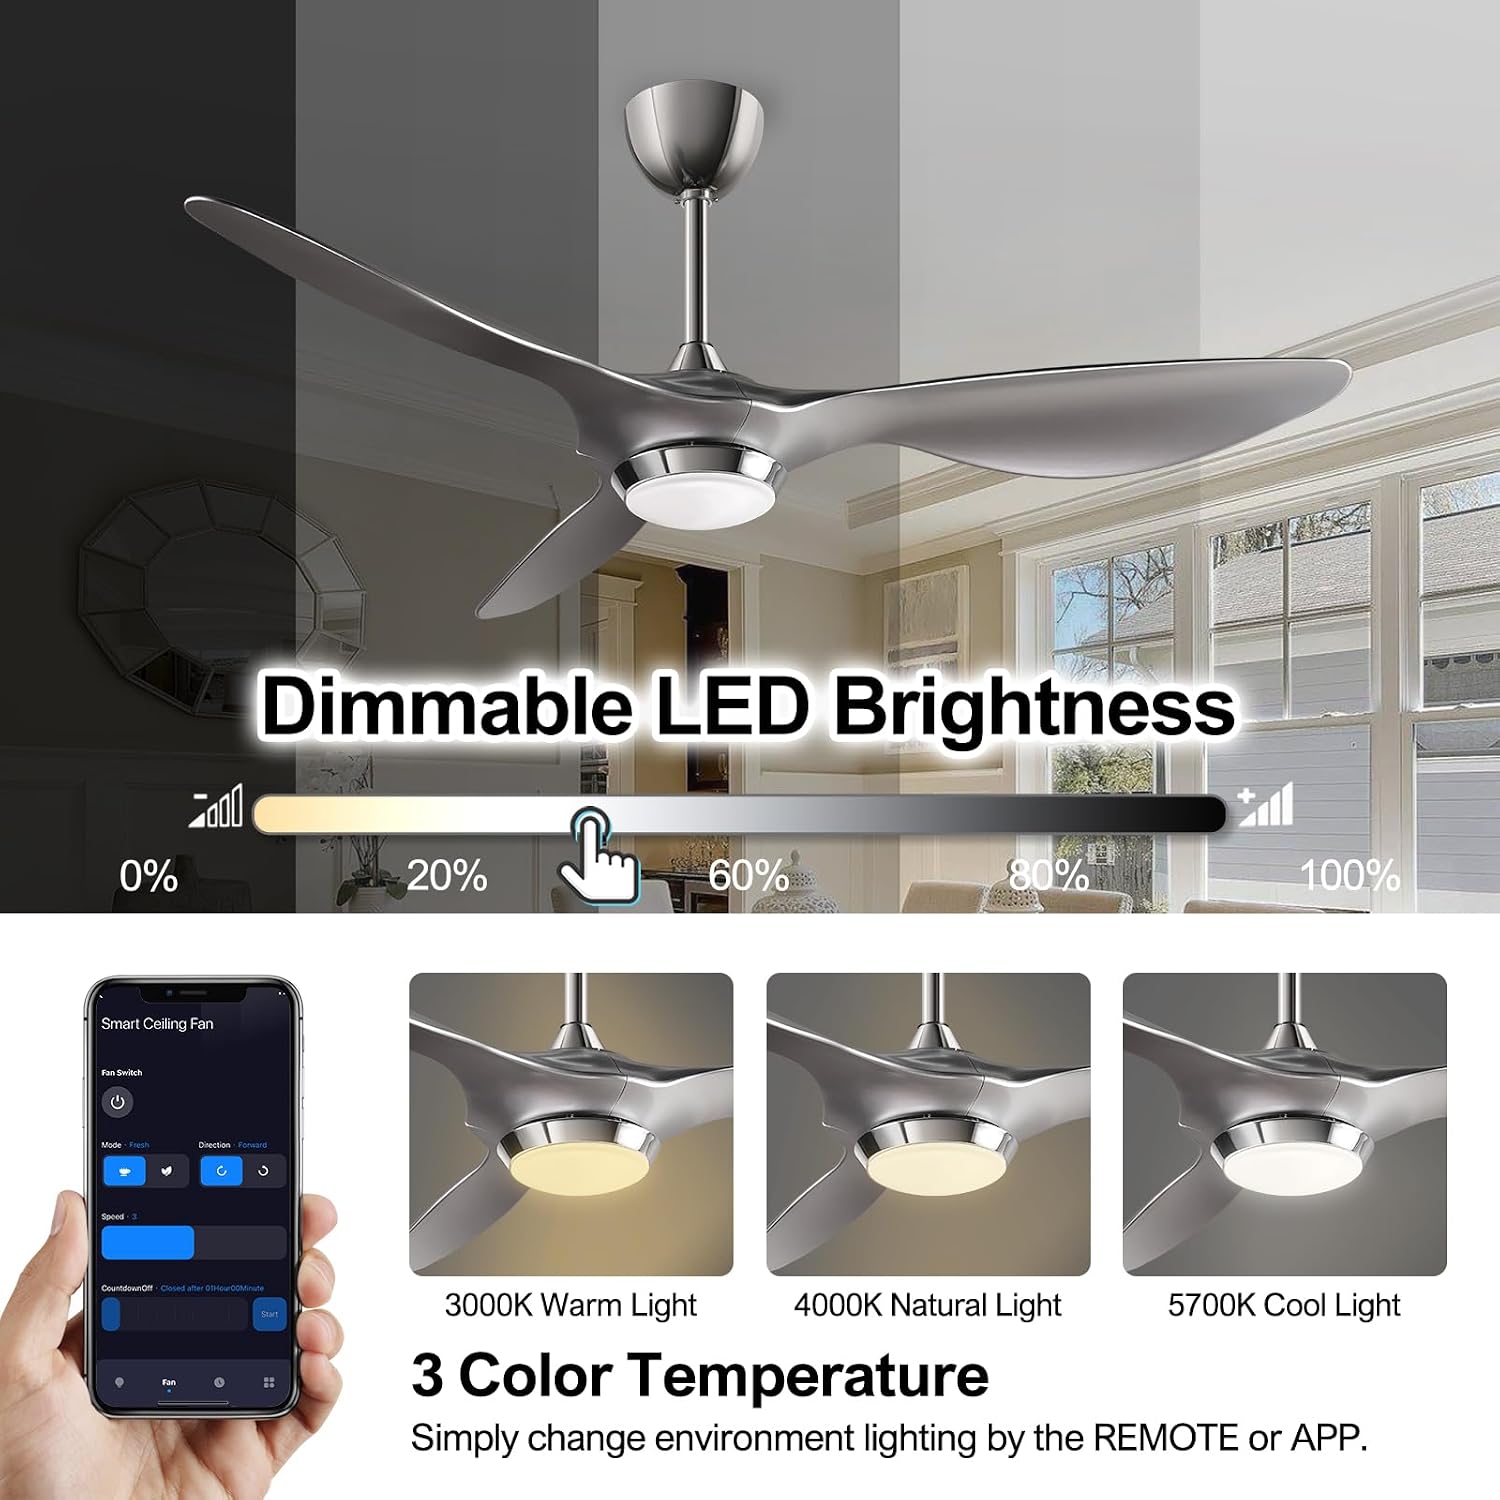
Figure 3: Illustration of the dimmable LED brightness and the three available color temperature options (3000K, 4000K, 5700K).

Figure 4: Depiction of the reversible rotation feature, showing airflow for summer (cooling) and winter (heat retention) modes.
3.2. Smart Control (WiFi, App, Voice)
The fan can be controlled via the Smart Life App or voice assistants like Amazon Alexa and Google Home.
- App Control: Download the Smart Life App from your device's app store. Follow the in-app instructions to connect your fan to your home WiFi network. Once connected, you can control all fan and light functions from your smartphone or tablet.
- Voice Control: Enable the Smart Life skill in your Amazon Alexa or Google Home app. Link your Smart Life account. You can then use voice commands such as "Alexa, turn on the ceiling fan" or "Hey Google, set fan speed to 3."

Figure 5: Visual representation of the smart control options, including remote control, Smart App, and voice control compatibility with Alexa and Google Home.
4. Maintenance
Regular maintenance helps ensure the longevity and optimal performance of your reiga ceiling fan.
4.1. Cleaning
- Fan Blades: Dust the fan blades regularly with a soft, lint-free cloth. Do not use abrasive cleaners or solvents as they may damage the finish.
- Light Fixture: Clean the light cover with a soft, damp cloth. Ensure the light is off and cool before cleaning.
4.2. General Care
- Periodically check all screw connections on the fan and mounting hardware to ensure they are secure.
- No lubrication is necessary for the motor.
5. Troubleshooting
If you encounter issues with your reiga ceiling fan, refer to the following common problems and solutions:
| Problem | Possible Cause | Solution |
|---|---|---|
| Fan does not start | No power to the fan; Loose wire connections; Remote control battery low or not paired. | Check circuit breaker; Verify all wiring connections are secure; Replace remote battery or re-pair remote. |
| Light does not work | Light kit wiring issue; LED module failure. | Check light kit connections; Contact customer support for replacement LED module if necessary. |
| Fan wobbles | Loose blade screws; Unbalanced blades; Loose mounting bracket. | Tighten all blade screws; Use a balancing kit (not included) to balance blades; Ensure mounting bracket is securely fastened. |
| Excessive noise | Loose screws; Motor housing rubbing against canopy; Bearings need lubrication (unlikely for DC motor). | Check and tighten all screws; Adjust canopy position; If noise persists, contact customer support. |
| Smart control not working | WiFi signal weak; Incorrect app pairing; Router issues. | Ensure strong WiFi signal; Re-pair fan with app; Restart router. |
If the problem persists after attempting these solutions, please contact reiga customer support for further assistance.
6. Specifications
| Feature | Detail |
|---|---|
| Brand | reiga |
| Model Name | YFT-7062-S |
| Color | 52'' Silver |
| Material | Acrylic, Acrylonitrile Butadiene Styrene, Metal |
| Style | Modern |
| Product Dimensions (L x W x H) | 52"L x 52"W x 16"H |
| Recommended Room Type | Bedroom, Dining Room, Home Office, Kitchen, Living Room |
| Indoor/Outdoor Usage | Indoor |
| Power Source | AC/DC |
| Installation Type | Downrod Mount |
| Special Features | Dimmable & Memory Function, ETL Listed, Timer, Wi-Fi Enabled |
| Control Method | App, Remote, Voice |
| Light Source Type | LED |
| Voltage | 110 Volts |
| Wattage | 24 watts |
| Air Flow Capacity | 5614 Cubic Feet Per Minute |
| Sound Level | 40 dB |
| Item Weight | 18.51 pounds |
| UPC | 724725992159, 743307954316 |

Figure 6: Detailed dimensions of the 52-inch ceiling fan and recommended room sizes for optimal performance.
7. Warranty and Support
reiga offers a warranty for this product. Please refer to the specific terms and conditions provided at the time of purchase.
7.1. Warranty Information
We offer 30 days unsatisfied replacement free or return 100% refund service. For detailed warranty coverage and duration, please retain your proof of purchase.
7.2. Customer Support
For any questions, technical assistance, or warranty claims, please contact reiga customer support. Contact information can typically be found on the product packaging or the official reiga website.
