1. Introduction
Thank you for choosing the Kalawen Weather Station. This device provides comprehensive indoor and outdoor environmental monitoring, including temperature, humidity, and weather forecasts. With its vibrant color display and three remote sensors, you can easily keep track of conditions in multiple locations. This manual will guide you through the setup, operation, and maintenance of your new weather station.
2. Safety Information
- Read all instructions carefully before using the device.
- Do not expose the main unit to extreme temperatures, direct sunlight, or moisture.
- The outdoor sensors are splash-resistant but not waterproof. Mount them in a sheltered location to protect them from heavy rain.
- Use only the specified power adapter and batteries. Incorrect power sources may damage the device.
- Keep the device and its components out of reach of children.
- Do not attempt to disassemble or repair the unit yourself. Contact customer support for assistance.
3. Package Contents
Please check the package contents to ensure all items are present:
- 1 x Kalawen Weather Station Main Unit
- 3 x Wireless Remote Sensors
- 1 x Power Adapter
- 1 x User Manual (this document)
4. Product Overview
The Kalawen Weather Station consists of a main display unit and three wireless remote sensors. Below are the key components and their functions.
4.1 Main Display Unit
The main unit features a large, multi-angle HD color screen that displays indoor and outdoor temperature, humidity, time, date, and weather forecasts.

Image: The Kalawen Weather Station main display unit with its three accompanying wireless remote sensors.
4.2 Wireless Remote Sensors
The three remote sensors transmit temperature and humidity data wirelessly to the main unit. Each sensor can be set to a different channel (CH1, CH2, CH3) to monitor distinct locations.

Image: The main weather station display and a remote sensor, illustrating the wireless transmission range of up to 60 meters (197 feet).
5. Setup
5.1 Powering the Main Unit
The main unit can be powered by the included AC adapter or by 2 AA batteries (not included). Using the AC adapter provides continuous backlight. If powered by batteries only, the screen will automatically turn off after a short period to save energy, and can be activated by pressing any button.
- Insert 2 AA batteries into the battery compartment on the back of the main unit, observing polarity.
- Alternatively, connect the power adapter to the DC IN port on the main unit and plug it into a wall outlet.

Image: The back of the weather station showing the battery compartment for 2 AA batteries and the port for the cable adapter.
5.2 Installing Sensor Batteries
Each remote sensor requires 2 AA batteries (not included).
- Open the battery compartment on the back of each sensor.
- Insert 2 AA batteries, ensuring correct polarity.
- Close the battery compartment securely.
5.3 Sensor Channel Selection
Before closing the battery compartment, select a unique channel for each sensor (CH1, CH2, or CH3) using the small switch inside the compartment. This allows the main unit to distinguish between the sensors.
5.4 Pairing Sensors with Main Unit
Once batteries are installed in both the main unit and sensors, the main unit will automatically search for sensor signals. This process may take a few minutes. Ensure sensors are within range (up to 60 meters / 197 feet in open air).
- If a sensor does not connect, press the 'TX' button inside the sensor's battery compartment to manually send a signal.
- On the main unit, you may need to press and hold the 'CHANNEL' button to initiate a manual search for sensors.
5.5 Placement Guidelines
- Main Unit: Place the main unit indoors, away from direct sunlight, heat sources, or drafts that could affect its indoor temperature/humidity readings.
- Remote Sensors: Place sensors in desired outdoor or indoor locations. For outdoor use, choose a sheltered spot to protect them from heavy rain and direct sunlight, which can cause inaccurate readings. Avoid placing them near metal objects or large electrical appliances that could interfere with wireless transmission.
6. Operating Instructions
6.1 Basic Display Information
The main display shows the following information:
- Time and Date: Current time, day of the week, and date.
- Indoor Temperature & Humidity: Readings from the main unit.
- Outdoor Temperature & Humidity: Readings from each connected remote sensor (CH1, CH2, CH3).
- Weather Forecast: Icons representing predicted weather conditions.
- Barometric Pressure: Current atmospheric pressure.
6.2 Setting Time and Date
The weather station supports WWVB radio-controlled time synchronization. Once connected, it will automatically set the time and date.

Image: The weather station displaying the WWVB signal icon, indicating automatic time and date synchronization.
To manually set the time and date or adjust time zone:
- Press and hold the 'SET' button to enter time setting mode.
- Use the 'UP' or 'DOWN' buttons to adjust values.
- Press 'SET' again to confirm and move to the next setting (e.g., 12/24 hour format, hour, minute, year, month, day, time zone).
- Exit setting mode by pressing 'SET' after the last option or by waiting for 15 seconds without input.
6.3 Alarm Function
The weather station features two independent alarms (Alarm 1 and Alarm 2) for weekdays and weekends.
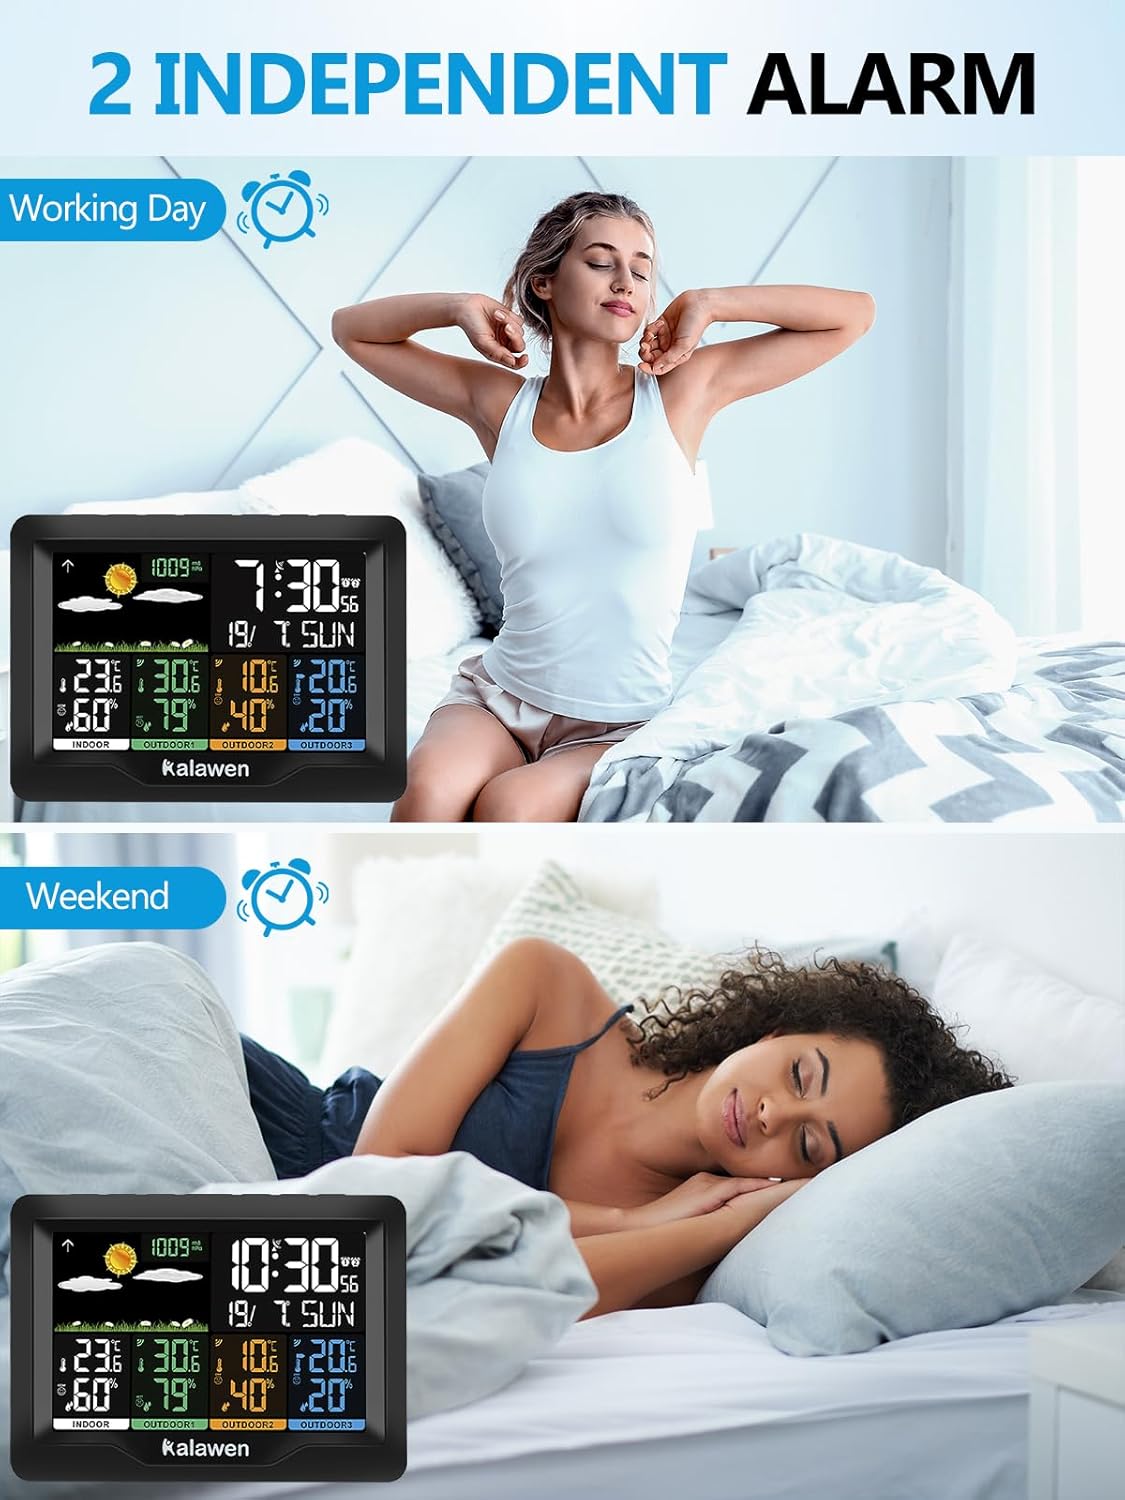
Image: The weather station displaying different alarm settings, one for working days and another for weekends.
- Press the 'ALARM' button to view Alarm 1 time. Press again for Alarm 2.
- Press and hold 'ALARM' to enter alarm setting mode.
- Use 'UP' or 'DOWN' to adjust the hour and minute.
- Press 'ALARM' to confirm and move to the next setting.
- To activate/deactivate an alarm, press the 'UP' button while viewing the alarm time. An alarm icon will appear/disappear.
- When an alarm sounds, press the 'SNOOZE/LIGHT' button to activate snooze (typically 5-10 minutes). To stop the alarm, press any other button.
6.4 Brightness Adjustment
The display offers multiple brightness levels for optimal readability in various lighting conditions.

Image: The weather station display shown with five different brightness modes, ranging from 100% to 5%, for various lighting environments.
Press the 'SNOOZE/LIGHT' button repeatedly to cycle through the brightness levels (e.g., 100%, 70%, 50%, 25%, 5%, OFF).
6.5 Unit Selection
You can switch between Celsius (°C) and Fahrenheit (°F) for temperature, and between hPa and inHg for barometric pressure.
- To change temperature units: Press the 'UP' button (or a dedicated °C/°F button if available) to toggle between °C and °F.
- To change pressure units: Press the 'PRESSURE' button (or a dedicated unit button if available) to toggle between hPa and inHg.
6.6 Weather Forecast Interpretation
The weather station predicts weather conditions for the next 12-24 hours based on changes in atmospheric pressure. The forecast icons include Sunny, Slightly Cloudy, Cloudy, Rainy, Heavy Rainy, and Snowy.

Image: A visual representation of the seven accurate weather forecast icons displayed on the Kalawen Weather Station, including Sunny, Slightly Cloudy, Cloudy, Heavy Rainy, Rainy, and Snowy.
Note that these are local forecasts based on pressure trends and may not always match official weather reports, which use broader data sources.
7. Maintenance
- Cleaning: Wipe the main unit and sensors with a soft, damp cloth. Do not use abrasive cleaners or solvents.
- Battery Replacement: Replace batteries in the main unit and sensors when the low battery indicator appears on the display. Always replace all batteries at the same time.
- Storage: If storing the device for an extended period, remove all batteries to prevent leakage.
8. Troubleshooting
| Problem | Possible Cause | Solution |
|---|---|---|
| No outdoor temperature/humidity reading | Sensor not paired or out of range; low sensor battery. | Check sensor batteries. Ensure sensor is within 60m of main unit. Press 'TX' on sensor and initiate manual search on main unit. |
| Inaccurate temperature/humidity readings | Sensor exposed to direct sunlight, heat source, or moisture. | Relocate sensor to a sheltered area, away from direct elements. Allow time for readings to stabilize. |
| Display is dim or blank (battery powered) | Energy-saving mode activated; low main unit battery. | Press any button to activate display. Replace main unit batteries or use AC adapter for continuous backlight. |
| Time/Date incorrect | WWVB signal not received; manual settings incorrect. | Ensure main unit is in an area with good signal reception. Manually set time/date if WWVB signal is consistently weak. |
9. Specifications
- Model: QXZ3383-DE
- Brand: Kalawen
- Power Source (Main Unit): AC Adapter (included) or 2 x AA Batteries (not included)
- Power Source (Sensors): 2 x AA Batteries (not included) per sensor
- Wireless Frequency: 433 MHz or 868 MHz
- Wireless Range: Up to 60 meters (197 feet) in open air
- Special Features: Alarm, Clock, Wireless, Splash-resistant sensors
- Product Dimensions: 9 x 15.8 x 11.2 cm (Main Unit)
- Manufacturer: Kunzhiyao
- Country of Origin: China
10. Warranty and Support
The Kalawen Weather Station comes with a 1-year warranty. If you encounter any issues or have questions regarding your product, please contact Kalawen customer support. Our team is dedicated to providing assistance and ensuring your satisfaction.
For support, please refer to the contact information provided with your purchase or visit the official Kalawen website.


