
Introduction
Welcome to the user manual for your new Peakeep Night Light Digital Alarm Clock. This compact and portable clock is designed for ease of use, offering essential features for your bedroom, desk, or travel needs. It provides a clear digital display, an adjustable night light, a reliable alarm with snooze functionality, and a convenient indoor temperature gauge.

Image: The Peakeep Digital Alarm Clock, designed for simple and easy use.
Key Features
- Compact Design: Measures 5 1/4 (L) * 2 (W) * 3 (H) inches, making it small and lightweight for versatile placement.
- Clear HD LCD Display: Large, easy-to-read digits for optimal visibility.
- Adjustable Night Light: Features three dimmer settings (LOW - HIGH - OFF) for customizable illumination.
- Gradually Louder Alarm: Beep noise gradually increases for 90 seconds to ensure you wake up.
- 8-Minute Snooze: Top snooze button allows for an additional 8 minutes of sleep.
- Indoor Temperature Display: Monitors room temperature from 15.8°F to 122°F (-9°C to 50°C) with high accuracy.
- 12-Hour / 24-Hour Format: Easily switch between standard and military time displays.
- Battery Operated: Requires 3 AAA batteries (not provided) for cordless operation.

Image: Overview of the clock's clear display and key functions.
Setup Guide
Battery Installation
The Peakeep Digital Alarm Clock operates on 3 AAA batteries (not included). Follow these steps to install them:
- Locate the battery compartment on the back of the clock.
- Open the battery cover by sliding it down or lifting it off.
- Insert 3 new AAA batteries, ensuring that the positive (+) and negative (-) ends align correctly with the indicators inside the compartment.
- Close the battery cover securely until it clicks into place.

Image: Back of the clock with the battery compartment open, ready for AAA batteries.
Operating Your Alarm Clock
Setting the Time
- Slide the TIME SET switch on the back of the clock to the TIME SET position. The time display will begin to flash.
- Use the HOUR button to adjust the hour.
- Use the MIN & °C/°F button to adjust the minutes.
- Once the desired time is set, slide the TIME SET switch back to the LOCK position to save the time and exit setting mode.
Setting the Alarm
- Slide the ALARM SET switch on the back of the clock to the ALARM SET position. The alarm time display will begin to flash.
- Use the HOUR button to set the desired alarm hour.
- Use the MIN & °C/°F button to set the desired alarm minutes.
- Once the desired alarm time is set, slide the ALARM SET switch back to the LOCK position.
- To activate the alarm, slide the ALARM switch on the left side of the clock to the ON position. To deactivate, slide it to OFF.
Snooze Function
When the alarm sounds, simply press the large SNOOZE/LIGHT button located on the top of the clock. This will temporarily silence the alarm and activate an 8-minute snooze period. The alarm will sound again after 8 minutes.

Image: The snooze/light button on top of the clock for temporary illumination and snooze.
Night Light Settings
The clock features a night light with three adjustable dimmer settings to suit your preference:
- Use the NIGHT LIGHT switch on the back of the clock to select between OFF, LOW, or HIGH brightness.
- Pressing the SNOOZE/LIGHT button on top will also temporarily illuminate the display for 10 seconds, regardless of the night light setting.

Image: The night light switch on the back of the clock for adjusting brightness.
Temperature Display
The clock provides an accurate indoor temperature reading:
- To switch the temperature display between Celsius (°C) and Fahrenheit (°F), press the MIN & °C/°F button.
- The temperature range is 15.8°F to 122°F (-9°C to 50°C) with a tolerance of ±1.8°F (±1°C).

Image: The clock displaying the indoor temperature.
12-Hour / 24-Hour Mode
You can easily switch between 12-hour (AM/PM) and 24-hour (military time) display formats:
- Press the 12/24HR button on the back of the clock to toggle between the two display modes.

Image: The clock display changing between 12-hour and 24-hour formats.
Maintenance
Battery Replacement
When the display becomes dim or the clock stops functioning, it is time to replace the batteries. Please follow the battery installation steps outlined in the "Setup Guide" section.
Always use 3 new AAA batteries for optimal performance and longevity of your alarm clock.
Troubleshooting
Display is dim or blank
- Check if the batteries are inserted correctly with the proper polarity.
- Replace old or depleted batteries with new AAA batteries.
- Ensure the "NIGHT LIGHT" switch is not set to "OFF" if you expect continuous illumination.
Alarm does not sound
- Ensure the "ALARM" switch on the side is set to the "ON" position.
- Verify that the alarm time is correctly set using the "ALARM SET" switch.
- Check battery level and replace if necessary, as low power can affect alarm function.
Incorrect Temperature Reading
- Ensure the clock is placed in a location with stable ambient temperature, away from direct sunlight, heating vents, or air conditioning units.
- The temperature sensor measures indoor temperature only and is not designed for outdoor readings.
Product Specifications
- Brand: Peakeep
- Model: MH-9060-White
- Dimensions: 5.25"W x 3"H (13.34 cm x 7.62 cm)
- Power Source: 3 x AAA Batteries (not included)
- Display Type: Digital LCD
- Special Features: Night Light (3 dimmers), Indoor Temperature Display (°C/°F), 12/24 Hour Mode, Snooze Function (8 minutes)
- Material: Plastic
- Item Weight: 6.6 ounces (186 grams)
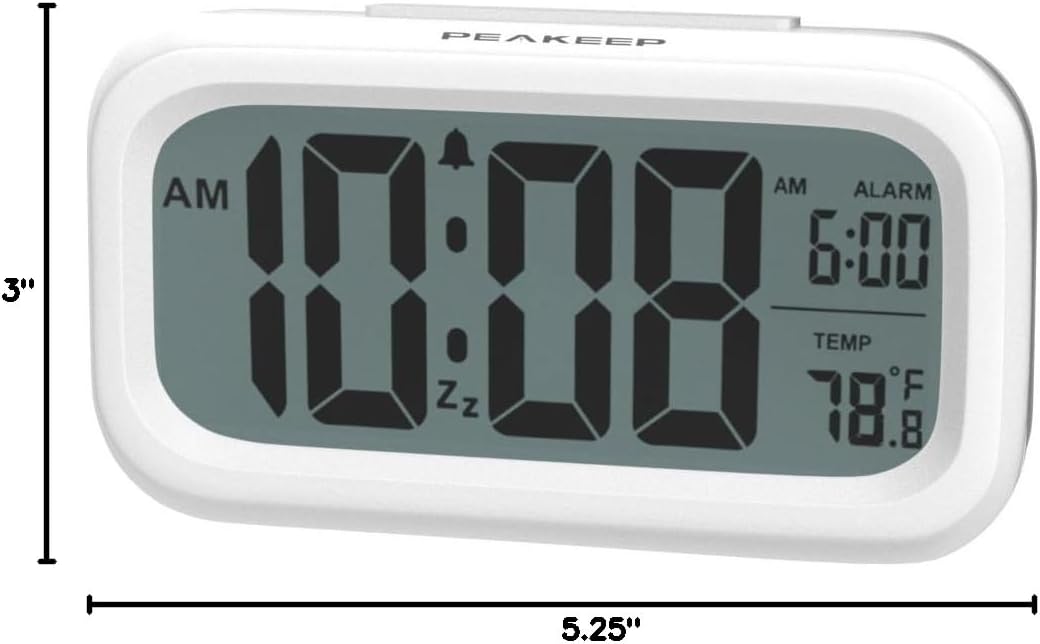
Image: Detailed dimensions of the Peakeep Digital Alarm Clock.
Warranty and Customer Support
For any warranty inquiries, technical assistance, or customer support regarding your Peakeep Night Light Digital Alarm Clock, please contact our support team directly.
Email: sales@us-myhome.com
Please provide your product model number (MH-9060-White) and a detailed description of your issue when contacting support to ensure the quickest resolution.