
Groov-e GV-CR01-WE
Groov-e Light Curve Touch Control FM Radio Alarm Clock User Manual
Model: GV-CR01-WE
1. Introduction
This manual provides detailed instructions for the operation and maintenance of your Groov-e Light Curve Touch Control FM Radio Alarm Clock. Please read this manual thoroughly before using the product to ensure proper function and safety.
The Groov-e Light Curve is a versatile light alarm clock featuring an FM radio, multiple alarm sounds, and light simulation functions for both sunrise and sunset. It is designed to provide a natural and gentle wake-up experience and a relaxing environment for sleep.
2. Safety Information
- Do not expose the device to water or excessive humidity.
- Avoid extreme temperatures.
- Do not disassemble or attempt to repair the device yourself. Refer to qualified service personnel.
- Use only the provided power adapter.
- Keep out of reach of children.
- Clean the device with a soft, dry cloth. Do not use abrasive cleaners.
3. Package Contents
Please check the package for the following items:
- Groov-e Light Curve Alarm Clock Unit
- Power Adapter
- User Manual (this document)

Figure 3.1: Groov-e Light Curve unit with included power adapter and cable.
4. Product Overview
Familiarize yourself with the various parts and controls of your Groov-e Light Curve alarm clock.
4.1 Front View
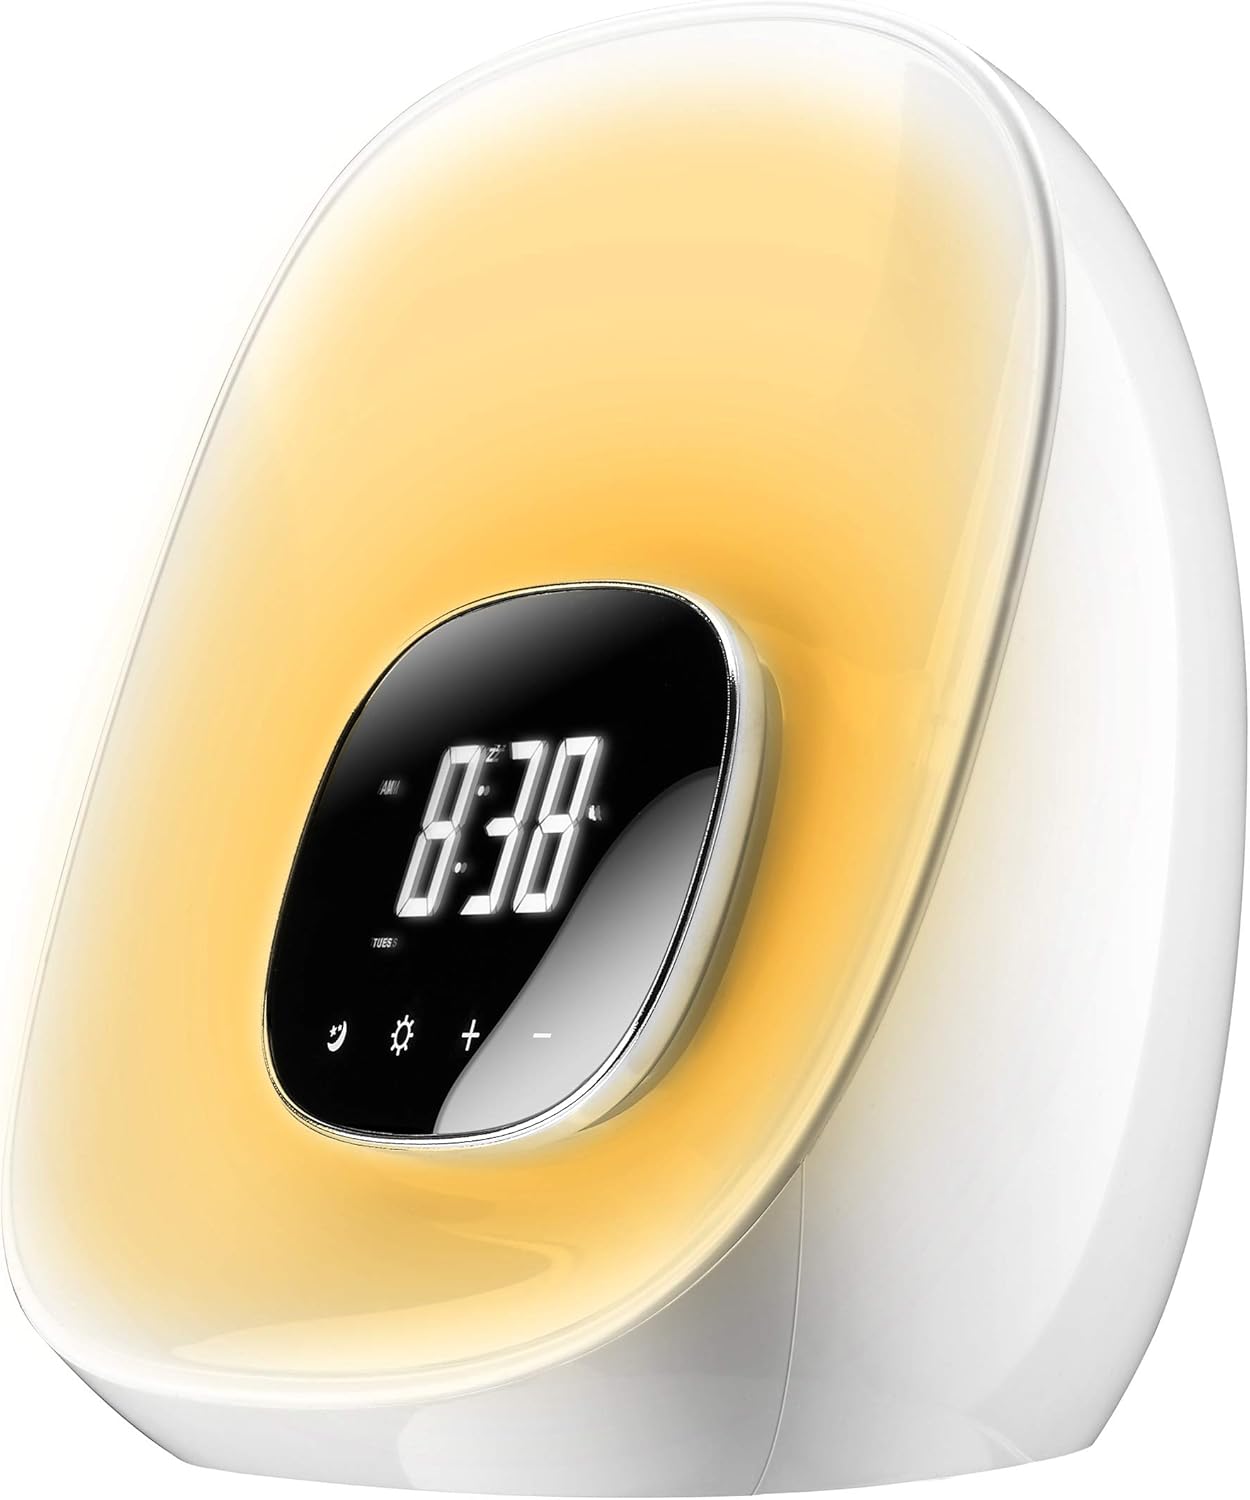
Figure 4.1: Front view of the Groov-e Light Curve.
- A. Digital Display: Shows time, alarm status, and other indicators.
- B. Touch Controls: Icons for various functions (e.g., alarm, light, brightness, volume).
- C. Light Panel: Emits light for sunrise/sunset simulation and mood lighting.
4.2 Top View

Figure 4.2: Top view of the Groov-e Light Curve with control buttons.
- D. Playback Controls: Buttons for radio tuning, volume, and alarm settings.
- E. Snooze/Sleep Button: Activates snooze or sleep function.
- F. Speaker Grille: For audio output.
4.3 Rear View

Figure 4.3: Rear view of the Groov-e Light Curve.
- G. DC 12V/1A Power Input: Connect the power adapter here.
- H. Rear Speaker: Additional speaker for audio output.
5. Setup
- Power Connection: Connect the provided power adapter to the DC 12V/1A input port on the back of the unit (G) and plug it into a wall outlet. The display will light up.
- Initial Time Setting:
- Press the Time Set button (usually indicated by a clock icon) to enter time setting mode.
- Use the +/- buttons to adjust the hour. Press the Time Set button again to confirm and move to minutes.
- Use the +/- buttons to adjust the minutes. Press the Time Set button one more time to confirm and exit.
- Backup Battery: The device has a backup battery function that maintains timing for up to 3 months in case of power failure, though the clock display will not be active during an outage.
6. Operating Instructions
6.1 Alarm Functions
The Groov-e Light Curve offers a unique wake-up experience with sunrise simulation and various alarm sounds.
- Setting an Alarm:
- Press the Alarm Set button (usually indicated by a bell icon) to enter alarm setting mode.
- Use the +/- buttons to adjust the alarm hour. Press Alarm Set again to confirm and move to minutes.
- Use the +/- buttons to adjust the alarm minutes. Press Alarm Set again to confirm.
- Wake-up Light Period: Select the duration for the wake-up light to start before the alarm time (OFF/10/20/30 minutes). This is displayed as "0:10/0:20/0:30". Use +/- to select.
- Alarm Sound Selection: Choose from 8 alarm sounds (1-6 natural sounds, 7 beep, 8 FM radio). Use +/- to select.
- Alarm Mode: Select "wake-up light + alarm" or "wake-up light only".
- Press Alarm Set one last time to save and activate the alarm.
- Sunrise Simulation: The light will gradually brighten through ten levels, mimicking a sunrise, reaching its brightest point at the set alarm time.
- Snooze Function: When the alarm sounds, press the Snooze button (E) to activate a 10-minute snooze. The alarm will sound again after 10 minutes. During snooze, other functions are paused.
- Stopping the Alarm: To turn off the alarm for the day, press any button other than the Snooze button. The alarm will sound for 1 hour if not turned off.
- Adjusting Alarm Volume: During the alarm, the volume gradually increases. You can adjust the maximum volume using the volume controls.
6.2 Light Functions
The device features versatile lighting options for various moods and purposes.
- Adjusting Brightness (White Light):
- When no alarm or wake-up light is active, briefly press the Sun Icon (light function button).
- Use the +/- buttons to cycle through 10 levels of brightness.
- RGB Mood Lighting:
- Long press the Sun Icon to activate the RGB mood light cycle. The light will cycle through different colors.
- Briefly press the Sun Icon again to pause the cycle on the current color.
- Use the +/- buttons to manually select your preferred color from the available options.
- Sunset Simulation (Sleep Function):
- Press the Sleep button (often combined with Snooze or a moon icon).
- Select the desired sleep duration (OFF/10/20/30 minutes). The light will slowly dim over this period and then turn off, simulating a sunset.

Figure 6.1: The Groov-e Light Curve offers a range of mood lighting colors.
6.3 FM Radio
The built-in FM radio allows you to listen to your favorite stations.
- Turning On/Off Radio: Press the Radio button (often indicated by a radio icon or FM).
- Tuning Stations:
- Use the Forward/Backward buttons (D) to manually tune to a station.
- Long press the Forward/Backward buttons to auto-scan for the next available station.
- Adjusting Volume: Use the Volume +/- buttons (D) to adjust the radio volume.
7. Maintenance
- Cleaning: Wipe the surface of the device with a soft, dry, lint-free cloth. Do not use liquid or aerosol cleaners.
- Storage: If storing the device for an extended period, disconnect it from power and store it in a cool, dry place.
8. Troubleshooting
| Problem | Possible Cause | Solution |
|---|---|---|
| Device does not turn on. | Not connected to power or power outlet is faulty. | Ensure the power adapter is securely connected and the outlet is working. |
| Alarm does not sound. | Alarm not set, alarm volume too low, or alarm mode incorrect. | Verify alarm settings, ensure alarm is enabled, and check volume. |
| Light does not brighten/dim. | Light function not activated or incorrect mode. | Ensure sunrise/sunset simulation is enabled or adjust brightness manually. |
| Radio reception is poor. | Weak signal or interference. | Adjust the position of the device or try auto-scanning for stronger signals. |
| Buttons are unresponsive during alarm. | This is normal behavior during the alarm/wake-up process (except snooze). | Press the bell symbol to prevent light from brightening further, or press any other button to stop the alarm. |
9. Specifications
| Feature | Detail |
|---|---|
| Brand | Groov-e |
| Model Number | GV-CR01-WE |
| Color | White |
| Product Dimensions (L x W x H) | 40 x 20 x 20 cm (approx. 20.4L x 18H cm for main unit) |
| Weight | 910 grams |
| Material | Plastic |
| Special Features | Snooze, Mood Light, Adjustable Brightness, Radio, Alarm, Illuminated |
| Display Type | Digital |
| Power Source | Battery Powered (backup) / Mains Powered (primary) |
| Alarm Sounds | 8 types (6 natural, 1 beep, 1 FM radio) |
| Wake-up Light Levels | 10 brightness levels |
10. Warranty and Support
Your Groov-e Light Curve alarm clock is covered by a standard return policy. For specific details regarding warranty coverage and returns, please refer to your point of purchase or the retailer's policy.
For technical support or further assistance, please contact Groov-e customer service or visit their official website. Keep your purchase receipt as proof of purchase.
Online Resources:
- Groov-e Official Website: www.groov-e.co.uk (Note: This is a general link, specific support pages may vary.)
Ask a question about this manual
Ask about setup, troubleshooting, compatibility, parts, safety, or missing instructions. Manuals+ will review the question and use this page’s manual context to help answer it.