
1. Product Overview
The NICHE Front CV Axle Drive Shaft is a high-strength, heavy-duty constant velocity axle designed as a direct replacement for specific Polaris off-road vehicles. This product includes two (2) complete CV axles, engineered for plug-and-play installation, ensuring reliable power transfer from the differential to the wheels.

Figure 1.1: Two NICHE Front CV Axles, packaged for shipment. These axles are designed for direct replacement in compatible Polaris models.
2. Compatibility
This front CV axle is compatible with various Polaris models. Please verify your vehicle's specific model and year against the list below to ensure proper fitment. This axle is a direct replacement for Polaris OEM part numbers 1332637 and 1333962.
- Polaris Brutus HD PTO: 2013-2018
- Polaris Ranger Diesel HST: 2015-2017
- Polaris Ranger Diesel HST Deluxe: 2014
- Polaris Ranger 1000 Diesel: 2015-2018
- Polaris Ranger 1000 Full Size: 2020
- Polaris Ranger 1000 EPS: 2018
- Polaris Ranger 570 Full-Size: 2015-2016
- Polaris Ranger Crew 570 Full-Size: 2015-2016
- Polaris Ranger XP 900: 2013-2019
- Polaris Ranger Crew 900: 2014-2017, 2019
- Polaris RZR S 800: 2009-2014
- Polaris RZR 4 800: 2010-2014
- Polaris RZR S 570 EPS: 2017
- Polaris Ranger Crew 1000: 2018, 2020
- Polaris Ranger Crew 1000 Diesel: 2015-2018
- Polaris Ranger Crew XP 1000 Back Country: 2019
- Polaris Ranger Crew XP 1000 High Lifter: 2018-2019
- Polaris Ranger Crew XP 1000 NorthStar Ultimate, Premium, Winter Prep: 2020
- Polaris Ranger Crew XP 1000 NorthStar, Premium: 2019-2020
- Polaris Ranger Crew XP 1000: 2017-2020
- Polaris Ranger XP 1000 EPS 20th Anniversary, Back Country: 2019
- Polaris Ranger XP 1000 EPS High Lifter: 2018-2019
- Polaris Ranger XP 1000 EPS NorthStar Premium, Ultimate, Winter: (Years not specified, refer to 2020 models)
3. Key Features
The NICHE Front CV Axle is engineered for durability and performance, featuring:
- High Strength Heavy Duty Construction: Built to withstand demanding off-road conditions.
- Precision Engineering: Designed for exact fitment and reliable operation.
- Complete Assembly: Each axle comes fully assembled, ready for installation.
- Optimized Dimensions:
- Compressed Length: 27 1/8 inches
- Inboard Splines: 22T (Teeth)
- Inboard Spline Diameter: 2 11/16 inches
- Outboard Splines: 26T (Teeth)
- Outboard Spline Diameter: 2 3/4 inches
- Shaft Diameter: 7/8 inches
- Thread Measurement: M18X1.5

Figure 3.1: A single NICHE Front CV Axle, showcasing its robust design and complete assembly.
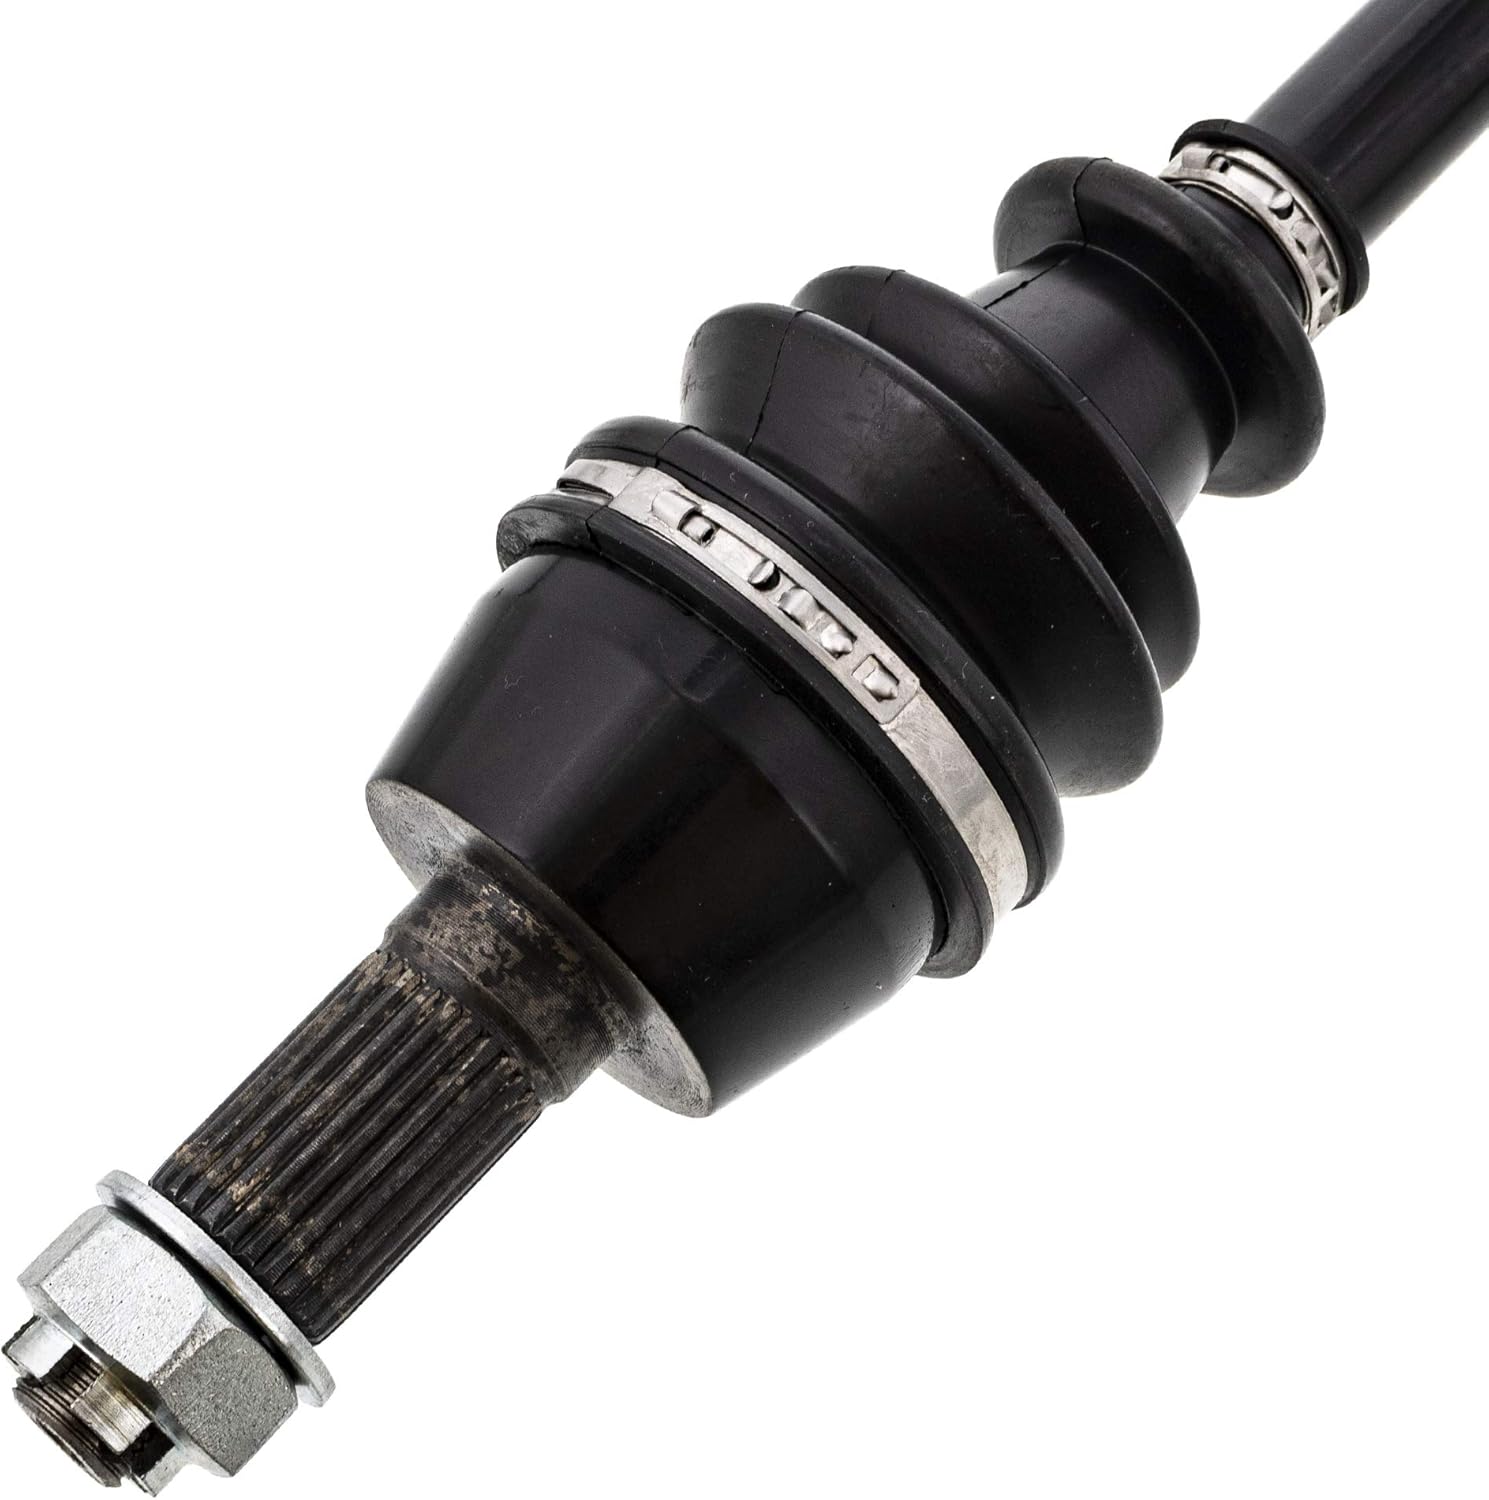
Figure 3.2: Detailed view of the outboard spline and retaining nut, highlighting the precision machining.

Figure 3.3: Detailed view of the inboard spline, designed for secure fitment into the differential.
4. Installation Guide
Installation of a CV axle requires mechanical knowledge and specialized tools. It is highly recommended that installation be performed by a qualified professional. Improper installation can lead to vehicle damage or personal injury.
4.1 Safety Precautions
- Always wear appropriate personal protective equipment (PPE), including safety glasses and gloves.
- Ensure the vehicle is securely supported on jack stands or a lift before beginning work. Never rely solely on a jack.
- Disconnect the vehicle's battery to prevent accidental electrical discharge.
- Refer to your vehicle's service manual for specific torque specifications and procedures.
4.2 General Installation Steps (Consult Vehicle Manual for Details)
- Prepare the Vehicle: Park the vehicle on a level surface, engage the parking brake, and block the rear wheels. Loosen the lug nuts on the front wheels.
- Lift and Secure: Lift the front of the vehicle and support it securely with jack stands. Remove the front wheels.
- Remove Brake Components: Carefully remove the brake caliper and rotor. Hang the caliper securely to avoid stressing the brake hose.
- Disconnect Suspension Components: Disconnect necessary suspension components (e.g., tie rod end, lower ball joint) to allow the steering knuckle to swing free.
- Remove Axle Nut: Remove the large axle nut from the end of the old CV axle.
- Separate Axle from Hub: Push the old CV axle shaft out of the wheel hub.
- Remove Axle from Differential: Carefully pry the inboard joint of the old CV axle from the differential. Be prepared for some transmission fluid to drain.
- Install New Axle: Insert the new NICHE CV axle's inboard joint into the differential, ensuring it seats fully. You may need to apply light pressure or tap it gently with a rubber mallet.
- Connect Axle to Hub: Guide the outboard spline of the new CV axle through the wheel hub.
- Reassemble Components: Reattach all disconnected suspension and brake components. Tighten all fasteners to the vehicle manufacturer's specified torque.
- Install Axle Nut: Install the new axle nut and tighten it to the specified torque.
- Reinstall Wheels: Reinstall the wheels and lower the vehicle. Tighten lug nuts to specification.
- Check Fluid Levels: Verify and top off differential fluid if necessary.
After installation, it is advisable to perform a test drive in a safe area to ensure proper function and listen for any unusual noises.
5. Maintenance
Proper maintenance can extend the life of your CV axles. Regular inspection is key.
- Regular Inspection: Periodically inspect the CV axle boots for cracks, tears, or signs of grease leakage. Damaged boots can lead to contamination and premature joint failure.
- Cleanliness: Keep the area around the CV axles clean to prevent dirt and debris from accumulating, which can damage the boots.
- Address Issues Promptly: If you notice clicking noises during turns, vibrations, or grease leaks, have the axle inspected by a professional immediately.
6. Troubleshooting
This section outlines common issues related to CV axles and potential causes. Always consult a qualified mechanic for diagnosis and repair.
| Symptom | Possible Cause | Action |
|---|---|---|
| Clicking or popping noise when turning | Worn or damaged outer CV joint. | Inspect outer CV joint and boot. Replace axle if joint is worn. |
| Vibration during acceleration | Worn or damaged inner CV joint. | Inspect inner CV joint and boot. Replace axle if joint is worn. |
| Grease leaking from boot | Damaged or torn CV boot. | Inspect boot for tears. Replace boot or entire axle if joint is contaminated. |
| Clunking noise when shifting from drive to reverse | Excessive play in CV joint or splines. | Inspect axle for looseness. Replace if excessive play is detected. |
7. Product Specifications
Detailed specifications for the NICHE Front CV Axle Drive Shaft (Model: 519-KCA2248X).
| Attribute | Value |
|---|---|
| Brand | NICHE |
| Model Number | 519-KCA2248X |
| OEM Part Number Cross-Reference | 1332637, 1333962 |
| Position | Front |
| Compressed Length | 27 1/8 inches |
| Inboard Splines | 22T |
| Inboard Spline Diameter | 2 11/16 inches |
| Outboard Splines | 26T |
| Outboard Spline Diameter | 2 3/4 inches |
| Shaft Diameter | 7/8 inches |
| Thread Measurement | M18X1.5 |
| Item Weight | 22 pounds (for the pair) |
| Product Dimensions | 34 x 8 x 4 inches (packaging) |
| Safety Rating | DOT Certified |
8. Warranty & Support
NICHE Industries stands behind the quality of its products. This product is covered by a 2-Year Warranty against manufacturing defects.

Figure 8.1: NICHE Industries 2-Year Warranty badge, indicating product coverage.
For warranty claims, technical support, or any inquiries regarding your NICHE product, please contact the manufacturer directly through their official website or the retailer from whom the product was purchased. Keep your proof of purchase for warranty validation.
For more information, visit the NICHE Industries Brand Store.