
1. Introduction
This manual provides essential information for the safe and efficient operation, maintenance, and troubleshooting of your Jasic TIG 500 AC/DC Digital Inverter welding machine. Please read this manual thoroughly before operating the equipment.
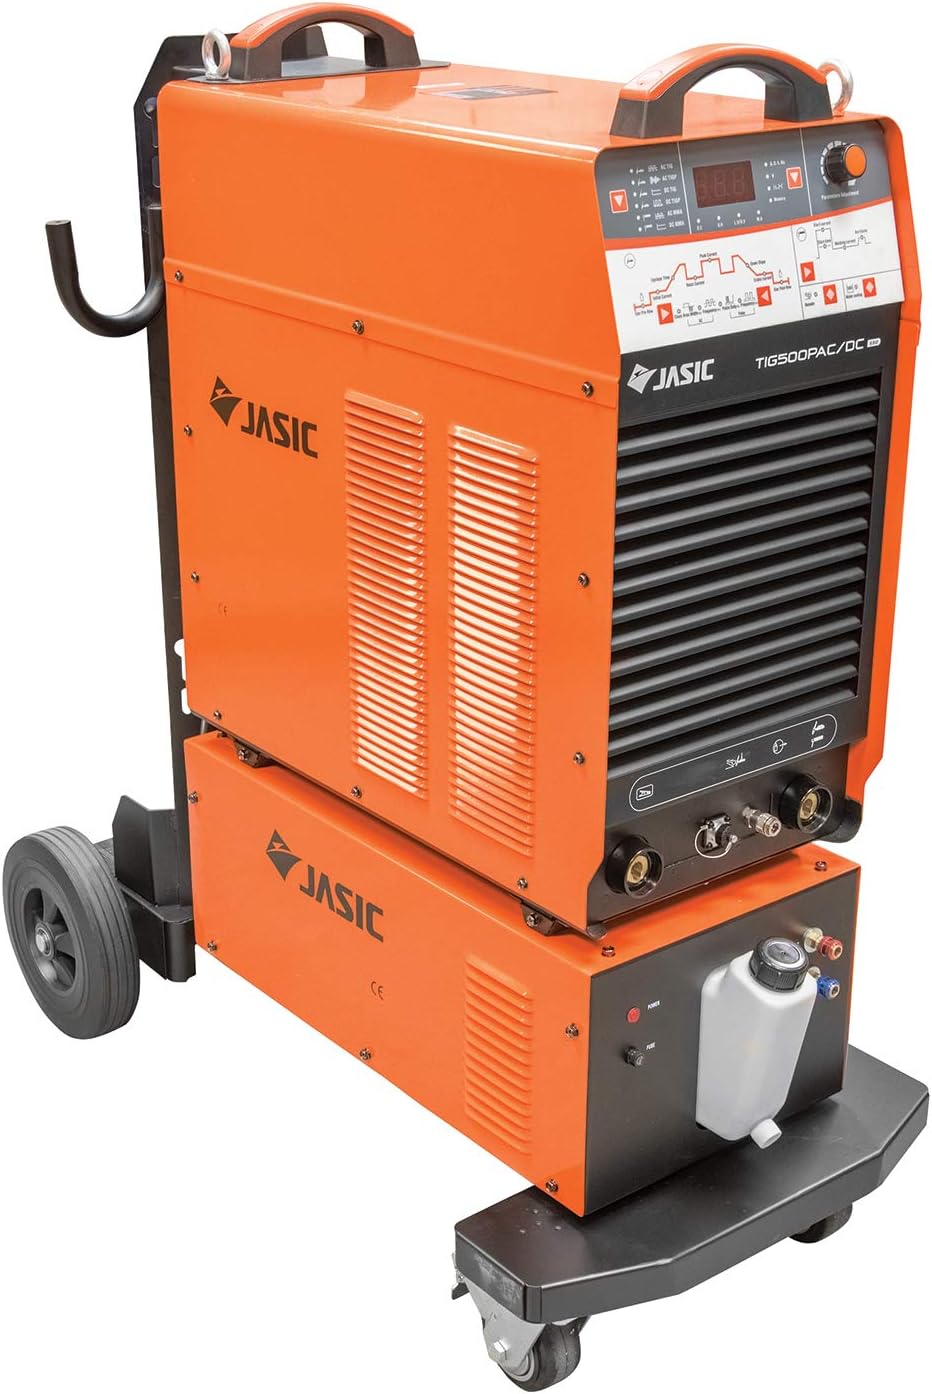
The Jasic TIG 500 AC/DC Digital Inverter is a high-performance welding machine designed for professional TIG welding applications, offering both AC and DC welding capabilities. It is supplied with a trolley for enhanced mobility.
2. Safety Precautions
Always observe the following safety precautions to prevent injury and equipment damage:
- Electric Shock: Welding current can cause fatal electric shock. Ensure proper grounding and insulation. Wear dry gloves and protective clothing.
- Fumes and Gases: Welding fumes and gases can be hazardous to health. Work in a well-ventilated area or use a fume extractor.
- Arc Rays: Arc rays can burn eyes and skin. Use a welding helmet with appropriate shade and protective clothing.
- Fire and Explosion: Welding sparks can cause fire or explosion. Keep flammable materials away from the welding area. Have a fire extinguisher readily available.
- Hot Parts: Hot parts can cause severe burns. Allow equipment to cool before handling.
- Noise: Excessive noise can damage hearing. Wear ear protection.
3. Setup and Installation
3.1 Unpacking and Inspection
Carefully unpack the welding machine and its components. Inspect for any shipping damage. Report any damage to your supplier immediately.
3.2 Power Connection
The Jasic TIG 500 AC/DC Digital Inverter requires a suitable power supply. Refer to the specifications section for detailed power requirements. Ensure the power supply is properly grounded and protected by a circuit breaker.
- Connect the power cable to a compatible mains outlet.
- Verify the input voltage matches the machine's requirements.
3.3 Gas Connection
Connect the shielding gas cylinder (typically Argon for TIG welding) to the gas inlet on the rear of the machine using a suitable regulator and hose. Ensure all connections are tight to prevent leaks.
3.4 Torch and Earth Clamp Connection
- Connect the TIG torch to the appropriate connector on the front panel.
- Connect the earth clamp cable to the work return terminal and securely attach the clamp to the workpiece, ensuring good electrical contact.
3.5 Water Cooler Connection (if applicable)
If your unit includes a water cooler (as depicted in Figure 1), connect the water lines from the cooler to the TIG torch and the machine's water cooling ports. Fill the cooler with the recommended coolant.
4. Operating Instructions
4.1 Control Panel Overview
The control panel features a digital display, various parameter adjustment knobs, and selection buttons for different welding modes and functions. Refer to the detailed diagram in your physical manual for specific button layouts.
4.2 Basic TIG Welding Procedure
- Power On: Turn on the main power switch.
- Select Mode: Choose between AC TIG or DC TIG mode depending on the material being welded.
- Set Parameters: Adjust welding current, gas pre-flow/post-flow, upslope/downslope, pulse settings, and AC balance/frequency (for AC TIG) according to the material thickness and type.
- Prepare Workpiece: Clean the workpiece thoroughly to remove any contaminants.
- Start Arc: Initiate the arc using the torch trigger. The machine typically features High-Frequency (HF) start for non-contact arc ignition.
- Weld: Maintain a consistent arc length and travel speed.
- Finish: Release the torch trigger to terminate the arc. The post-flow gas will continue to protect the weld puddle as it cools.
4.3 Advanced Features
- Pulse TIG: For improved control over heat input and penetration.
- AC Balance Control: Adjusts the cleaning action and penetration when welding aluminum.
- AC Frequency Control: Influences arc focus and bead width.
- 2T/4T Trigger Modes: Provides flexibility for short or long welding runs.
5. Maintenance
Regular maintenance ensures the longevity and optimal performance of your welding machine.
5.1 Daily Maintenance
- Inspect cables and connections for damage.
- Check the TIG torch for wear on consumables (collet, collet body, tungsten electrode, ceramic nozzle).
- Ensure proper coolant level in the water cooler (if applicable).
5.2 Weekly/Monthly Maintenance
- Clean the machine's exterior and ventilation openings to prevent dust buildup. Use compressed air if necessary, ensuring the machine is powered off and disconnected.
- Check gas hose for leaks.
- Inspect the earth clamp for good contact surfaces.
5.3 Periodic Maintenance (by qualified personnel)
- Internal cleaning of dust and debris.
- Inspection of internal electrical connections.
- Calibration checks.
6. Troubleshooting
This section provides solutions to common operational issues. For problems not listed here, contact qualified service personnel.
| Problem | Possible Cause | Solution |
|---|---|---|
| No power | Power cable disconnected, circuit breaker tripped, machine fault. | Check power cable, reset circuit breaker, contact service. |
| No arc ignition | Poor earth connection, incorrect gas flow, worn tungsten, HF start issue. | Ensure good earth, check gas supply, replace tungsten, contact service. |
| Poor weld quality | Incorrect parameters, contaminated workpiece, insufficient gas shielding. | Adjust settings, clean workpiece, check gas flow and leaks. |
| Overheating protection activated | Exceeded duty cycle, blocked ventilation, high ambient temperature. | Allow machine to cool, clear vents, reduce duty cycle. |
7. Specifications
The following specifications are for the Jasic TIG 500 AC/DC Digital Inverter welding machine:
- Model: TIG 500 AC/DC Digital Inverter
- Brand: Jasic
- Power Source: Battery Powered (Note: While listed as 'Battery Powered', high-power industrial TIG welders like this typically operate on a robust mains electricity supply, often three-phase. Please consult your supplier for precise power input requirements.)
- Wattage: 1000 watts (Input Power Consumption)
- Output Power: 500 Amps (Welding Current) (Note: The '500' in the model name and typical TIG welder specifications refers to the maximum welding current in Amperes, not Watts.)
- ASIN: B07XVPK3Z8
- Date First Available: 19 Oct. 2020
- Key Features: AC/DC TIG Welding, Digital Control Interface, Pulse Welding Functionality, High-Frequency (HF) Arc Start, Integrated Mobility Trolley.
8. Warranty Information
Jasic products are typically covered by a manufacturer's warranty. For specific warranty terms and conditions, including duration and coverage, please refer to the warranty card included with your product or contact your authorized Jasic dealer. Keep your proof of purchase for warranty claims.
9. Customer Support
For technical assistance, spare parts, or service inquiries, please contact your authorized Jasic distributor or the retailer from whom you purchased the product. When contacting support, please have your product model number (TIG 500 AC/DC Digital Inverter) and serial number ready.
You can also visit the official Jasic website for additional resources and contact information.


