
GODOX V860II-S and XPro-S
Contents
Godox V860II-S TTL Flash and XPro-S Wireless Trigger User Manual
Model: V860II-S & XPro-S | Brand: GODOX
Introduction
This manual provides detailed instructions for the safe and effective use of your Godox V860II-S TTL Flash and XPro-S Wireless Flash Trigger. Please read this manual thoroughly before operation to ensure optimal performance and to prevent damage to the product.
What's in the Box
Verify that all items listed below are included in your package:
- Godox V860II-S Flash Unit
- Godox XPro-S Wireless Flash Trigger
- Lithium-Ion Battery (2000mAh)
- Battery Charger
- USB Cable
- Mini Stand
- Protection Case
- Instruction Manual

Figure 1: All components included in the Godox V860II-S and XPro-S kit.
Product Overview
The Godox V860II-S TTL Flash and XPro-S Wireless Flash Trigger offer advanced lighting solutions for photography. The flash unit features a built-in 2.4G wireless X system, high guide number (GN60), and a versatile zoom flash coverage.
Key Features:
- Integrated 2.4G Wireless X System: Functions as both a master and slave flash, offering comprehensive control and extended transmission range.
- High Guide Number: GN60 (ISO 100, 200mm) for powerful illumination.
- Zoom Flash Coverage: Adjustable from 20-200mm.
- Fast Recycle Time: Max. 1.5 seconds recycle time with up to 650 full power flashes per charge.
- Full TTL Functions: Supports TTL auto flash, manual flash, 1/8000s high-speed sync (HSS), flash exposure compensation (FEC), and second curtain sync.
- XPro-S Trigger: Provides multi-channel triggering, stable signal transmission, and sensitive reaction for controlling camera flash, outdoor flash, and studio flash.

Figure 2: Godox V860II-S TTL Flash and XPro-S Wireless Flash Trigger.
Detailed Features:
Broader Bounce Angle
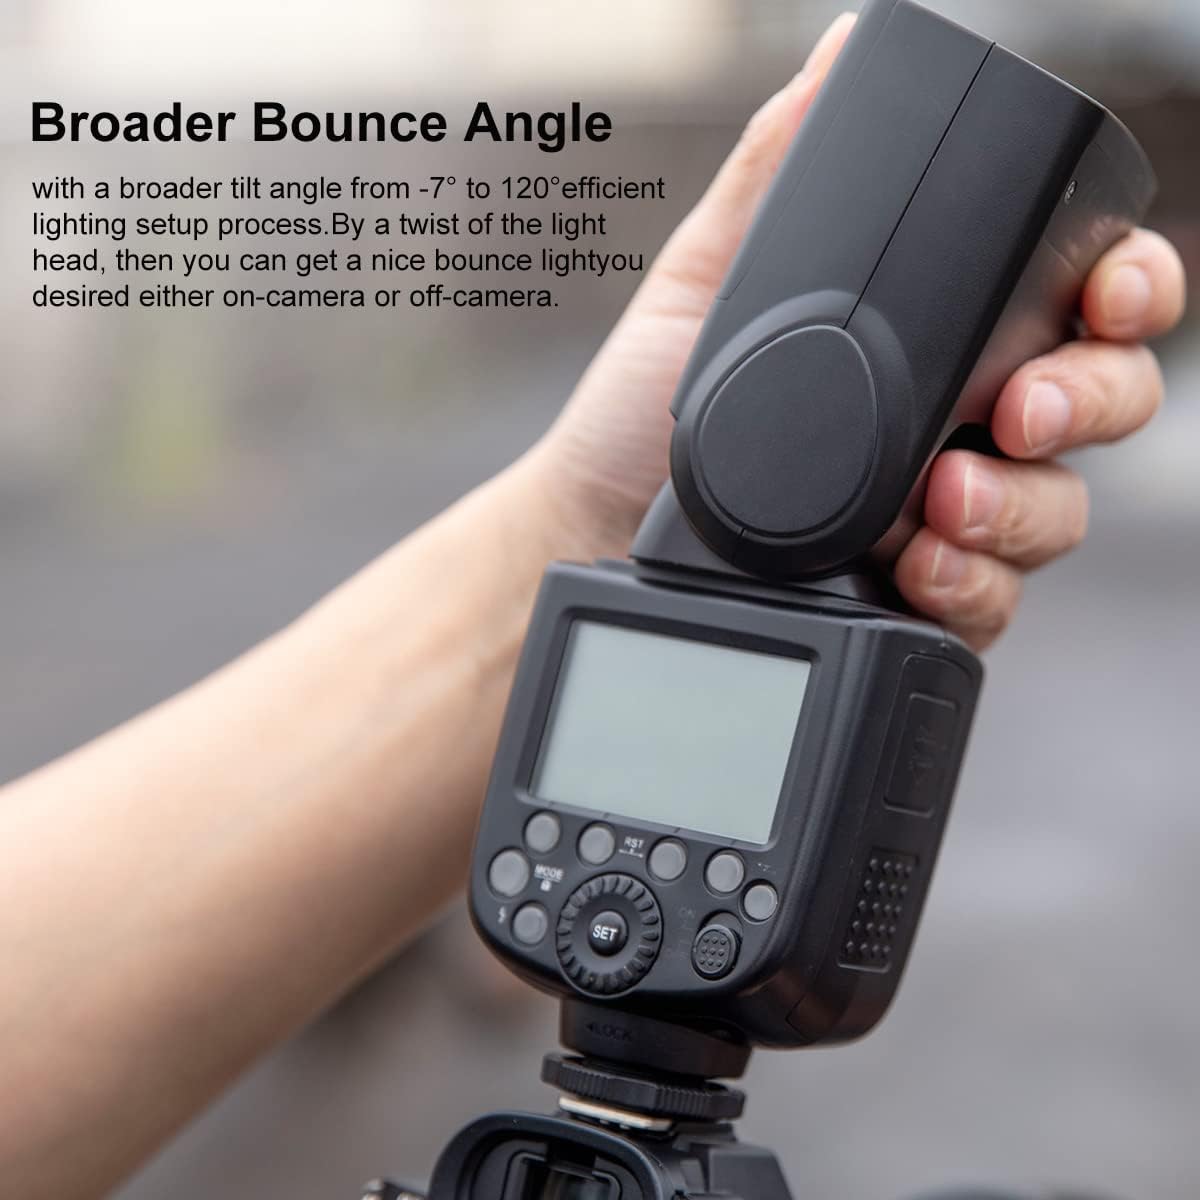
Figure 3: Flash head with broader bounce angle.
The V860II-S flash head offers a tilt angle from -7° to 120°, allowing for efficient and flexible lighting setups. This broad range facilitates both on-camera and off-camera bounce lighting techniques.
Upgraded Li-ion Battery

Figure 4: Inserting the upgraded Li-ion battery.
The V860II-S is equipped with an upgraded Li-ion battery, enhancing convenience and efficiency for photographers on the go. This battery ensures reliable power and quick recycling.
Improved Control Experience

Figure 5: Adjusting settings on the control panel.
The V860II-S features an upgraded control panel designed for a simple, smooth, and clear interactive experience, allowing users to quickly master lighting adjustments.
2.4G Wireless Transmission

Figure 6: Wireless flash setup using 2.4G transmission.
The V860II-S has a built-in 2.4G wireless X system, integrating both transmitter and receiver functions. This allows for seamless wireless connectivity with other Godox flashes and triggers.
High Brightness Output
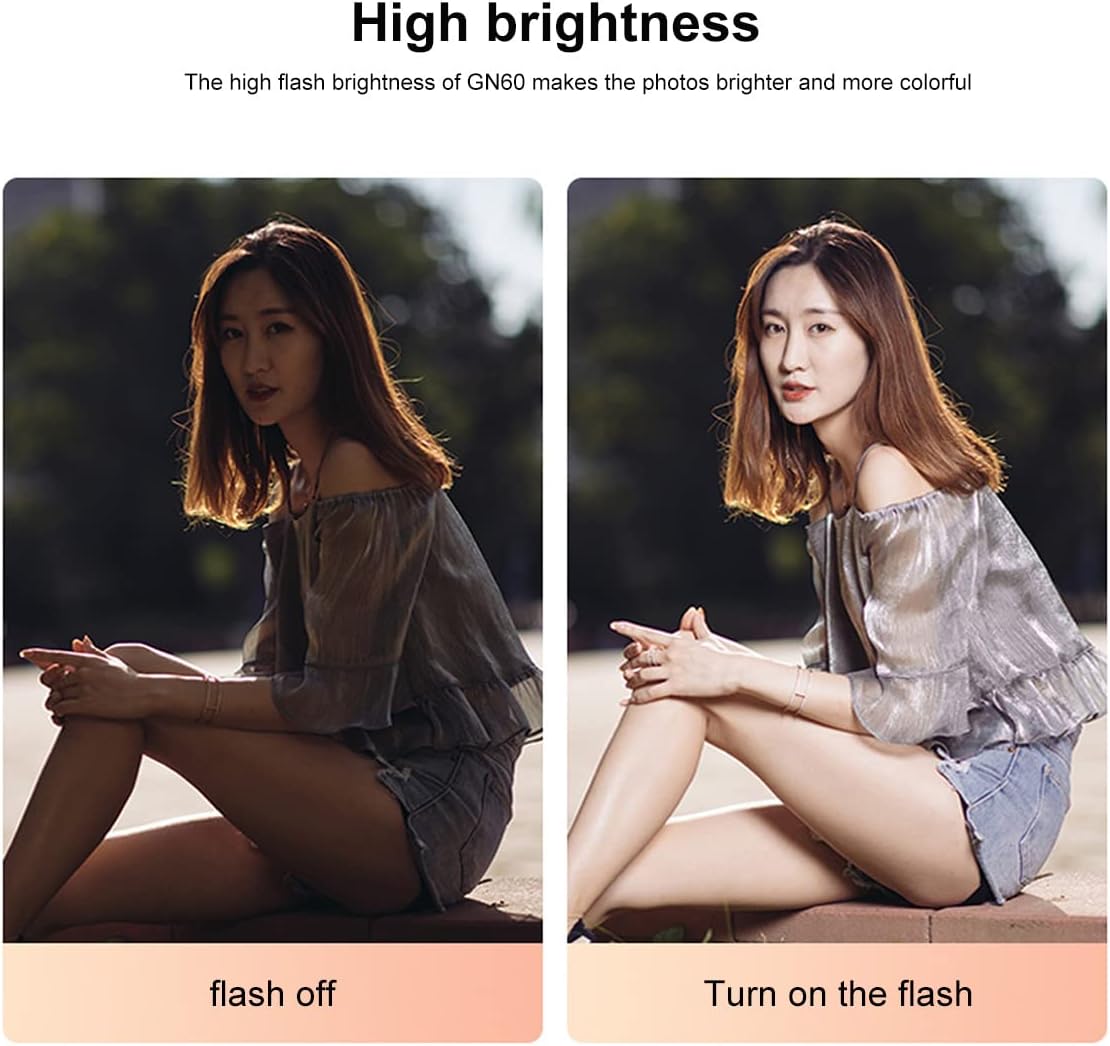
Figure 7: Visual comparison of a scene with and without flash, demonstrating high brightness.
With a high guide number of GN60, the V860II-S flash delivers significant brightness, resulting in clearer and more vibrant photographs.
Variable Light Focal Length

Figure 8: Flash head with adjustable zoom from 20mm to 200mm.
The flash head's zoom capability ranges from 20mm to 200mm, allowing users to conveniently adjust the light beam to match various focal lengths and shooting scenarios.
Setup
1. Battery Installation
Insert the provided Li-ion battery into the V860II-S flash unit. Ensure proper orientation as indicated by the battery compartment markings.
Video 1: Demonstrates the unboxing and battery installation for the Godox V860II-S flash.
2. Mounting Flash to Camera
Slide the V860II-S flash unit onto your camera's hot shoe. Secure it by tightening the locking mechanism.
3. Attaching XPro-S Trigger
Mount the XPro-S wireless trigger onto your camera's hot shoe. Ensure it is securely fastened.
Video 2: Demonstrates the setup and basic operation of the V860II-S flash and XPro-S trigger.
Operating Instructions
1. Power On/Off
To power on the flash or trigger, slide the ON/OFF switch to the 'ON' position. To power off, slide it to 'OFF'.
2. Basic Flash Modes (TTL, Manual, Multi)
Press the 'MODE' button on the flash unit or trigger to cycle through TTL (Through-The-Lens), Manual (M), and Multi (Stroboscopic) flash modes. Adjust settings within each mode using the dial and 'SET' button.
3. Wireless X System Operation
The V860II-S and XPro-S utilize the Godox 2.4G Wireless X System. Ensure both devices are set to the same channel (CH) and group (GR) for proper communication. The flash can operate as a master or slave unit.
- Channel (CH) Selection: Use the CH button on the trigger to select a channel (1-32). Match this channel on the flash unit.
- Group (GR) Control: Assign flash units to different groups (A, B, C, D, E) for individual power control.
- Master/Slave Mode: Set the V860II-S flash to Slave mode when triggered by the XPro-S. The XPro-S acts as the Master.
4. High-Speed Sync (HSS)
The V860II-S supports High-Speed Sync up to 1/8000s, allowing you to use flash with fast shutter speeds. This is ideal for freezing action or overpowering ambient light in bright conditions.
5. Zoom Function
The flash head's zoom can be adjusted manually or automatically to match the lens's focal length. Use the zoom button and dial to set the desired coverage (20-200mm).
Video 3: Demonstrates various functions and settings of the Godox V860II-S flash.
Maintenance
1. Battery Care
- Always use the original Godox Li-ion battery and charger.
- Avoid exposing the battery to extreme temperatures.
- Store the battery in a cool, dry place when not in use.
- Do not disassemble or short-circuit the battery.
2. Cleaning
Regularly clean the flash unit and trigger with a soft, dry cloth. For stubborn dirt, use a slightly damp cloth and then dry thoroughly. Avoid using harsh chemicals or abrasive materials.

Figure 9: Example of cleaning camera equipment.
Troubleshooting
If you encounter issues with your Godox V860II-S or XPro-S, refer to the following common solutions:
- Flash not firing:
- Ensure the flash and trigger are powered on.
- Check battery levels on both devices.
- Verify that the flash is securely mounted to the camera or that the trigger is properly communicating with the flash (same channel/group).
- Confirm camera settings are compatible with flash operation.
- Inconsistent flash output:
- Check for obstructions between the trigger and flash.
- Ensure the flash head zoom matches the lens focal length.
- Review flash mode and power settings.
- Trigger not communicating with flash:
- Confirm both devices are set to the same 2.4G wireless channel and group.
- Ensure the flash is set to Slave mode if triggered remotely.
- Check for potential wireless interference.
Specifications
| Feature | Detail |
|---|---|
| Brand | GODOX |
| Model Number | T3911 (V860II-S) |
| Compatible Mountings | Sony |
| Camera Flash Type | Slave, Studio |
| Flash Sync Speed | 1/8000s (High-Speed Sync) |
| Batteries | 1 Lithium Ion battery required (included) |
| Item Weight | 7 ounces |
| Package Dimensions | 9.41 x 8.94 x 6.42 inches |
| First Available Date | May 17, 2017 |
Warranty and Support
For warranty information or technical support, please refer to the warranty card included in your product package or visit the official GODOX website. Keep your purchase receipt as proof of purchase for warranty claims.
You can also visit the GODOX Store on Amazon for additional product information and resources.
Ask a question about this manual
Ask about setup, troubleshooting, compatibility, parts, safety, or missing instructions. Manuals+ will review the question and use this page’s manual context to help answer it.