1. Product Overview
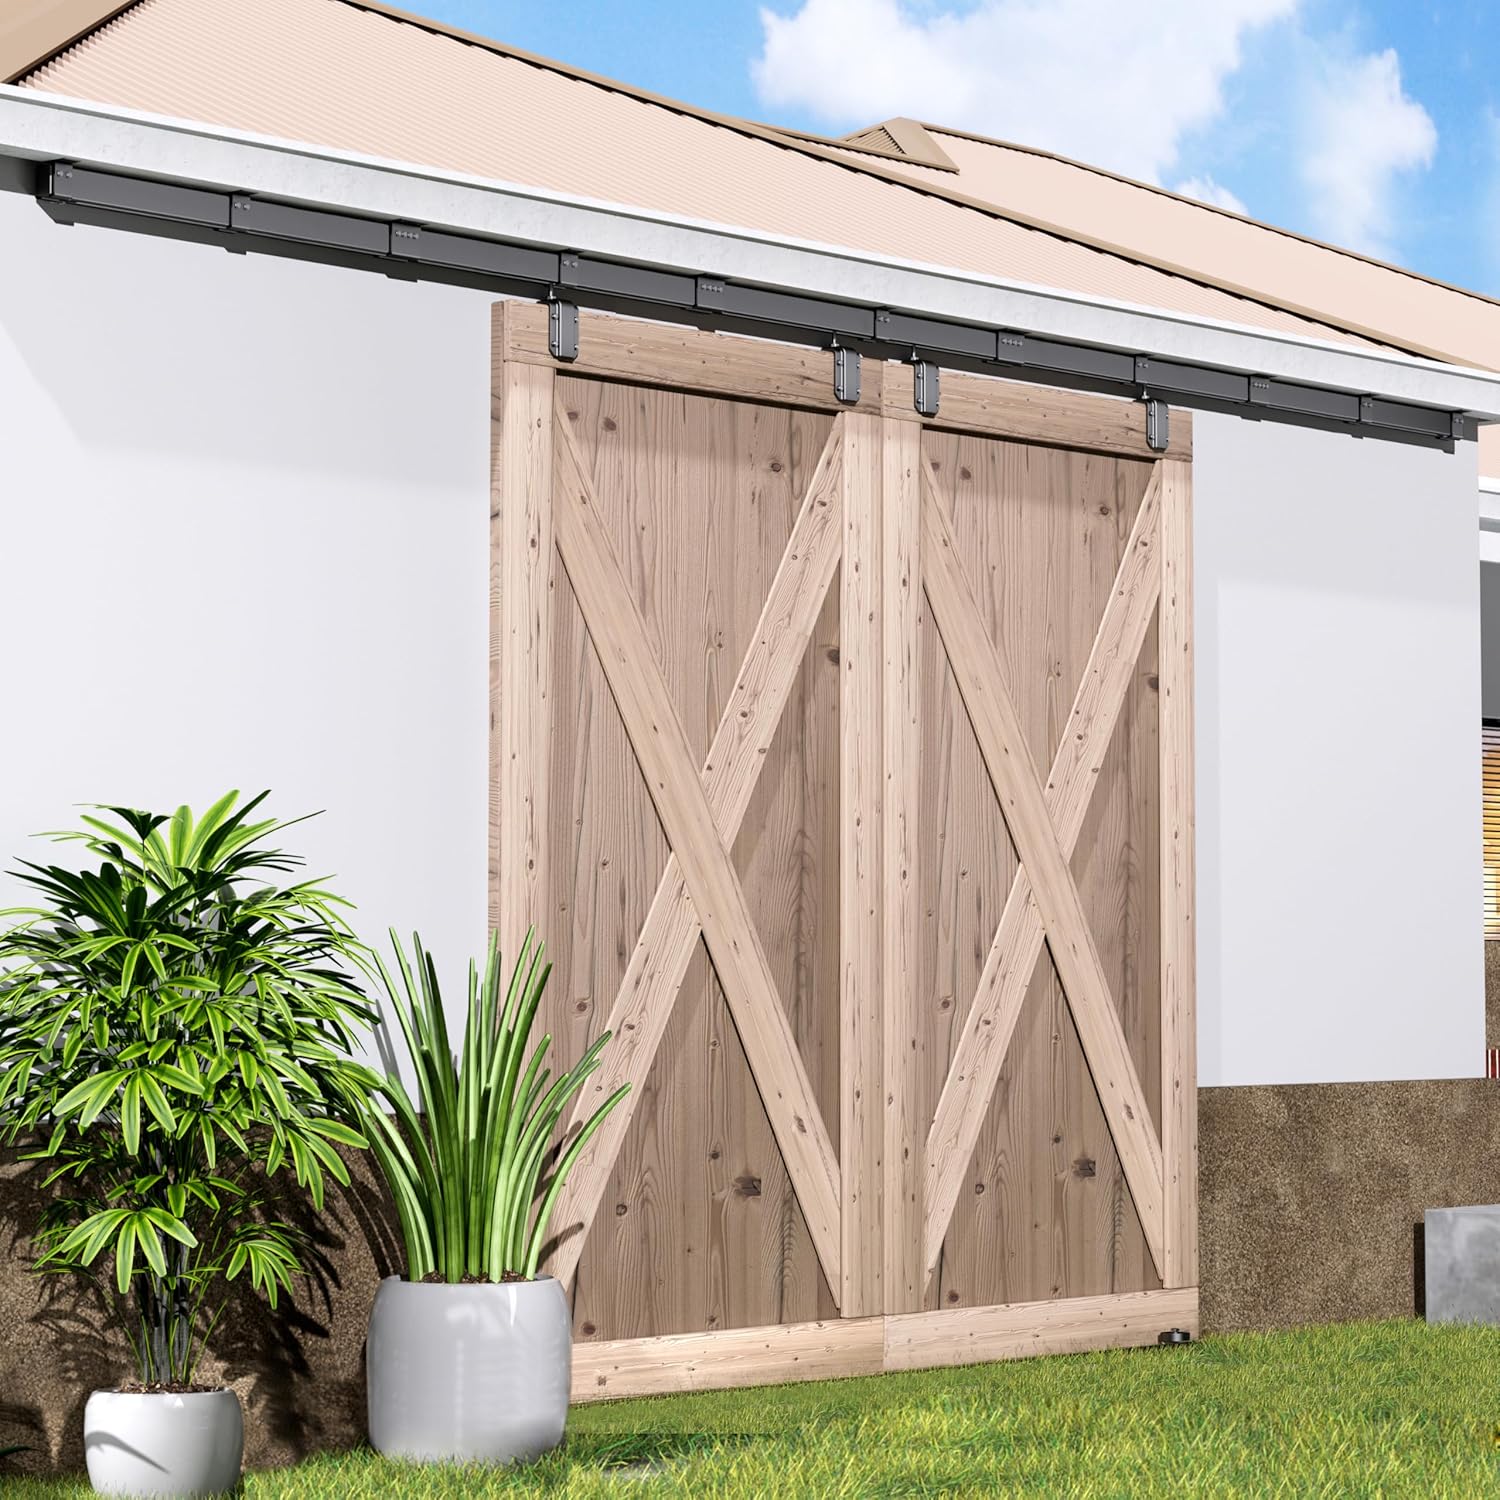
This DIYHD ceiling mount box track sliding barn door hardware is designed for exterior or outdoor use. The kit includes all necessary hardware for installation, but door panels and handles are not included. Constructed from heavy-duty steel with a durable black finish, it offers a robust and industrial aesthetic suitable for barns, garages, and other outdoor structures.
The 13FT double sliding barn door kit comprises four 3.3FT tracks, connected by three track connectors. It is designed for double doors with a total width of 79 inches (39 inches per door panel). The system supports a maximum door weight of 330 lbs and is compatible with door panels 1-1/2 inches to 2 inches thick.
2. Included Components
The 13FT box track double barn door kit includes the following components:
- 3.3FT Box Track: 4 pieces
- Track Connector: 3 pieces
- Ceiling Bracket: 6 pieces
- Roller: 4 pieces
- Stop: 4 pieces
- End Cap: 2 pieces
- L Guides: 2 pieces
- Wall Mount Guide: 2 pieces


3. Installation Requirements
This is a heavy-duty hardware system that requires at least 2-3 people for proper installation. It is not suitable for a single-person DIY project due to the weight and complexity of the components. Proper installation ensures maximum stability and long-term durability.
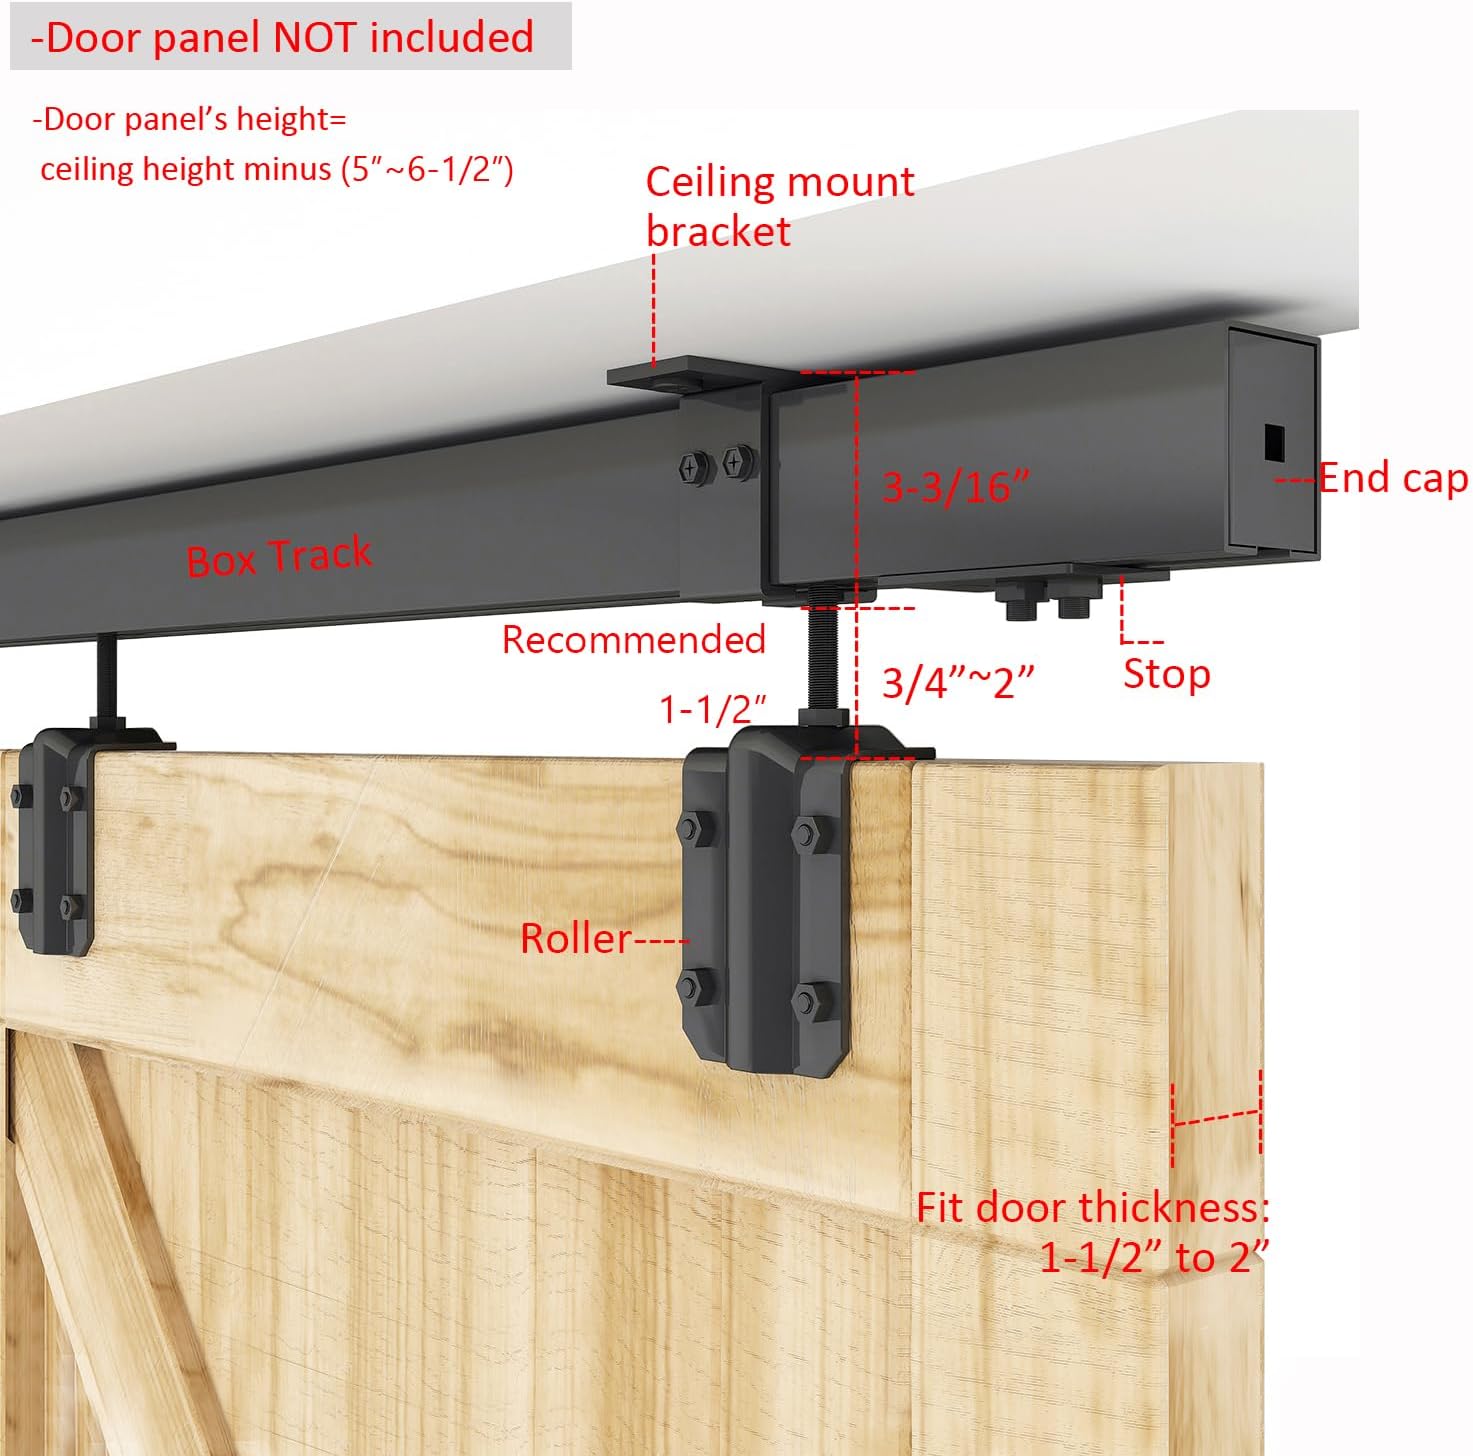
The ceiling-mounted track system is specifically designed for areas with low ceilings where wall-mounted brackets may not be feasible. The rollers feature adjustable vertical lock nuts, allowing for fine-tuning of the door's position.
Door Height Calculation
For optimal installation, adjust the gap between the box track and the apron to 1-1/2 inches. With this configuration, the correct door height can be calculated as:
Door Height = Ceiling Height - 5-3/16 inches
4. Installation Steps
4.1 Track Assembly
The 13FT track is assembled from four 3.3FT sections. Connect these sections using the provided track connectors. Ensure a secure connection for stability.


4.2 Ceiling Bracket and Track Installation
Secure the ceiling brackets to the ceiling structure at appropriate intervals. Then, slide the assembled box track onto the ceiling brackets and fasten it securely with the provided screws.
4.3 Roller Installation
Attach the rollers to the top edge of your door panels. The rollers feature adjustable vertical lock nuts, allowing you to fine-tune the door's height and ensure smooth operation.
4.4 Door Stopper and Floor Guide Installation
Install the door stoppers at the desired positions on the track to prevent the doors from sliding too far. Mount the L guides or wall mount guides on the floor to keep the bottom of the door panels aligned and prevent swinging.

5. Operation
Once installed, the barn doors will slide smoothly along the track. Ensure that the path of the doors is clear of obstructions. The system is designed for ease of use in opening and closing the doors.
Noise Consideration
While this hardware is not completely silent, the roller design has been enhanced for reduced noise. The wheels are coated with a layer of durable hard plastic over the standard metal material, which helps to minimize metal-on-metal noise during operation. Some operational noise is still present, which is typical for heavy-duty sliding systems, especially when used in exterior applications like barns, sheds, and garages where noise is less of a concern.
6. Maintenance
To ensure the longevity and smooth operation of your DIYHD barn door hardware, periodic maintenance is recommended:
- Cleaning: Regularly wipe down the track and rollers to remove dust, dirt, and debris that could impede smooth sliding. Use a damp cloth and mild detergent if necessary, then dry thoroughly.
- Lubrication: Apply a silicone-based lubricant to the roller bearings and the top surface of the track periodically to maintain smooth movement and reduce friction. Avoid oil-based lubricants that can attract dirt.
- Hardware Check: Periodically inspect all screws, bolts, and connections to ensure they remain tight. Re-tighten any loose fasteners to prevent instability and wear.
- Rust Prevention: As this product is designed for outdoor use, its durable black finish provides protection. However, inspect for any signs of rust, especially in harsh weather conditions, and address them promptly with appropriate rust-inhibiting treatments if needed.
7. Troubleshooting
7.1 Doors Not Sliding Smoothly
- Check for Obstructions: Ensure the track is clear of any debris or foreign objects.
- Lubrication: Apply lubricant to the rollers and track as described in the Maintenance section.
- Roller Adjustment: Verify that the adjustable vertical lock nuts on the rollers are correctly set and not causing excessive friction.
- Track Alignment: Inspect the track for any misalignment or bending. Re-align if necessary.
7.2 Excessive Noise During Operation
- Lubrication: Ensure rollers and track are adequately lubricated.
- Roller Condition: Check rollers for any damage or wear. While designed for reduced noise, some operational sound is inherent to the system.
- Tightness of Fasteners: Loose bolts or screws can cause rattling. Ensure all components are securely fastened.
7.3 Doors Not Hanging Level
- Roller Adjustment: Use the adjustable vertical lock nuts on the rollers to level the door panels.
- Ceiling Level: Verify that the ceiling where the track is mounted is level. Shims may be required if the ceiling is uneven.
8. Product Specifications
| Brand | DIYHD |
| Model Number | 13FT-Double door kit (outdoor barn door kit) |
| Color | Ceiling mount hardware (Black finish) |
| Material | Steel |
| Style | Rustic |
| Item Weight | 30 Pounds |
| Product Dimensions | 192 x 2.4 x 4.5 inches (Overall track length) |
| Assembly Required | Yes |
| Track Length | 13FT (composed of four 3.3FT sections) |
| Door Compatibility | Fits 2 doors, each up to 39 inches wide (79 inches total width) |
| Max Load Capacity | 330 lbs |
| Door Thickness | 1-1/2 inches to 2 inches |
9. Warranty and Support
Specific warranty information for the DIYHD 13FT Ceiling Mount Outdoor Double Sliding Barn Door Hardware is not provided in the product details. For warranty claims, technical support, or further inquiries, please contact DIYHD directly through their official channels or the retailer from whom the product was purchased.


