
1. Introduction
This manual provides comprehensive instructions for the safe and efficient use of your new Orient Electric Aquator 15-Litre Vertical Storage Water Heater. Please read all instructions carefully before installation and operation to ensure proper functioning and to prevent injury or damage. Keep this manual for future reference.
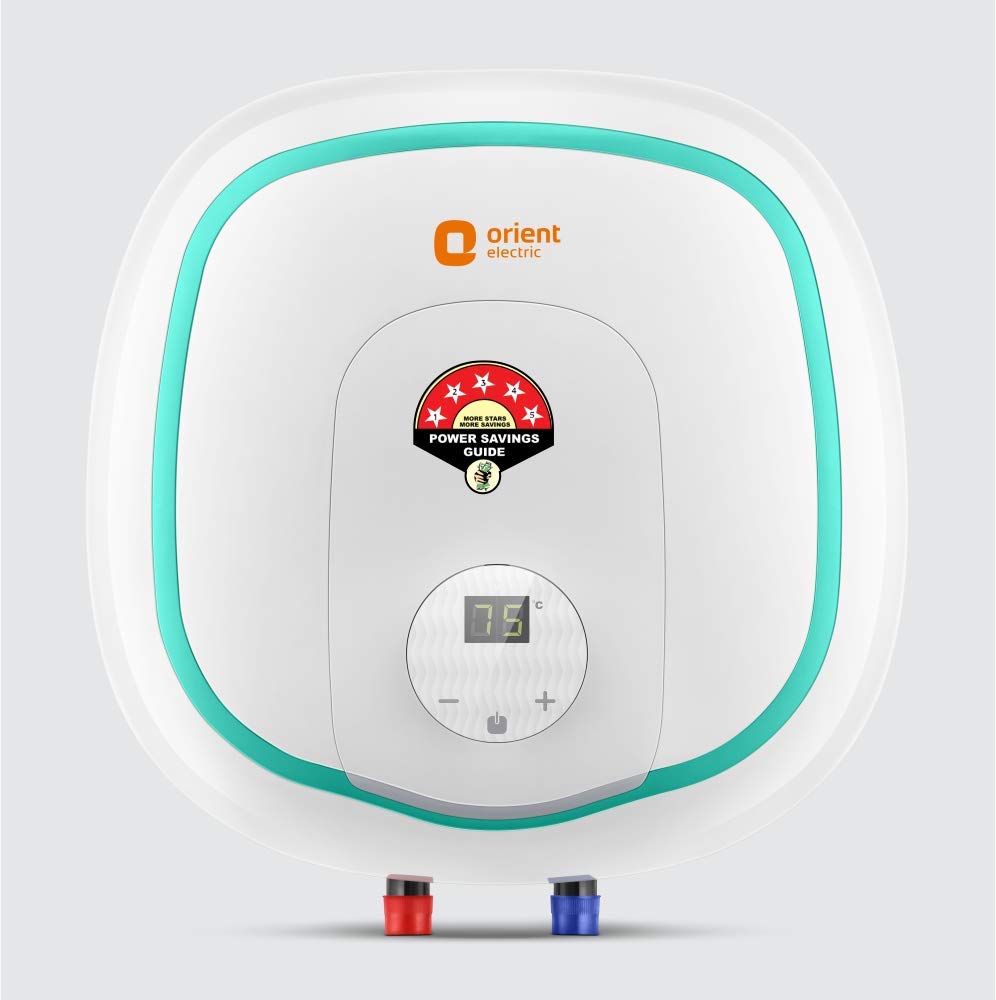
Figure 1: Front view of the Orient Electric Aquator 15-Litre Water Heater.
2. Safety Instructions
Important: Failure to follow these safety instructions may result in electric shock, fire, property damage, or personal injury.
- Ensure the water heater is installed by a qualified technician in accordance with local regulations and this manual.
- Do not operate the water heater if it is damaged or malfunctioning. Disconnect power immediately and contact customer support.
- Verify that the electrical supply matches the specifications of the appliance (2000 Watts). Use a properly grounded 3-pin plug.
- Do not block or tamper with the pressure relief valve. Regular inspection of the valve is recommended.
- Keep flammable materials away from the water heater.
- The appliance is designed for indoor use only. Protect it from freezing temperatures.
- Do not attempt to repair the water heater yourself. Refer all servicing to authorized personnel.
- Ensure proper ventilation around the unit.
- The water heater is suitable for high-rise buildings with water pressure up to 8 bar.
3. Product Components
The package includes the following items:
- Orient Electric Aquator 15-Litre Water Heater Unit
- Mounting Clamps
- Warranty Card
- Instruction Manual (this document)

Figure 2: Key features including 8 Bar Pressure Compatibility and Glassline Coated Heating Element.
4. Setup and Installation
Installation should only be performed by a qualified professional to ensure safety and compliance with local codes.
4.1. Location Selection
- Choose a vertical wall-mount location that can support the weight of the water heater when full (approx. 9.7 kg + 15 kg water = 24.7 kg).
- Ensure adequate clearance around the unit for maintenance and ventilation.
- The location should be protected from freezing temperatures and direct sunlight.
- Ensure the location is near a suitable water supply and drainage point.
4.2. Mounting the Unit
- Mark the drilling points on the wall using the provided mounting template or by measuring the distance between the mounting clamps.
- Drill holes and insert appropriate wall anchors suitable for the wall material.
- Securely fasten the mounting clamps to the wall.
- Carefully lift and hang the water heater onto the mounted clamps, ensuring it is stable and level.
4.3. Water Connections
- Connect the cold water inlet (blue marked pipe) to the main cold water supply using appropriate plumbing fittings.
- Connect the hot water outlet (red marked pipe) to the hot water distribution system.
- Install a pressure relief valve (not included, but essential) on the cold water inlet line, as close to the water heater as possible.
- Open the cold water supply valve and allow the tank to fill completely. Open a hot water faucet in your home to purge air from the system until water flows steadily.
- Check all connections for leaks.
4.4. Electrical Connection
- Ensure the power supply is turned off at the main circuit breaker before making any electrical connections.
- Connect the water heater's moulded 3-pin plug to a dedicated, properly grounded electrical outlet.
- Verify that the circuit can handle a 2000 Watt load.

Figure 3: Example installation in a bathroom setting.
5. Operating Instructions
5.1. Initial Start-up
- After ensuring the tank is full of water and all connections are secure, turn on the electrical power supply to the water heater.
- The indicator light will illuminate, signaling that the heating process has begun.
5.2. Temperature Adjustment
The Aquator 15-Litre model features a manual temperature control knob. Rotate the knob to set your desired water temperature. Refer to the markings on the unit for temperature ranges.

Figure 4: Manual temperature control for customized settings.
5.3. Normal Operation
The water heater will automatically heat the water to the set temperature and maintain it. The indicator light will turn off once the desired temperature is reached and will cycle on and off as needed to maintain the temperature.
The whirl flow technology ensures faster heating and optimized energy saving by preventing direct contact between cold and hot water flows.
6. Maintenance
Regular maintenance ensures the longevity and efficiency of your water heater. Always disconnect power before performing any maintenance.
6.1. Draining the Tank
If the water heater needs to be drained (e.g., for extended periods of non-use or relocation):
- Turn off the power supply to the unit.
- Close the cold water inlet valve.
- Open a hot water faucet in your home to relieve pressure.
- Connect a hose to the drain valve at the bottom of the water heater and direct it to a suitable drain.
- Open the drain valve and allow the tank to empty completely.
6.2. Anode Rod Inspection and Replacement
The magnesium anode rod protects the glass-lined tank from corrosion. It should be inspected annually and replaced if significantly depleted. This procedure should be performed by a qualified technician.

Figure 5: Magnesium Anode Rod for tank protection.
6.3. Cleaning
Wipe the exterior of the water heater with a soft, damp cloth. Do not use abrasive cleaners or solvents.
7. Troubleshooting
| Problem | Possible Cause | Solution |
|---|---|---|
| No hot water or insufficient hot water. |
|
|
| Water is too hot. | Temperature setting too high. | Adjust temperature knob to a lower setting. |
| Leaking from the unit. |
|
|
| Unusual noises. | Sediment buildup in tank. | Drain and flush the tank (refer to Maintenance section). If noise persists, contact service technician. |
For issues not listed above or if solutions do not resolve the problem, please contact Orient Electric customer support.
8. Specifications
| Feature | Detail |
|---|---|
| Brand | Orient Electric |
| Model Number | SWAS15VPGM2-WH |
| Capacity | 15 Liters |
| Power Source | Electric |
| Wattage | 2000 Watts |
| Maximum Pressure | 8 Bars (116.03 Pound per Square Inch) |
| Mount Type | Wall |
| Tank Material | Ultra-diamond Glassline Tank |
| Heating Element | Glass line heating element |
| Insulation | Thick PUF-insulated tank |
| Safety Features | IPX4 high-strength polymer body, shock-proof, water-proof, multifunction valve, Magnesium Anode Rod |
| Item Weight | 9.7 Kilograms |
| Color | White & Lavender |
9. Warranty and Support
9.1. Warranty Information
Your Orient Electric Aquator water heater comes with the following warranty:
- Tank: 7 Years
- Heating Element: 4 Years
- Product: 2 Years
The warranty is limited to manufacturing defects only. Please retain your purchase receipt and warranty card for any claims.
9.2. Customer Support
For technical assistance, service requests, or warranty claims, please contact Orient Electric customer support.
Manufacturer: Orient Electric, Smart Enterprises- Sector-23, Plot no. 95-96, Phase-III, Industrial Area, Barhi, Sonipath, Haryana, 131029
Refer to your warranty card or the official Orient Electric website for the most current contact information.

