Introduction
This manual provides comprehensive instructions for the setup, operation, maintenance, and troubleshooting of your Singer Simple 3221 Sewing Machine. Please read this manual thoroughly before using your machine to ensure safe and efficient operation.

Figure 1: Front view of the Singer Simple 3221 Sewing Machine.
Setup
Unpacking and Placement
Carefully remove the sewing machine from its packaging. Place the machine on a stable, flat surface with adequate lighting. Ensure there is enough space for fabric movement.
Power Connection
Connect the power cord to the machine and then to a suitable electrical outlet. Ensure the machine's power switch is in the OFF position before connecting.
Bobbin Winding
Before sewing, the bobbin must be wound with thread. Follow these steps:
- Place a spool of thread on the spool pin.
- Guide the thread through the upper thread guide and around the bobbin winding tension disc.
- Place an empty bobbin onto the bobbin winder spindle.
- Wind the thread a few times manually around the bobbin.
- Push the bobbin winder spindle to the right.
- Press the foot controller to start winding. Stop when the bobbin is full.
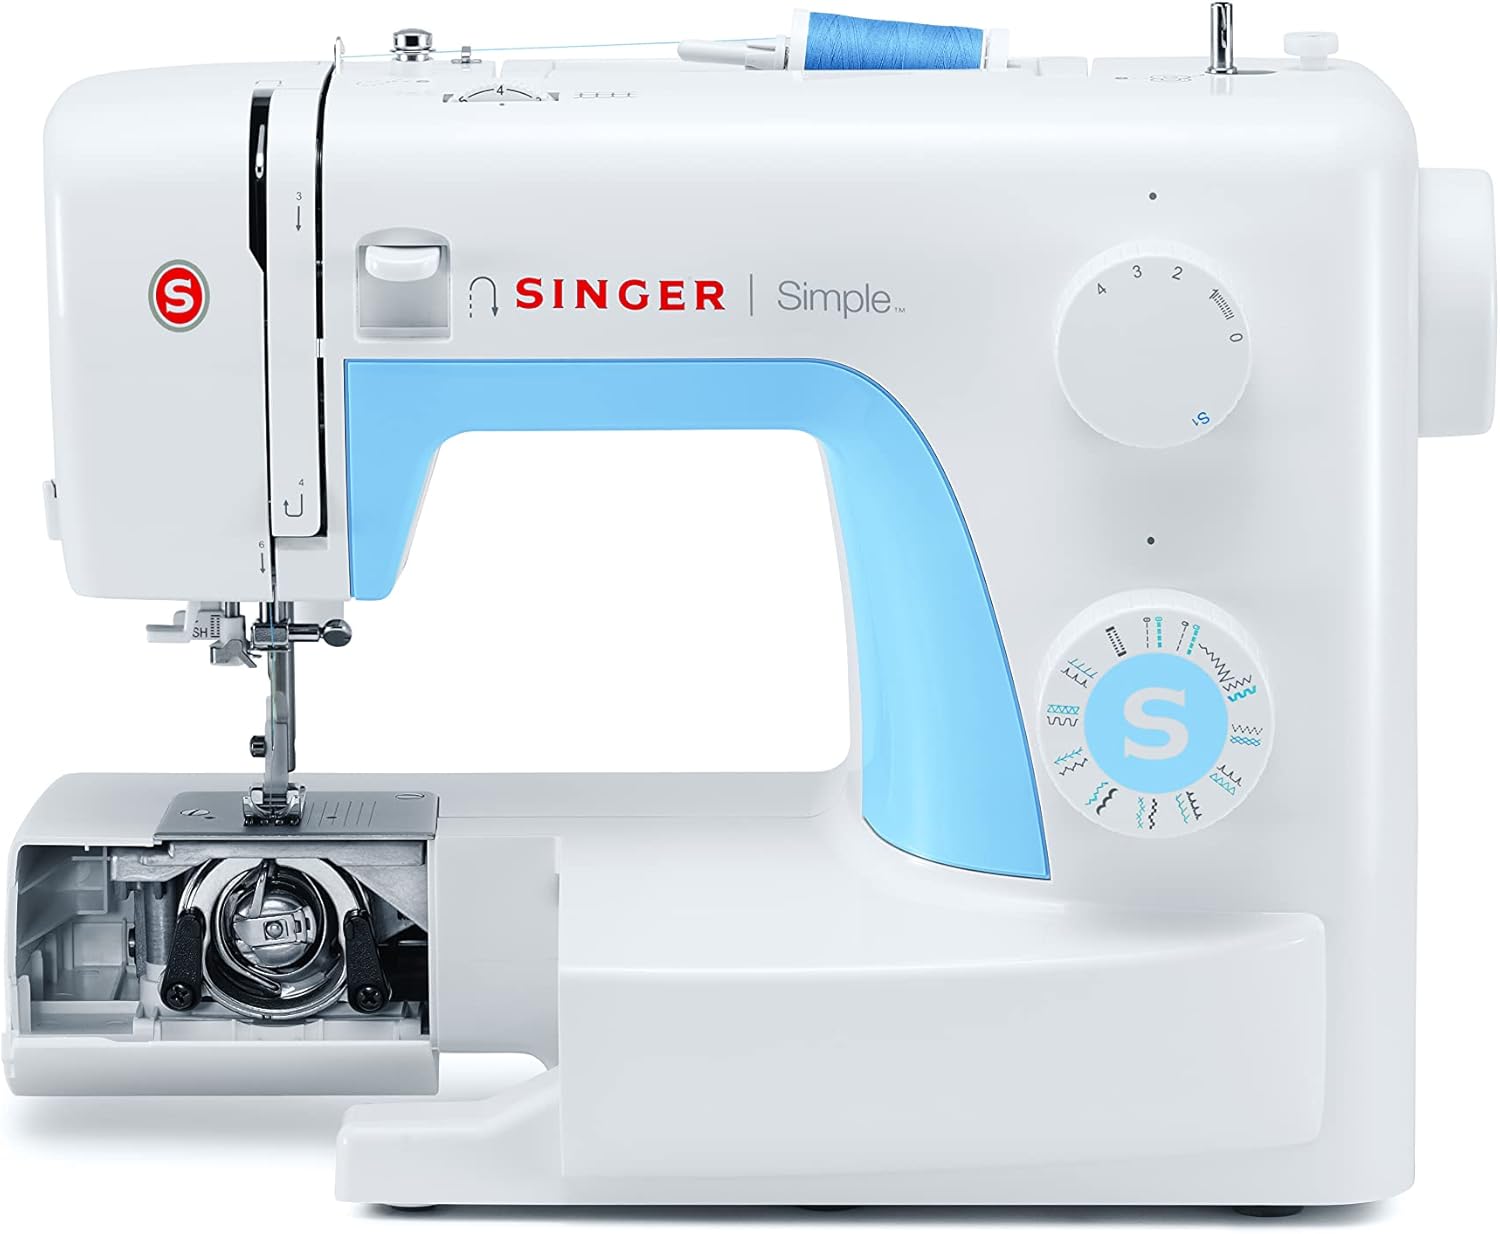
Figure 2: View of the bobbin compartment, illustrating where the bobbin is inserted for winding and sewing.
Threading the Machine
Proper threading is crucial for stitch quality. The Singer Simple 3221 features an automatic needle threader for convenience.
- Raise the presser foot lifter.
- Place the thread spool on the spool pin.
- Follow the numbered threading path indicated on the machine, ensuring the thread passes through all guides and the take-up lever.
- Use the automatic needle threader to thread the needle eye.
- Insert the wound bobbin into the bobbin case and pull the bobbin thread through the tension spring.
- Bring the bobbin thread up by turning the handwheel towards you, lowering the needle to pick up the bobbin thread loop.
Operating Instructions
Stitch Selection
The Singer Simple 3221 offers 21 built-in stitches, including basic, stretch, decorative, and a one-step buttonhole. To select a stitch, turn the stitch selector dial to the desired stitch pattern.

Figure 3: The stitch chart for the Singer Simple 3221, displaying various stitch patterns available.
Adjusting Stitch Length and Width
Adjust the stitch length using the stitch length dial to suit your fabric and project. Many decorative stitches can have their width adjusted up to 5mm for varied effects.
Sewing Basics
- Place fabric under the presser foot.
- Lower the presser foot.
- Turn the handwheel to lower the needle into the fabric.
- Press the foot controller to begin sewing. The machine can sew at a maximum speed of 750 stitches-per-minute.
- To secure stitches, use the reverse lever at the beginning and end of seams.
One-Step Buttonhole
The machine features a fully automatic one-step buttonhole function for professional results.
- Attach the buttonhole foot.
- Place the button in the buttonhole foot's holder.
- Select the buttonhole stitch on the dial.
- Lower the presser foot and begin sewing. The machine will automatically create the correct size buttonhole.

Figure 4: The Singer Simple 3221 in action, demonstrating the automatic one-step buttonhole feature.
Extra High Presser Foot Lifter
For sewing multiple layers of thick fabric, the presser foot can be raised to an extra high position, allowing for easier placement and removal of bulky materials.

Figure 5: Demonstrating the adjustment of the presser foot for different fabric thicknesses.
Maintenance
Regular maintenance ensures the longevity and optimal performance of your sewing machine.
- Cleaning: Clean your machine regularly by removing all small parts and using a small, lint-free brush to remove lint, old thread, and other debris. Use tweezers to reach smaller inner parts if necessary. Use compressed air to clean your machine instead of blowing on it with your breath, as moisture can cause rust.
- Screws: Periodically check and tighten any loose screws on your machine.
- Oiling: Oil your machine regularly. Refer to your sewing machine manual for specific instructions on which parts require oiling.
- Needle Replacement: Use the proper needles for each project and change them every one to two major projects. Consult a guide to determine which needles are best for specific materials.
- Covering: Cover your machine after each use to prevent dust and particles from accumulating in crevices.
Troubleshooting
This section addresses common issues you might encounter with your Singer Simple 3221 Sewing Machine.
| Problem | Possible Cause | Solution |
|---|---|---|
| Skipped Stitches | Incorrect needle, bent needle, improper threading. | Replace needle with correct type/size, re-thread machine correctly. |
| Thread Breaking | Incorrect tension, poor quality thread, needle inserted incorrectly. | Adjust tension, use good quality thread, ensure needle is fully inserted and facing correctly. |
| Fabric Puckering | Stitch length too long for fabric, incorrect tension. | Shorten stitch length, adjust tension. |
| Machine Not Starting | Power cord not connected, power switch off, foot controller issue. | Check power connections, ensure switch is on, inspect foot controller. |
For more detailed troubleshooting, refer to the comprehensive online resources available from Singer or contact customer support.
Specifications
- Model: Singer Simple 3221
- Built-In Stitches: 21 (6 Basic, 5 Stretch, 9 Decorative, 1 Buttonhole)
- Buttonhole Type: 1 Fully Automatic One-Step
- Needle Threader: Automatic
- Stitch Width: Up to 5mm
- Sewing Speed: Up to 750 stitches-per-minute
- Frame Material: Heavy Duty Metal
- Dimensions: 19D x 35W x 29H centimetres
- Item Weight: 5.53 Kilograms
- Color: White and Blue
Warranty and Support
The Singer Simple 3221 Sewing Machine comes with a 3 Year Limited Warranty.
For warranty claims, technical support, or additional assistance, please contact Singer customer service or visit the official Singer website. Keep your proof of purchase for warranty purposes.
You can visit the official Singer store on Amazon: Singer Store


