1. Introduction
Welcome to the user manual for your new Singer M1605 Domestic Sewing Machine. This machine is designed for ease of use, offering a range of features suitable for both beginners and experienced sewers. Please read this manual thoroughly before operating your machine to ensure safe and efficient use. Proper care and maintenance will extend the life of your sewing machine.

Figure 1.1: Front view of the Singer M1605 Domestic Sewing Machine.
2. Safety Instructions
Always follow basic safety precautions when using an electrical appliance to reduce the risk of fire, electric shock, or injury to persons.
- Always unplug the machine from the electrical outlet when removing covers, lubricating, or when making any other user servicing adjustments mentioned in the instruction manual.
- Do not allow to be used as a toy. Close attention is necessary when this machine is used by or near children.
- Use this machine only for its intended use as described in this manual. Use only attachments recommended by the manufacturer as contained in this manual.
- Never operate this machine if it has a damaged cord or plug, if it is not working properly, if it has been dropped or damaged, or dropped into water.
- Never drop or insert any object into any opening.
- Do not use outdoors.
- Do not operate where aerosol (spray) products are being used or where oxygen is being administered.
- To disconnect, turn all controls to the off position, then remove plug from outlet.
3. Setup
3.1 Unpacking
Carefully remove the machine from its packaging. Retain all packaging materials for future storage or transport. Ensure all accessories listed in the packing list are present.
3.2 Power Connection
Connect the foot controller plug to the machine's receptacle and the power cord to a suitable electrical outlet. Ensure the voltage matches your local power supply (127V as per specifications).
3.3 Winding the Bobbin
Before you begin sewing, you will need to wind thread onto the bobbin. Place an empty bobbin onto the bobbin winder spindle. Follow the threading path for bobbin winding as indicated on the machine. Press the foot controller to start winding. Stop when the bobbin is full.

Figure 3.1: Front loading bobbin area for easy access.
3.4 Threading the Machine
Proper threading is crucial for good stitch quality. Raise the presser foot. Place a spool of thread on the spool pin. Guide the thread through the upper tension discs and take-up lever, following the numbered threading path on the machine. Finally, thread the needle from front to back.
4. Operating
4.1 Stitch Selection
The Singer M1605 offers 6 built-in stitches. To select a stitch, turn the stitch selector dial to the desired stitch pattern. The machine features preset stitch length and width for simplicity.

Figure 4.1: Stitch selection dial for choosing desired patterns.
4.2 Sewing Straight Stitches
Place your fabric under the presser foot. Lower the presser foot. Gently press the foot controller to start sewing. Guide the fabric smoothly. Use the reverse lever for back-tacking at the beginning and end of seams to secure stitches.
4.3 Sewing Zigzag Stitches
Select a zigzag stitch from the dial. The machine will automatically set the appropriate width and length. Use zigzag stitches for finishing raw edges or for decorative purposes.
4.4 Creating Buttonholes
The M1605 features a four-step buttonhole process. Attach the buttonhole foot. Follow the steps indicated on the machine or in the detailed manual for each of the four sides of the buttonhole. This ensures a neat and consistent buttonhole.

Figure 4.2: The buttonhole foot facilitates precise buttonhole creation.
4.5 Using the Free Arm
To use the free arm, slide off the accessory storage compartment. The free arm is ideal for sewing cylindrical items like cuffs, collars, and trouser hems, allowing for easier manipulation of fabric.

Figure 4.3: The free arm simplifies sewing on cuffs and other small circular items.
4.6 Adjusting Thread Tension
The adjustable thread tension dial allows for precise control over stitch quality. Turn the dial to increase or decrease tension as needed. Correct tension results in balanced stitches on both sides of the fabric.

Figure 4.4: Adjusting the thread tension dial for optimal stitch quality.
5. Maintenance
5.1 Cleaning
Regular cleaning is essential. Use a small brush to remove lint and dust from the bobbin case area and feed dogs. Do not use harsh chemicals or abrasive cleaners.
5.2 Oiling
Refer to the detailed manual for specific oiling points. Use only high-quality sewing machine oil. Oiling helps ensure smooth operation and prevents wear.
5.3 Needle Replacement
Replace the needle regularly, especially if it becomes bent, dull, or if you notice skipped stitches. Always use the correct type and size of needle for your fabric and thread.
6. Troubleshooting
This section provides solutions to common issues you might encounter.
| Problem | Possible Cause | Solution |
|---|---|---|
| Skipped Stitches | Incorrect needle, bent needle, improper threading. | Replace needle with correct type/size, re-thread machine correctly. |
| Thread Breaking | Incorrect tension, poor quality thread, burr on needle plate. | Adjust tension, use good quality thread, check for burrs. |
| Bobbin Thread Looping | Improper bobbin winding or insertion, upper tension too tight. | Re-wind and re-insert bobbin, loosen upper tension. |
| Machine Not Sewing | Machine not plugged in, bobbin winder engaged, foot controller not connected. | Check power, disengage bobbin winder, ensure foot controller is connected. |
7. Specifications
Detailed technical specifications for the Singer M1605 Domestic Sewing Machine:
| Feature | Specification |
|---|---|
| Brand | Singer |
| Model Number | M1605 |
| Color | White |
| Product Dimensions | 18.01 x 37.01 x 29.01 cm |
| Item Weight | 4.5 Kilograms |
| Power / Wattage | 70 watts |
| Voltage | 127V |
| Material | Metal (Full metal frame) |
| Built-in Stitches | 6 (including straight, zigzag, blind hem, multi-step zigzag, decorative scallop, 4-step buttonhole) |
| Special Features | Lightweight, Adjustable Thread Tension, LED Lighting, Free Arm, Extra High Presser Foot Lift |
| Noise Level | 44 dB |
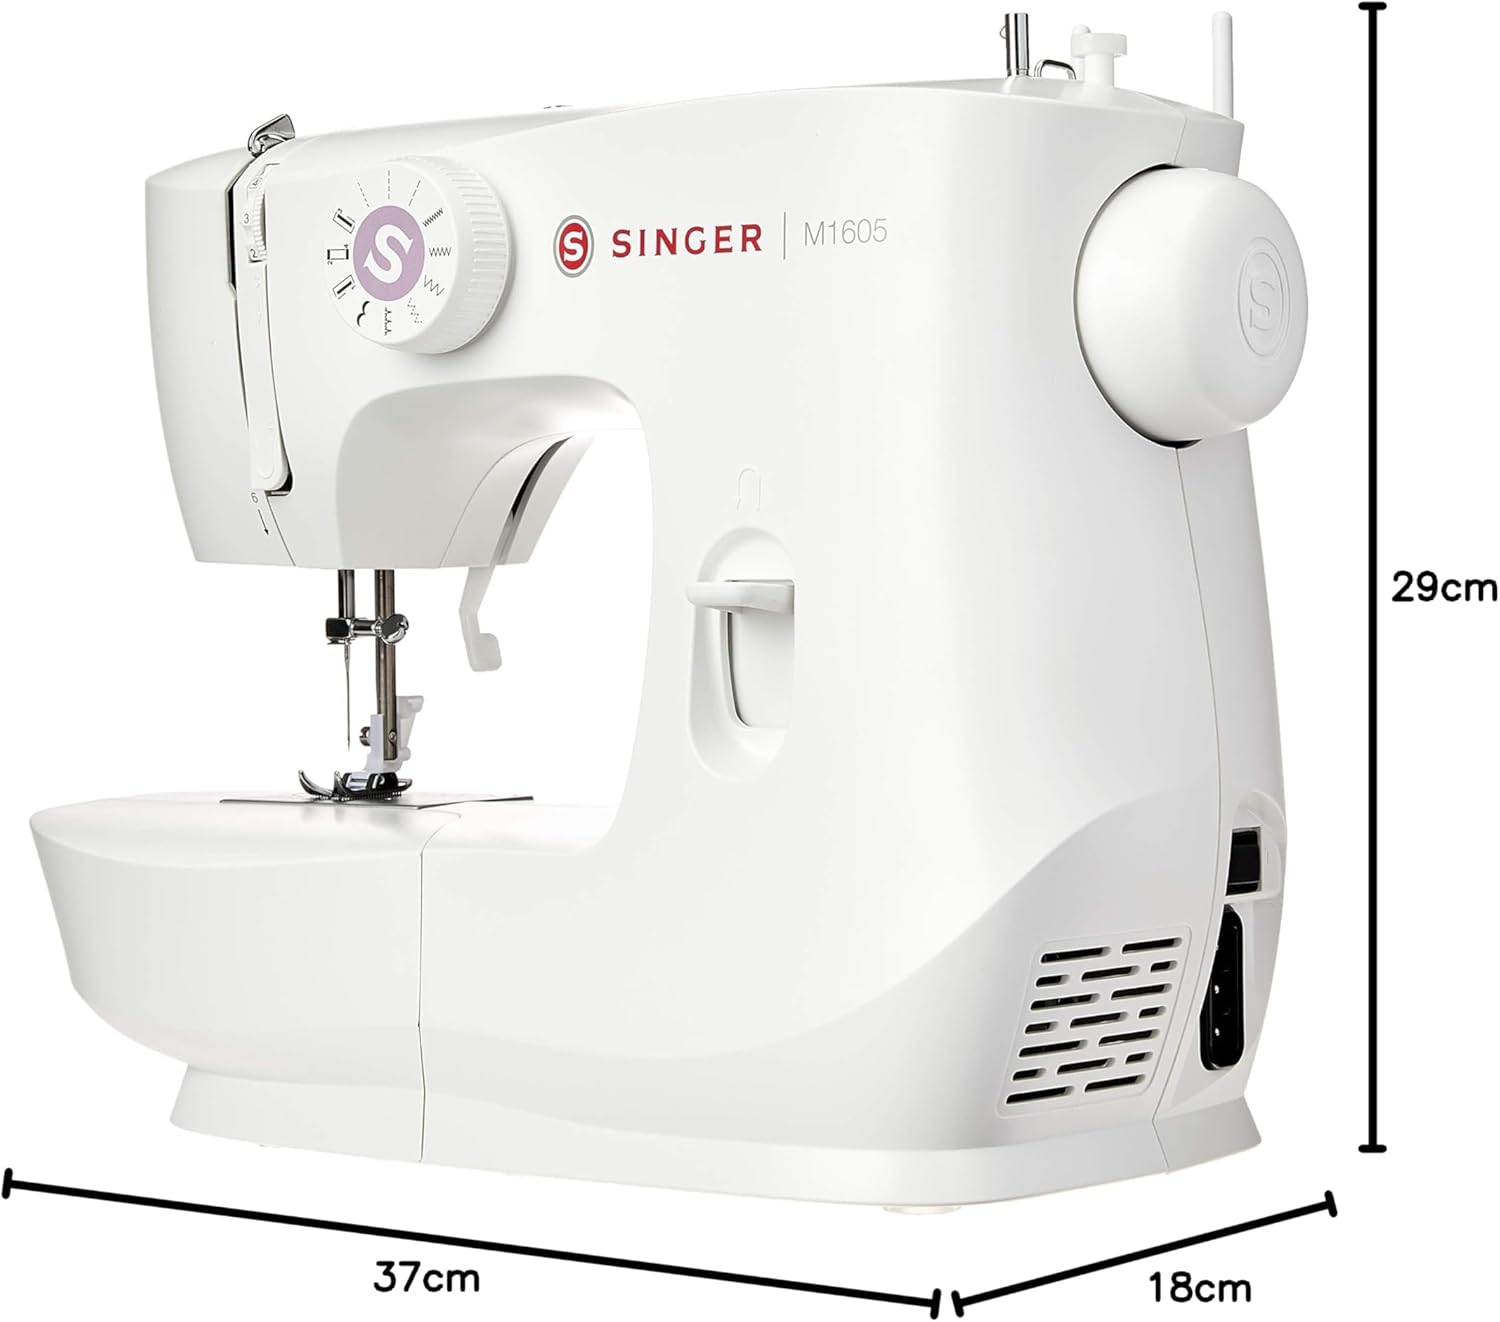
Figure 7.1: Product dimensions for the Singer M1605.
8. Warranty and Support
8.1 Warranty Information
Your Singer M1605 Domestic Sewing Machine comes with a manufacturer's warranty. Please refer to the warranty card included in your product packaging for specific terms, conditions, and duration. Keep your proof of purchase for warranty claims.
8.2 Customer Support
For technical assistance, spare parts, or service inquiries, please contact Singer customer support. Visit the official Singer website or refer to the contact information provided in your product documentation.


